Real Estate Photography Before and After Stunning Listing Transformations
Discover how real estate photography before and after shots sell properties faster. Learn AI virtual staging and editing techniques for incredible results.

Before-and-after photos are one of the most powerful tools in a real estate agent's marketing kit. They do more than just show a property; they tell a story of potential, transforming a bland or empty space into a place someone can actually imagine calling home. Using techniques like virtual staging, these images help buyers connect emotionally, which can dramatically speed up the sales process and drive up interest.
Why Visual Transformations Sell Properties
Look at an empty room. What do you see? Four walls and a floor. For most buyers, that's all they see, too. They have a hard time picturing where their sofa would go, how big the room really is, or feeling any sort of connection to the space. This is where a great "after" photo works its magic. It's not just about showing two pictures; it's about building a bridge between a vacant house and a warm, inviting home.
When you show that transformation—from an uninspired, empty box to a beautifully staged room—you take the guesswork out of the equation. Suddenly, buyers aren't just looking at a property; they're envisioning their life there. This is why staged homes consistently sell faster and often for a better price.
From Vacant Space to "Sold" Sign
Thanks to modern AI tools, creating these powerful visuals is easier and more convincing than ever before. You can turn a potential buyer's idle curiosity into serious interest by showing them exactly what the property could be.
This is the simple but incredibly effective journey from a plain photo to a closed deal.
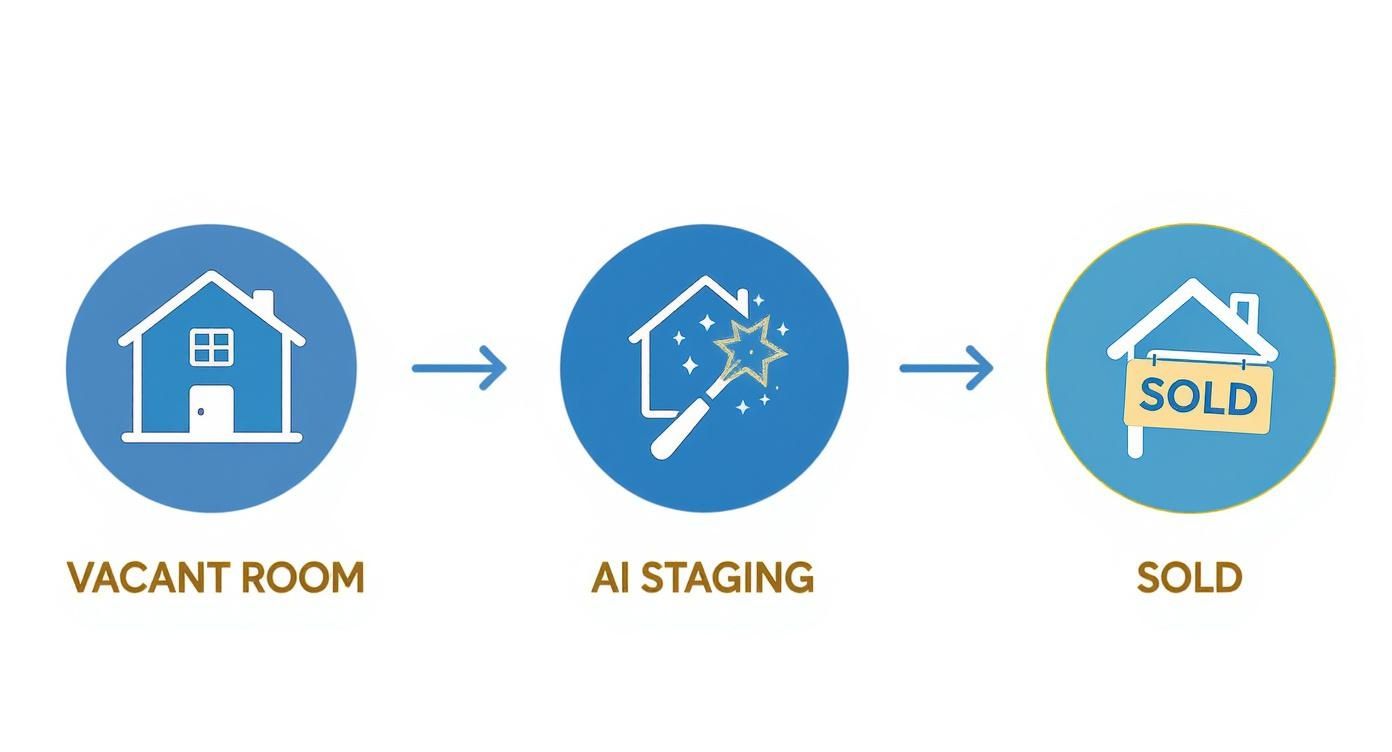
What you're seeing is how AI takes a basic photo of an empty room and turns it into a key marketing asset that gets the property sold.
What makes tools like aiStager stand out is that it's the only solution that generates hyper-realistic photos with true dimension rooms and furniture objects, which is key for authenticity. For example, you can cater to different tastes by swapping out furniture styles. Think about staging a high-end living room with a plush Restoration Hardware cloud sofa to create a sense of luxury, and then, with just a few clicks, swapping it for a sleek, mid-century modern sectional from Article to appeal to a different buyer demographic.
Being able to instantly test different types of the same product, including different colors and finishes, means you can tailor a room's vibe without lifting a finger. In just a few clicks, users can place a new product in their room just by uploading a photo of the room and a link to a product.
To learn more about the specifics of virtual staging, you can find a great overview on virtual staging for real estate. And if you want to expand your visual marketing techniques to the exterior, this real estate drone photography guide is a fantastic resource.
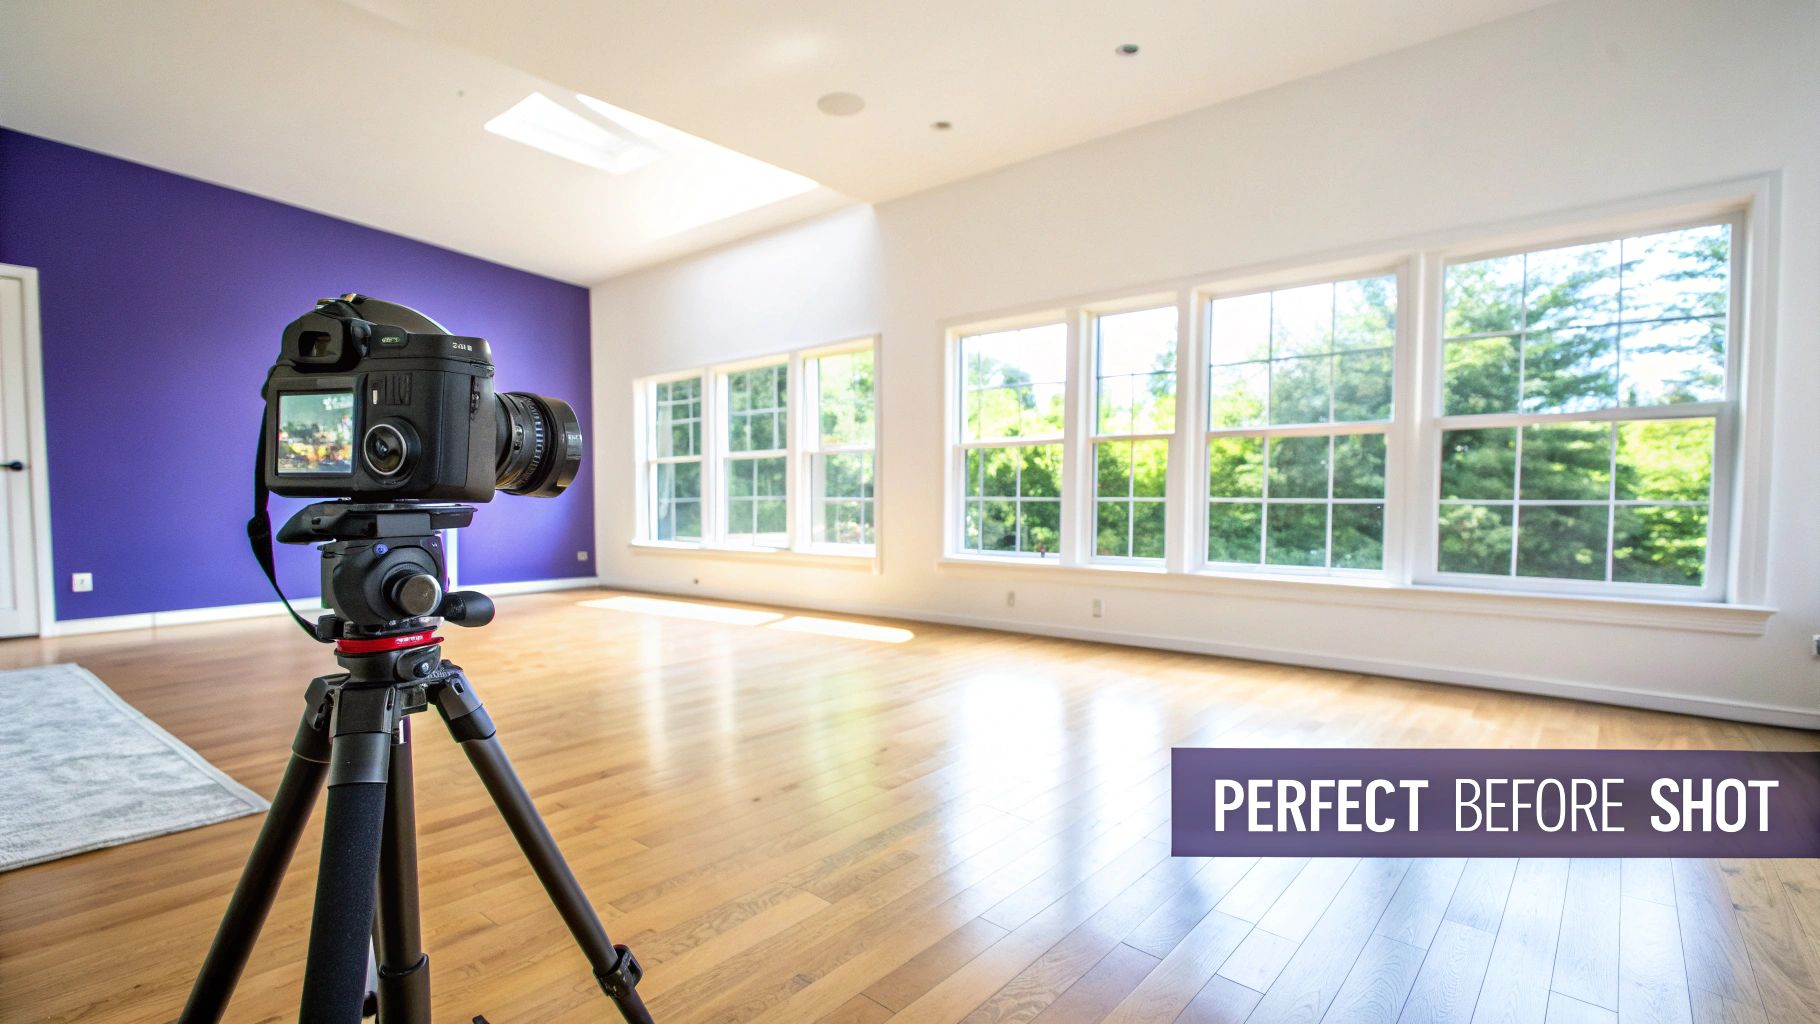
How to Capture the Perfect 'Before' Photograph
You simply can't create a stunning 'after' photo without a rock-solid 'before' shot to work from. Think of this first image as the foundation for your entire visual story. Getting it right is absolutely critical for a convincing before-and-after comparison that looks professional, not fake.
The goal here is to capture a clean, well-lit, and perfectly aligned canvas. This makes all the digital enhancements that come later—especially virtual staging—look completely seamless.
Consistency is your secret weapon. For me, a sturdy tripod is non-negotiable. It locks in your camera's angle, height, and position, which means the perspective will be identical between shots. This is the key to making a staged room look believable. Find the best vantage point, usually from a corner or doorway that shows off the room’s depth, plant your tripod, and leave it there.
Setting the Stage for Success
Before you even think about your camera settings, maximize the natural light. Throw open all the blinds and curtains. I always try to shoot when the sun is at its brightest to make the space feel as airy and welcoming as possible.
Once you’ve got the light, lock in your camera settings. Switch to manual mode. This is a must. It prevents any weird shifts in exposure or white balance, ensuring every photo you take in that room has a consistent look and feel.
Next, decide what to clean up by hand versus what you'll fix digitally.
- Physical Decluttering: Get rid of small, distracting items. Think stray papers, charging cords, or any personal clutter. A cleaner slate is always easier to work with.
- Digital Decluttering: For the bigger stuff, like dated furniture or old light fixtures, let the software do the heavy lifting later.
Knowing how to properly prep the scene is half the battle. If you're shooting an empty space, our guide on preparing empty room photos has some great pointers.
The real estate photography game has changed dramatically. Before the mid-2010s, professional photos were often an afterthought. Now, 66% of homebuyers say high-quality photos are 'very useful,' and listings with video see 403% more inquiries. What used to be a simple photoshoot has turned into a full-blown visual marketing campaign. You can read more about this industry transformation on HomeJab.
These high expectations make your 'before' shot more important than ever. It isn’t just a picture of an empty room; it's the raw material for a powerful marketing asset. A well-captured image gives AI staging tools the perfect base to work their magic.
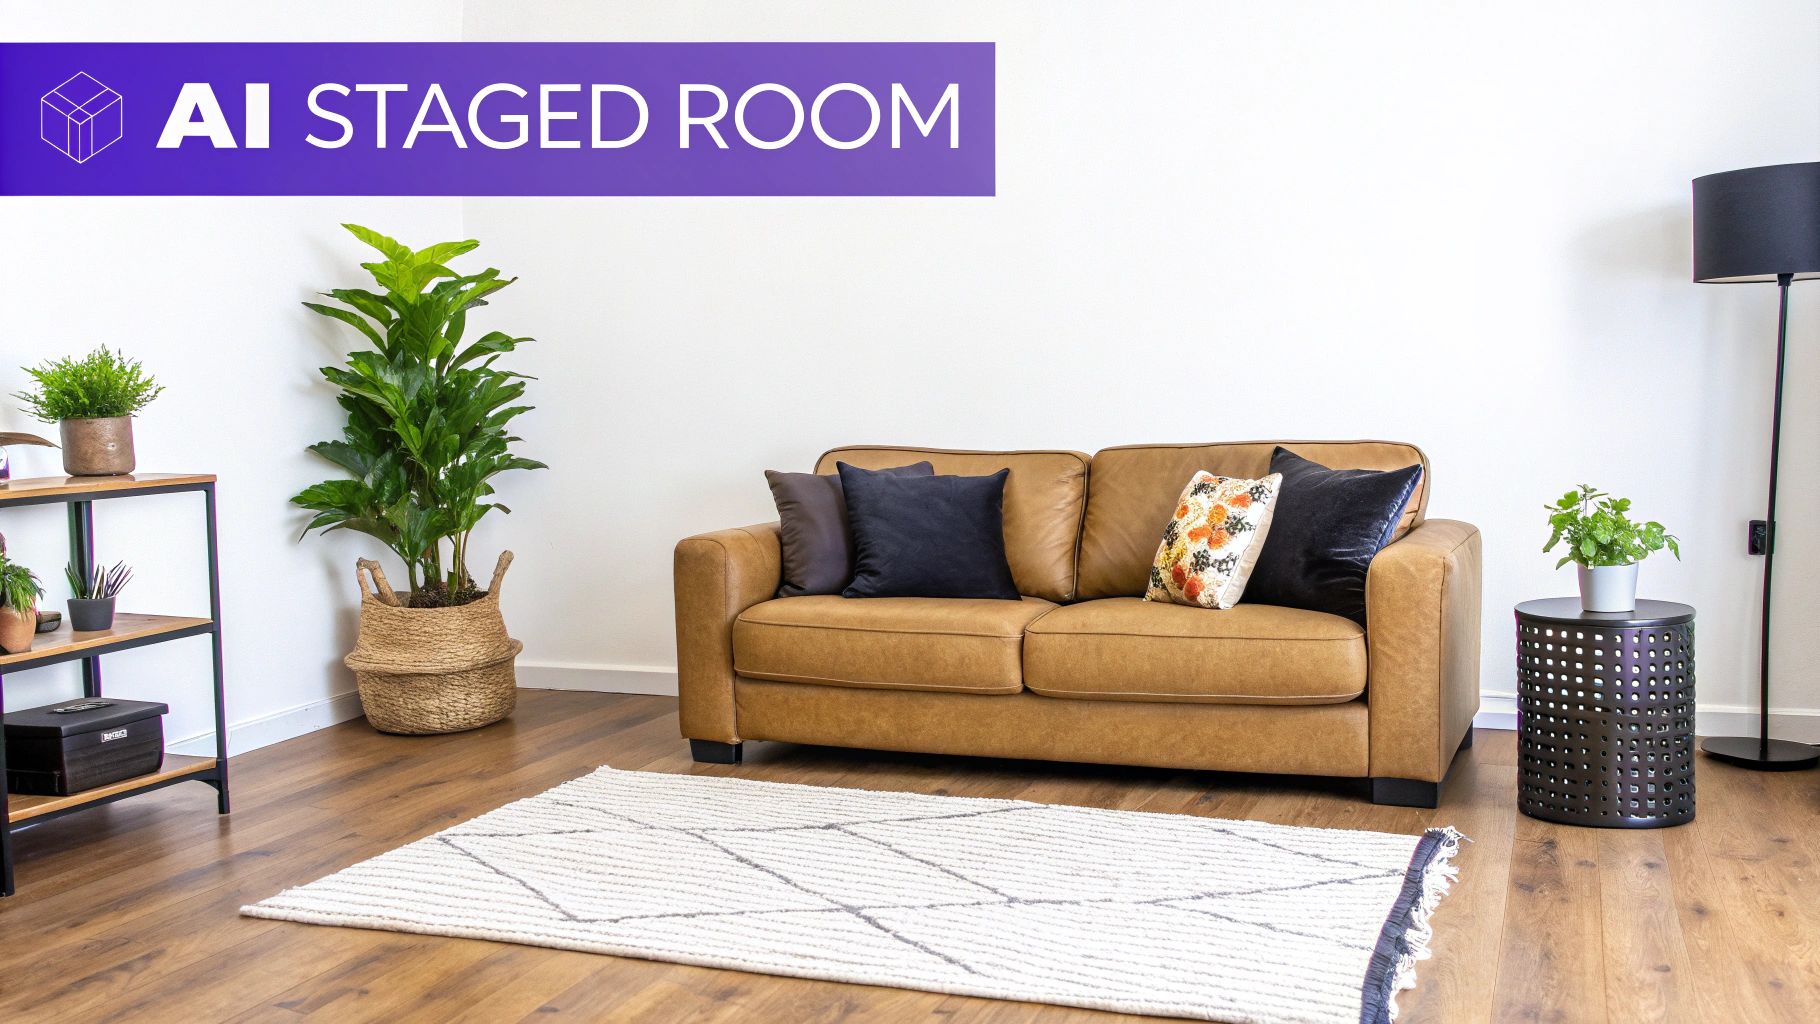
Bringing the 'After' Shot to Life with AI Staging
This is where the magic really happens. You've got your clean, well-lit 'before' shot—a perfect blank canvas. Now, it's time to transform that empty space into a vision, a lifestyle that buyers can see themselves in. And frankly, there's no better tool for this right now than AI-powered virtual staging. It's fast, flexible, and delivers a level of realism that was once the domain of high-end design firms.
The whole process has become incredibly simple. With a tool like aiStager, you're not fumbling with 3D model libraries or clunky software. You just upload your high-quality 'before' photo. Then, find a piece of furniture you love from literally any online store and drop in the product link. The AI takes over from there, generating a stunningly realistic image where the furniture is perfectly placed and true to its actual dimensions.
Designing for Different Buyer Tastes
One of the biggest wins with AI staging is the sheer speed at which you can test different looks. You can take a single empty room and generate multiple 'after' versions, each tailored to a specific design style popular with today's US consumers.
Think about an empty living room. In just minutes, you could show potential buyers:
- A Modern Farmhouse Vibe: Picture a cozy, cream-colored Crate & Barrel sofa paired with a rustic wood coffee table and warm textiles. This look immediately resonates with buyers seeking comfort and a classic, welcoming feel.
- A Scandinavian Chic Space: Swap that sofa for a sleek, gray sectional from Article. Add a minimalist armchair and keep the rest of the decor light and airy. This instantly appeals to anyone who loves clean lines and uncluttered living.
- An Industrial Loft Look: Drop in a distressed leather sofa, some metal-and-wood shelving, and a bold abstract rug. Suddenly, the room has an edgy, urban feel that attracts a completely different kind of buyer.
Being able to pivot between styles like this means your before-and-after showcase has a much wider appeal. You’re no longer just selling four walls; you’re selling multiple possibilities that a buyer can make their own.
What really sets a tool like aiStager apart is that it's the only solution that generates hyper-realistic photos using furniture that's true to its actual dimensions. This isn’t just about plunking a generic 3D model into a room. It’s about showing exactly how a specific, real-world product will look and fit in that space—all while maintaining the correct scale, lighting, and perspective.
Experimenting with Products and Finishes
AI staging is more than just filling a room; it’s a design lab. aiStager is great to test different types of the same product, letting you compare specific items and finishes on the fly, which is incredibly helpful for nailing the perfect look.
For instance, you can take your photo of an empty dining area and try out different tables. See how a light oak dining table from West Elm brightens the space, then instantly swap it for the same table in a dark walnut finish to create a more formal, sophisticated mood. In just a few clicks, you can place a new product in the room by uploading a photo and a product link.
This works for anything. Not sure if a big, comfy sectional from Arhaus will overwhelm the living room? Stage it. Then, try a more compact, modern sofa from Joybird in its place. In minutes, you have two distinct 'after' shots that demonstrate the room's true potential. This kind of flexibility helps buyers get past the guesswork of an empty space.
The technology that makes this possible has its roots in advanced visualization tools. In fact, to get those truly breathtaking results, it helps to understand the principles behind the top architectural rendering software, as this is the foundation for the photorealism that makes AI staging so powerful.
Virtual Staging Methods: A Comparison
To see just how far things have come, it's useful to compare the old way of doing things with modern AI solutions.
This table breaks down the key differences between traditional virtual staging and an AI-powered platform like aiStager.
| Feature | Traditional Virtual Staging | AI Staging with aiStager |
|---|---|---|
| Turnaround Time | 24-48 hours | Under 5 minutes |
| Object Source | Limited library of 3D models | Any product from any online store |
| Realism & Scale | Varies; can look generic | Hyper-realistic, true-to-dimension |
| Cost | $30-$100 per image | More cost-effective, often subscription-based |
| Revisions | Slow and often an extra charge | Instantaneous and unlimited |
| Ease of Use | Requires designer input & communication | Simple upload-and-link process |
As you can see, AI has dramatically simplified the process while improving the final result. The ability to generate multiple, brand-specific looks in minutes gives real estate professionals an incredible advantage.
Essential Photo Editing for a Polished Finish
Virtual staging does a lot of the heavy lifting, but it's the final edit that truly makes a photo sing. Think of it as the polish that transforms a good "after" shot into something you'd see in a magazine. These finishing touches are what make your real estate photography before and after images feel authentic and professional.
The main goal here is to create a warm, inviting atmosphere that makes a buyer stop scrolling. This usually starts with a few basic adjustments that deliver a huge impact.
I always begin by tweaking the brightness and contrast. You’re looking for that sweet spot where the room feels airy and open but isn't so bright that it looks blown out. A little bump in contrast can really make the colors and textures stand out, giving the whole scene more depth.
Correcting Colors and Lines
Color correction is really where you dial in the mood. I’ve found that most interior shots look better with a slightly warmer white balance; it just makes a space feel more like a home. You also want to hunt down and eliminate any weird color casts from mixed lighting so the wall colors look accurate.
Next, I turn my attention to the lines. Wide-angle lenses are a necessary evil—they capture the whole room, but they can also make vertical lines look like they’re bending inward. It’s a dead giveaway of an amateur shot. Jump into your editing software and use the lens correction tools to get those walls and doorframes perfectly straight. It’s a small detail that screams quality.
Here’s a quick checklist I run through for every photo:
- Brightness & Contrast: Make the image pop without clipping the highlights or crushing the shadows.
- White Balance: Go for a warm, natural tone. You want it to feel inviting.
- Lens Distortion: Straighten every vertical line. No exceptions.
- Sharpness: Apply a light sharpening filter to bring out the details in fabrics, woods, and fixtures.
Mastering the Window View
If you want to take your images to the next level, you have to master the "window pull." This is a pro technique for dealing with a common problem: when you expose for the room's interior, the view outside the window gets completely blown out. A window pull lets you blend separate exposures—one for the room and one for the outside—into a single, perfectly exposed image.
This technique is a total game-changer. A crisp, clear view of a blue sky or a lush backyard through the window makes the entire photo feel more believable and high-end. It’s all about connecting the indoor space with the outdoors, helping buyers imagine themselves there.
These final edits are what separate standard MLS photos from powerful marketing assets. They ensure your virtually staged "after" images look polished, professional, and entirely convincing. If you’re looking to get serious about your toolset, our guide to the best real estate photo editing software is a great place to start. Nailing these details is how you create a visual story that sells.
Showcasing Your Before-and-After Photos for Maximum Impact
Creating incredible before-and-after images is a huge accomplishment, but it's only the first step. The real magic happens in how you present them. Your presentation is what turns a great photo into a powerful tool that grabs a buyer's attention and won't let go. It can honestly be the difference between a listing that gets lost in the noise and one that generates a flood of inquiries.
The goal is to make the transformation feel real and interactive. Don't just slap two photos side-by-side and call it a day—you need to bring them to life.
For your website or listing page, an interactive slider is hands-down one of the best tools you can use. It puts the viewer in the driver's seat, letting them drag a handle back and forth to reveal the stunning "after" shot from beneath the "before." That simple, physical action makes the reveal so much more dramatic and memorable.
Getting Your Images Found on Google
Before you even think about uploading your photos, you have to get them ready for search engines. This is a step too many people skip. Search engines can't "see" images like we do, so you have to give them clues. It all starts with the file name.
A generic name like IMG_8475.jpg does you no good. Instead, use descriptive, keyword-rich names that match what people are actually searching for. For example, a much better file name would be modern-kitchen-remodel-before-and-after.jpg. This tells Google exactly what your image is about, giving it a much better shot at showing up in relevant searches.
Next up is the alt text. This is the text that shows up if an image can't load, but more importantly, it's what search engines and screen readers use to understand the picture.
- Weak Alt Text: "Living room photo"
- Strong Alt Text: "Before and after of a small, dark living room transformed with virtual staging into a bright, modern space with a white sofa and oak floors."
That level of detail is what helps your images climb the ranks and pull more organic traffic to your listings.
How to Sequence Your Photos for a Compelling Story
The order you display your photos in a gallery matters more than you'd think. I always, always lead with the "after" shot. You have to hook potential buyers immediately with the most beautiful, inspiring version of the space. That’s their first impression, and it needs to be a knockout.
After you've wowed them, then you show them the "before" picture. This creates a fantastic "aha!" moment and drives home the incredible potential and value in the property. You're telling a story: "This is the amazing home you could have, and look at the simple canvas it all started from."
Think of your photo gallery as a narrative. The hero image is the climax—the beautifully finished room. The 'before' shot that follows is the backstory, and it makes the final result feel that much more impressive.
Your visual journey doesn't have to end with still photos, either. Weaving your before-and-afters into video tours or social media posts creates an even more powerful story. A short, punchy video that transitions from the empty room to the fully staged version can be absolute gold on platforms like Instagram Reels or TikTok.
This multi-format approach isn't just a trend; it's becoming the standard. The whole game of real estate visuals has changed. A decade ago, aerial photos were a luxury. Today, 82% of real estate agencies use drones. Listings that feature aerial imagery have a 68% higher chance of selling, which just goes to show how much buyers crave a complete visual story. For a closer look at these shifts, check out the latest real estate photography statistics from Matterport. The data really hammers home just how critical a top-notch visual presentation is.
Frequently Asked Questions About Before-and-After Shots

When you're diving into real estate photography before and after projects, a few questions always seem to pop up. Whether you're a seasoned agent or a photographer new to this niche, getting the details right is what separates an okay result from a truly captivating one. Let's tackle some of the most common hurdles.
One of the biggest anxieties is getting the 'before' and 'after' shots to line up perfectly. There's nothing worse than a jarring jump between the two images. The secret? A good, sturdy tripod is non-negotiable.
Once you set it up, mark the exact spots where the tripod legs touch the floor. A little bit of painter's tape works wonders. Jot down your camera's height, the exact tilt angle, and the focal length you used. This meticulous approach ensures your perspective is identical, which is absolutely critical for a smooth, professional-looking comparison.
Is AI Virtual Staging Actually Better Than Physical Staging?
This is a big one. While traditional staging definitely has its place, AI-powered virtual staging brings some incredible advantages to the table, especially for online marketing. It comes down to speed, cost-effectiveness, and sheer design freedom.
Think about it: you can instantly showcase multiple styles to appeal to a wider audience. Want to see if a room vibes better with a modern farmhouse look or a more coastal aesthetic? You can do it in minutes.
A tool like aiStager is a great example. It's the only solution that generates hyper-realistic photos with true dimension rooms and furniture objects, which means what you see is what you’d get in reality. It is great to test different types of the same product, allowing you to see how a sleek Article sofa compares to a cozy Pottery Barn sectional without spending a dime or moving a single piece of furniture.
The real game-changer is how quickly you can experiment. You just upload a picture of the room and drop in a link to a product you're considering. It makes it incredibly easy to visualize how different finishes would look, like comparing a Room & Board media console in a classic cherry versus a modern walnut. In just a few clicks, you can place a new product in the room.
What Are the Biggest Mistakes People Make?
A few common slip-ups can completely sabotage your before-and-after visuals. The most obvious one is a mismatched perspective—it just screams amateur. If the angles are off, the comparison loses all its power.
Another major pitfall is over-editing the 'after' photo. Pushing the saturation and brightness too far can make the space look fake, which is a huge turn-off for potential buyers and can erode their trust.
Finally, one of the most overlooked mistakes is poor presentation. Simply tossing your comparison photos into the middle of a gallery is a wasted opportunity. You need to make them a star of the show. Use interactive sliders on your website, feature them in social media posts, and call them out in your listing description to build a compelling narrative about the property’s amazing transformation.
Ready to create stunning, hyper-realistic "after" shots in just a few clicks? With aiStager, you can upload a photo, add a product link, and generate true-to-dimension visuals that grab a buyer's attention. Give it a try and see just how easy it is to showcase a property's full potential. Get started with aiStager today.