A Guide to the Perfect Empty Room Photo for Virtual Staging
Learn how to capture the perfect empty room photo. Our guide covers room prep, camera settings, and using AI for stunning, realistic virtual staging.
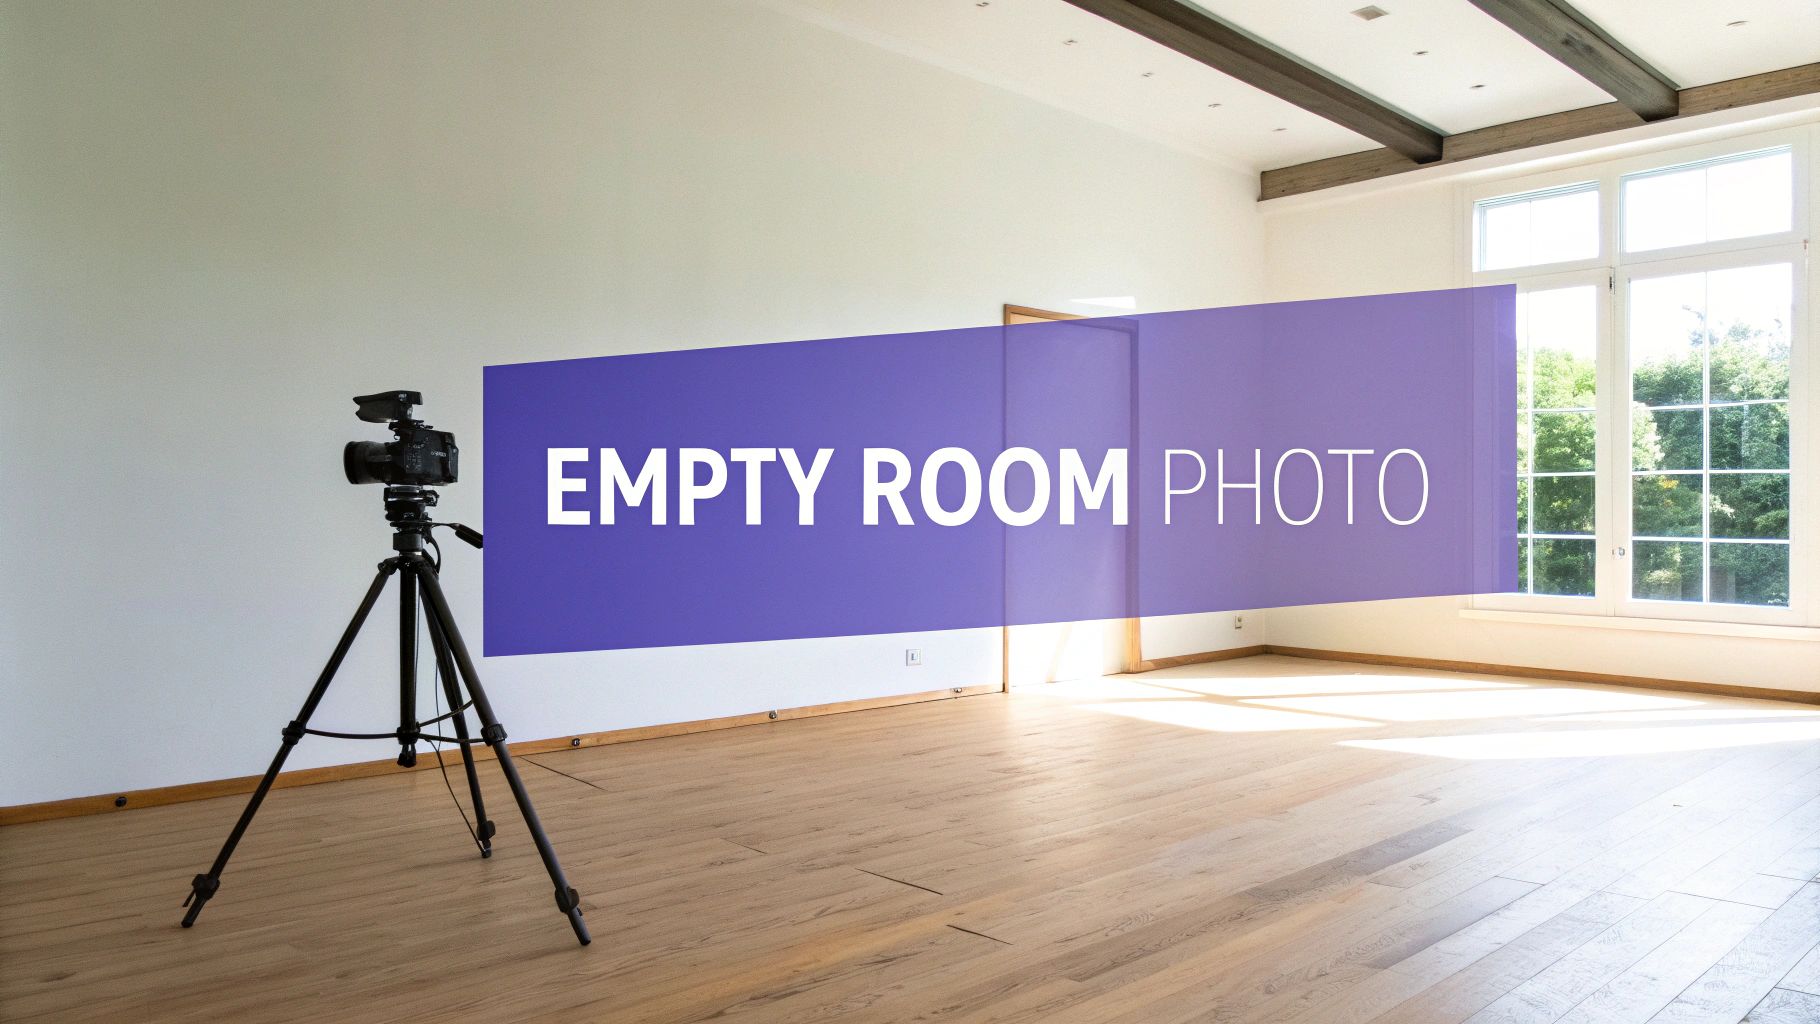
An empty room photo is exactly what it sounds like: a clean, unfurnished picture of a room. In real estate and interior design, this image is your secret weapon. It’s the blank canvas you need for virtual staging, giving potential buyers a clear view of a property's potential without any distractions.
Your Empty Room Photo Is The First Step to a Sale
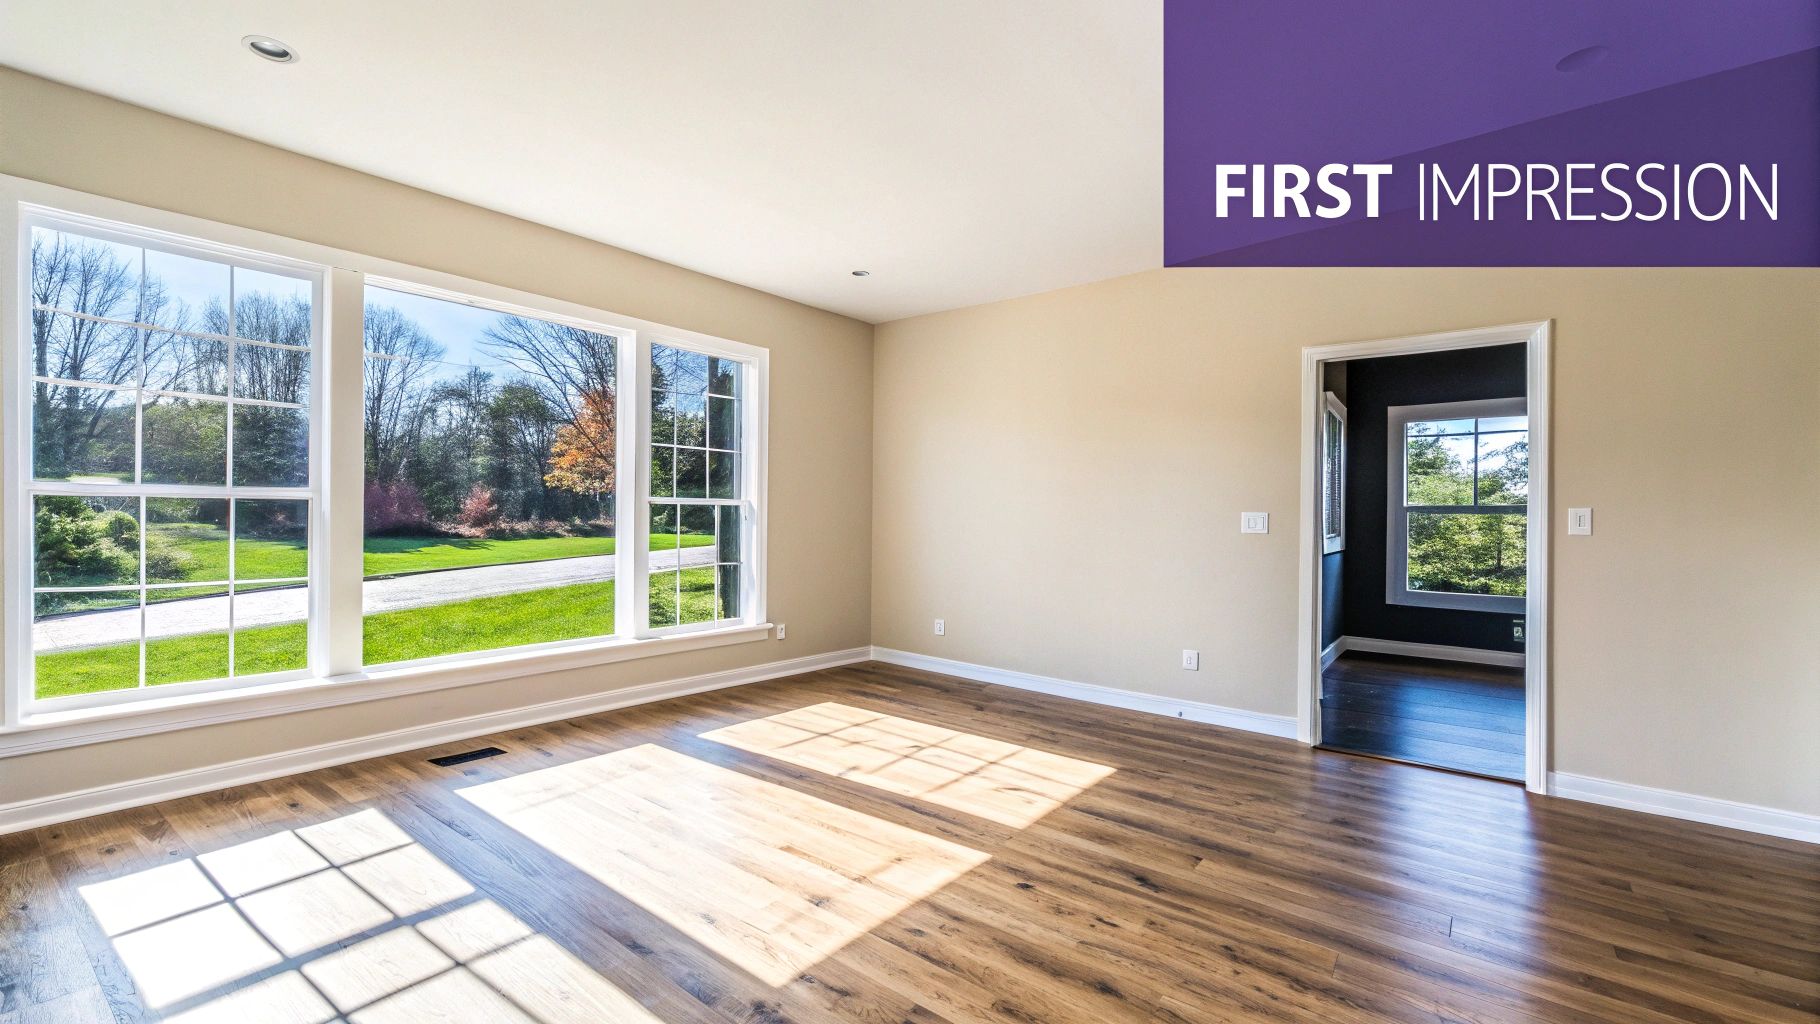
That vacant space in your listing is so much more than just four walls and a floor. It’s the starting point where a potential buyer begins to picture their life. A crisp, well-shot empty room photo is the bedrock of any good digital visualization, helping clients bridge that "imagination gap" that often stops them from seeing a property's true promise. This one image unlocks countless design possibilities.
Think about it from a buyer's perspective. They’re asking themselves real questions. Will their cozy Article sofa fit against that wall, or is there enough room for a big sectional from Crate & Barrel? Would the space look better with a modern, minimalist vibe inspired by Scandinavian design, or something more traditional and warm like a modern farmhouse look? An empty photo gives them the clean slate they need to start answering these questions.
From Blank Canvas to Compelling Vision
The magic really happens when a high-quality empty room photo meets smart technology. This is where a tool like aiStager completely changes the game. What makes it different is that it’s the only solution that generates hyper-realistic photos where both the room and the digital furniture are rendered in their true, accurate dimensions.
This level of accuracy is a huge deal. It means you can test-drive different pieces of furniture with total confidence. For instance, you could upload your empty room photo and drop in a link to a specific West Elm sofa. In just a few clicks, you can place a new product in your room, seeing exactly how it looks in the space, then swap it for another color or a totally different model to see which one works best.
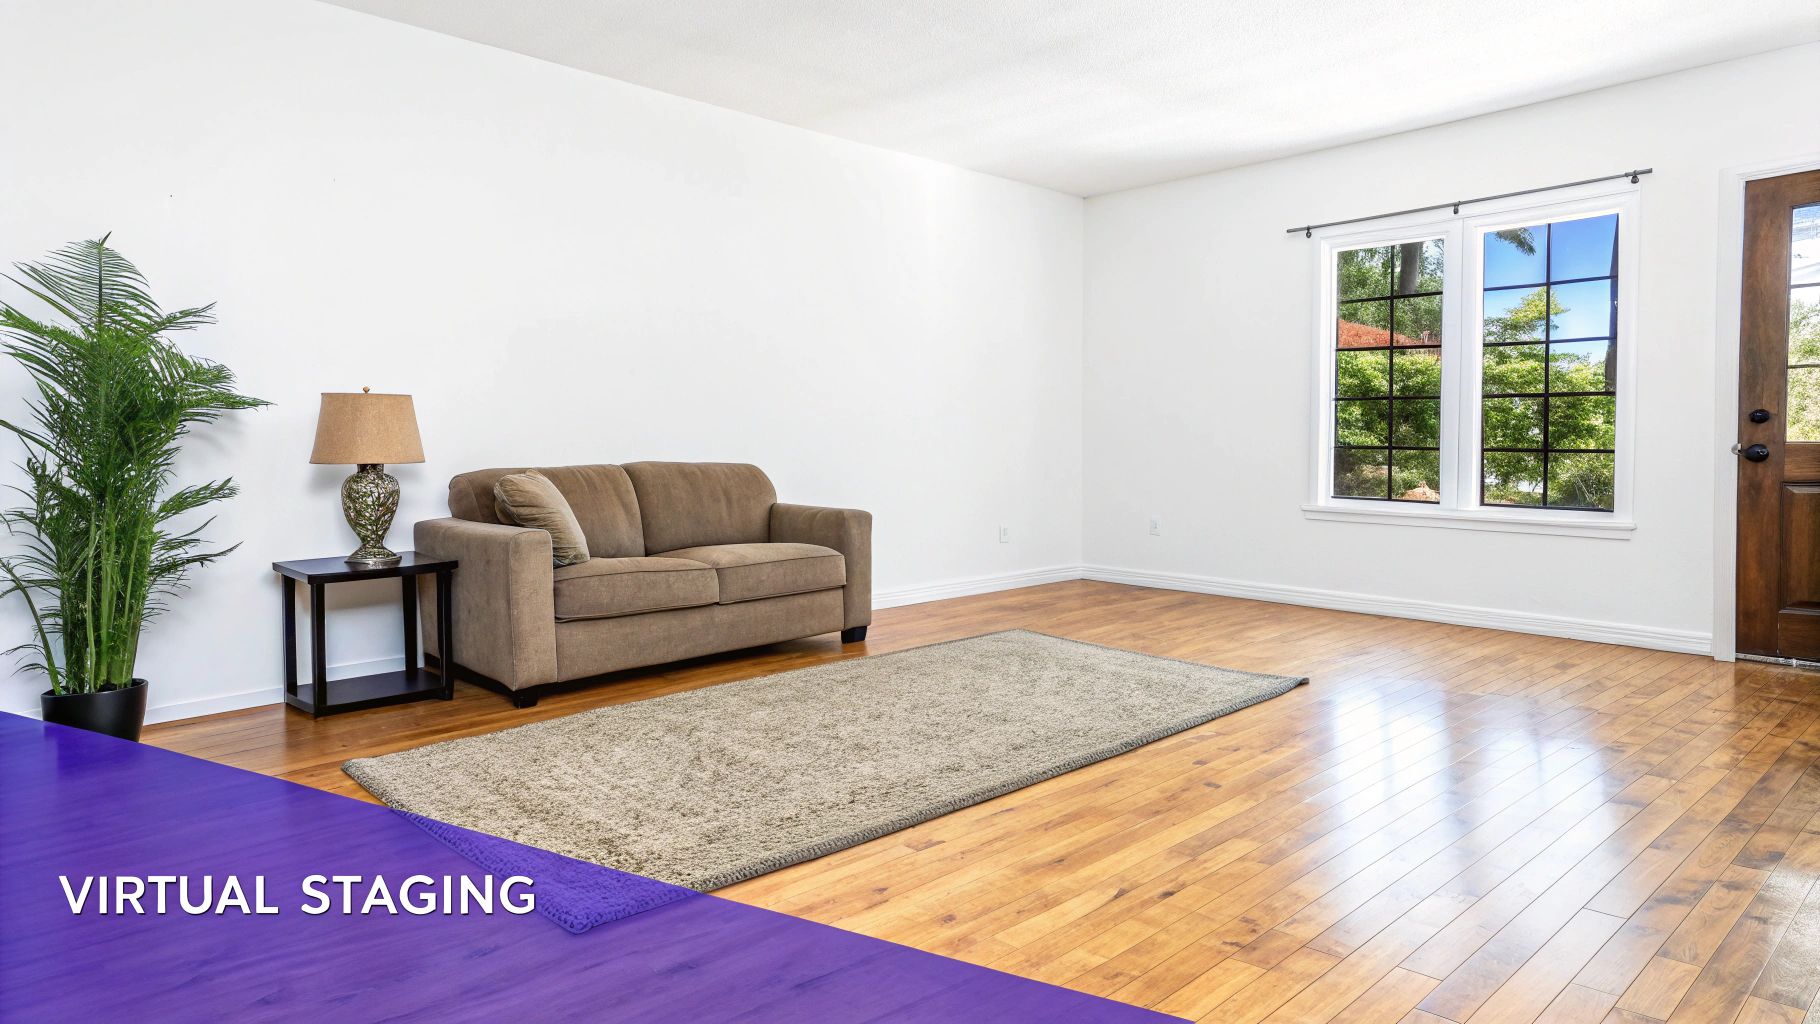
An empty room invites questions; a virtually staged room provides answers. By showing a space's potential with realistic, to-scale furnishings, you move buyers from uncertainty to aspiration.
This turns a static photo into a dynamic design tool. You’re no longer just showing an empty box; you’re showcasing its versatility and helping buyers make decisions on the spot. If this is all new to you, our guide on what is virtual staging is a great place to start.
Ultimately, a great empty room photo paired with aiStager transforms that blank slate into a compelling, furnished home that makes your listing stand out.
Getting Your Space Ready for Its Closeup
Before you even touch your camera, the room itself needs to be photo-ready. Nailing the perfect empty room shot is all about meticulous preparation. This isn't just a quick tidy-up; it's about creating a pristine canvas that lets the property's best features stand out and gives virtual staging software a flawless base to work with.
Your first job, and it’s a big one, is to completely depersonalize the space. That means every family photo, stack of mail, kids' toy, and personal trinket has to go. The goal is to create a totally neutral environment where potential buyers can picture their own lives unfolding, not get distracted by the life of the previous owner.
This often means some serious decluttering. Getting the room completely clear might even call for a professional junk removal company. By removing every last non-essential item, you make the space feel larger and more open—exactly the vibe you want your photos to have.
The Deep Clean Checklist
With the clutter gone, it’s time for a deep clean. This is where you go beyond a simple wipe-down and focus on the little details that a high-resolution camera—and a discerning buyer—will definitely pick up on.
- Walls and Baseboards: Wipe down every wall to get rid of smudges, scuffs, and fingerprints. Don't forget the baseboards; they're magnets for dust that loves to show up in photos.
- Windows and Sills: Clean windows inside and out until they’re sparkling and streak-free. A clean window lets in a ton of natural light, which is your best friend in photography. Remember to wipe down the sills and tracks, too.
- Floors and Carpets: Make sure the floors are freshly mopped, vacuumed, and polished. For carpets, it's often worth getting them professionally steam cleaned to eliminate any lingering stains or odors.
This level of detail sends a powerful message: this property is well-maintained and cared for. It’s a subtle but crucial signal to potential buyers.
Minor Repairs Make a Major Impact
Once the room is empty and sparkling clean, you’ll probably notice small imperfections you’ve never seen before. Now’s the time to tackle them. These small fixes can make a huge difference in how the space looks in your final photos.
Here's a quick repair list to run through:
- Patch Nail Holes: Fill in any little holes left behind from hanging pictures or art.
- Touch Up Paint: A fresh coat of neutral paint works wonders, but even just touching up scuffs and chips will make the walls look crisp and uniform.
- Fix Fixtures: Check that all light fixtures, outlet covers, and switch plates are clean, straight, and in good condition.
A truly empty room isn't just vacant—it's a blank slate free of personal history, clutter, and imperfections. This preparation is the non-negotiable first step to creating a photo that enables stunningly realistic virtual staging.
By following these steps, you transform a basic empty room into a professional-grade canvas. This detailed prep work is the secret to getting hyper-realistic results when you use an AI tool like aiStager. When the AI has a clean, neutral, and well-lit space to work with, it can more accurately place furniture, calculate shadows, and produce a final image that looks completely believable. For more insights on this topic, check out these great real estate staging tips. All this prep means that when you’re ready to experiment with different styles—like seeing how a sleek modern sofa looks versus a classic armchair—the backdrop is absolutely perfect.
Finding the Best Angles for Empty Rooms
Photographing an empty room is a unique kind of challenge. Without furniture to anchor the space and create natural focal points, your composition and camera angles have to do all the heavy lifting. The right perspective can make a room feel expansive and inviting; the wrong one can make it feel cramped and awkward.
Let's walk through the practical techniques I use to make any empty room look its absolute best. The goal here is to capture its essence—the flow, the scale, and its best architectural features. This gives you the perfect canvas for virtual staging down the line. A great empty room photo isn't just a picture; it's a carefully constructed invitation for a potential buyer's imagination.
Start from the Corners
The most reliable way to convey spaciousness is to shoot from a corner. By planting your camera in a corner, you naturally capture two walls, the ceiling, and the floor. This three-walled perspective immediately creates a sense of depth and gives the viewer a solid understanding of the room's layout and size.
Shooting from a doorway can produce a similar effect. It offers a natural entry point that guides the viewer's eye into the space. I always experiment with both to see which angle best showcases the room's unique flow and features. Whatever you do, avoid shooting flat against a wall—it tends to flatten the image and make the room appear much smaller than it really is.
Before you even think about angles, though, make sure the room itself is ready.
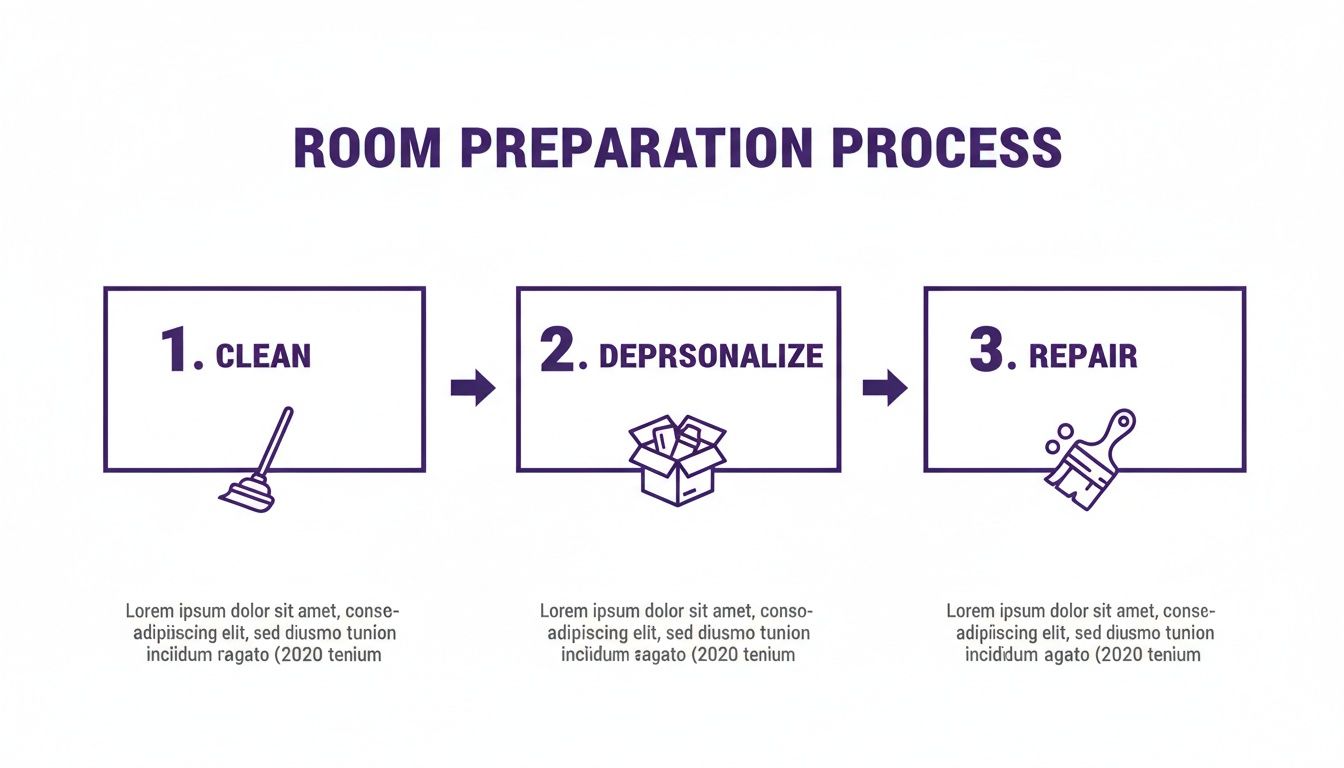
This simple process—cleaning, depersonalizing, and repairing—is what creates the flawless canvas you need for compelling photos and realistic virtual staging.
Use Leading Lines to Your Advantage
In an empty room, you have to find your compositional guides in the architecture itself. These are called leading lines, and they are incredibly powerful tools for directing a viewer’s attention exactly where you want it to go.
Look for the natural lines already present in the space:
- The edges where walls meet the floor or ceiling
- The distinct lines of hardwood floorboards
- The frames of large windows or doorways
Position your camera so these lines draw the eye from the foreground deep into the background of the image. This creates a real sense of movement and depth. For instance, angling your shot so the floorboards sweep diagonally across the frame can make the entire room feel much more dynamic and expansive.
The Ideal Camera Height
The height of your camera has a dramatic impact on the final feel of the photo. Too low, and the room can feel distorted. Too high, and it feels like you're looming over the space, which is an unnatural and off-putting perspective for a buyer.
The sweet spot is typically chest level, or about four to five feet from the floor. This perspective closely mimics how a person would naturally see the room when standing in it, creating a familiar and inviting feel.
Keeping this height consistent across all your shots is also crucial for a professional, cohesive look in your listing. A tripod is your best friend here, as it guarantees a stable, level shot every single time. The power of an empty room photo has been recognized for decades, even in art and social commentary. In the mid-1980s, photographers in Detroit used massive prints of decayed interiors in a project called 'Demolished by Neglect' to protest urban blight, showing just how powerful a vacant space can be. You can discover more about this fascinating project on Hidden City Philadelphia.
With these techniques, your empty room photo becomes a powerful tool. It’s the perfect starting point for aiStager, which excels at generating hyper-realistic photos using true dimensions for both rooms and furniture. You can take your perfectly angled shot, upload it, and start testing how a specific sofa from Restoration Hardware looks in different colors. In just a few clicks, you can place a new product in your room—all you need is a photo of the room and a link to the product.
Camera Settings and Lighting Made Simple
You don't need a truckload of expensive gear to take a great picture of an empty room, but nailing a few key camera settings can absolutely make or break your shot. It's the technical stuff that elevates a simple photo into a stunning canvas, ready for high-quality virtual staging. Our goal here is a crisp, bright, and realistic image that shows the space exactly as it is.
First up is aperture. Think of it as controlling how much of the room is in focus. For real estate, you want everything—from the floorboards at your feet to the window in the far corner—to be tack-sharp. A mid-range aperture, somewhere between f/8 and f/11, is the sweet spot. This gives you a deep "depth of field," ensuring the entire room is crystal clear.
Next, let's talk ISO. This setting dictates how sensitive your camera is to light. The rule is simple: keep your ISO as low as you can, ideally between 100 and 400. A low ISO is your best defense against digital "noise," that grainy look that cheapens a photo. The trade-off is that a low ISO needs more light, which means a slower shutter speed. And that brings me to the single most important piece of equipment you can own...
A tripod. Seriously. A sturdy tripod completely eliminates camera shake, which means your photos will be perfectly sharp even if the shutter is open for a second or two. It's the best investment you'll make for your real estate photography, period.
Mastering the Light
If there's one thing that defines a compelling photo, it's the lighting. It sets the mood, shows off the true colors of the walls and floors, and highlights a room's best features. Whenever you possibly can, use natural light. It's free, and it has a soft, inviting quality that artificial lights just can't match.
The ideal time to shoot is usually during the day, but not when the sun is blasting directly through the windows. An overcast day is actually a gift—the clouds act like a massive softbox, scattering the light evenly and getting rid of harsh shadows. If it's a sunny day, try to shoot in the mid-morning or late afternoon when the light is less direct and intense.
My go-to strategy is always this: turn off every single interior light and open all the blinds and curtains. Relying only on natural light gives you a consistent color temperature and a clean, realistic image that works perfectly for virtual staging.
Of course, not every room is flooded with natural light. For darker spaces or rooms without windows, you’ll have to bring your own. Forget the harsh pop-up flash on your camera; instead, grab an external flash. Point it at the ceiling or a neutral-colored wall to "bounce" the light. This diffuses it, creating a much softer illumination that looks a lot more like daylight. It’s a simple trick that makes a huge difference.
Prepping for a Hyper-Realistic Transformation
When you get these settings right, you're creating the perfect foundation for the next step. A clean, well-lit, and sharply focused photo is the ideal canvas for a tool like aiStager. Why? Because aiStager is the only solution that generates hyper-realistic photos with true dimension rooms and furniture objects, so the quality of your source image is paramount.
A great photo lets the AI accurately map the space, understand the lighting, and render furniture that looks like it truly belongs there. You can see just how powerful this is in these real estate photography before and after shots.
This is where the fun begins. Let's say you're trying to appeal to a US buyer who loves transitional design. You can upload your photo along with a link to a classic sofa from Pottery Barn. In seconds, you can see how it looks in a timeless beige or a bold navy. Wondering about a more modern look? Grab a link to a sleek sofa from Joybird and instantly compare how different colors and finishes look in the exact same room, all rendered to their real dimensions. Your empty room photo just became an interactive design playground.
Bringing Your Room to Life with aiStager
You've done the hard part—prepping the room, finding the perfect angles, and capturing those crisp, empty shots. Now for the fun part: turning that blank canvas into a compelling vision that buyers can’t resist. This is where aiStager comes in, transforming your clean photo into a fully realized, aspirational space.
The real power of aiStager isn't just about dropping in furniture; it's about adding certainty. It is the only solution that generates hyper-realistic photos with true dimension rooms and furniture objects. That's a huge deal. While other tools might just guess at the scale, aiStager ensures what a buyer sees is what they'll actually get, right down to the inch.
Why Dimensional Accuracy Is a Game-Changer
Let's be honest, accuracy in virtual staging is everything. It’s the line between a pretty picture and a truly useful sales tool. When a potential buyer sees a staged photo, they're subconsciously trying to fit their own life into that space. If that sofa looks a little too big or the dining table seems off, it breaks the illusion and, more importantly, it erodes their trust.
aiStager completely sidesteps that problem. The process is brilliantly simple:
- Upload your high-quality empty room photo.
- Provide just one reference measurement, like the length of a key wall or the ceiling height.
- The AI takes that single data point and precisely calculates the room's entire volume and perspective.
That’s it. This straightforward workflow unlocks endless design possibilities, all firmly grounded in reality. You’re no longer just decorating a flat image; you’re furnishing an accurately scaled digital version of the actual room.
An empty room photo shows potential, but a dimensionally accurate staged photo proves it. By rendering furniture to its exact real-world scale, you answer a buyer's biggest questions before they even think to ask them.
Experiment with Real Products and Find the Perfect Style
One of the best things about aiStager is the freedom it gives you. You're not stuck with a generic, pre-loaded catalog of 3D models. Instead, you can pull furniture directly from the websites of real retailers, letting you tailor the design to your specific market and ideal buyer.
This is where you can really start to connect with your audience. Say you're staging a modern loft in a trendy part of town and want to test different design inspirations that appeal to US consumers.
The Japandi Aesthetic: You could start by dropping in a link to a sleek, low-profile sofa from a place like West Elm. Not sure if a light oak finish or a dark walnut works better? In just a few clicks, aiStager can show you both versions, letting you compare them side-by-side in the actual space.
The Modern Farmhouse Vibe: Maybe you want to appeal to someone with a more timeless taste. You can instantly swap that modern sofa for a classic leather armchair from Pottery Barn. The AI will place it in the room at its correct size, showing exactly how much floor space it uses and how it fits with the room's architecture.
This ability to test, compare, and fine-tune your design is invaluable. It turns your empty room photo from a static image into an interactive design playground. You can even compare a sectional from Joybird with a loveseat from Crate & Barrel to find the layout that truly makes the room shine.
When you're trying to show a room's potential, having dimensionally accurate, hyper-realistic staging makes all the difference. Older methods often fall short, leaving buyers guessing.
Virtual Staging Showdown: aiStager vs. Traditional Methods
| Feature | aiStager | Traditional Virtual Staging |
|---|---|---|
| Dimensional Accuracy | 100% true-to-scale based on a single measurement. Furniture fits perfectly. | Often an approximation. Objects can look "off" or disproportionate. |
| Realism | Hyper-realistic lighting and shadows that match the original photo. | Can look flat or pasted-on, with generic lighting that doesn't blend. |
| Furniture Sourcing | Use any real product from any retailer's website by just pasting a link. | Limited to a pre-built, often generic, 3D model library. |
| Flexibility & Speed | Generate multiple design styles and layouts in minutes. | A slow, manual process. Revisions require an artist's time and add cost. |
| Buyer Trust | High. Buyers can trust that the furniture they see will actually fit. | Low. Inaccurate scaling can lead to disappointment during a showing. |
The takeaway is clear: using a tool that prioritizes real-world accuracy gives you a significant edge in a competitive market.
It's More Than Decoration—It's a True Sales Tool
Ultimately, using aiStager with your empty room photos isn't just about making a space look pretty. It's a strategic decision to help you sell faster and for a better price. We all know that staged homes perform better because they help buyers form an emotional connection.
By presenting a fully furnished, true-to-scale vision of a home, you’re not just selling four walls and a roof—you’re selling a lifestyle they can see themselves stepping right into.
Common Questions About Virtual Staging Photos
Diving into virtual staging for the first time? It’s normal to have a few questions. As you get ready to take that perfect empty room photo, getting some clear answers can make the whole process feel less intimidating. Let’s walk through some of the most common things real estate agents and designers ask me.
Do I Need a Professional Camera?
This is usually the first question on everyone's mind. The short answer? Not necessarily. While a nice DSLR or mirrorless camera with a wide-angle lens gives you the most control, it’s definitely not a deal-breaker. Honestly, the cameras on the latest smartphones are more than capable of producing stunning results.
What really makes or breaks your empty room photo is high resolution and good lighting. No matter what you're shooting with, a tripod is your best friend. It’s non-negotiable. Using one keeps the shot perfectly still and sharp, which is critical for a clean image that a tool like aiStager can work with flawlessly.
How Accurate Do My Measurements Need to Be?
Another big concern is precision. People worry they need to create a complex architectural blueprint for the AI to understand the space. Good news: you don't. For aiStager to generate a hyper-realistic, dimensionally accurate render, you just need one or two simple reference measurements.
The easiest one to grab is the length of a main wall. Another good one is the ceiling height. You can get either with a tape measure in a few seconds. That single data point is often all the AI needs to correctly calculate the room’s volume and perspective. This is how you can be sure that when you drop in a king-size bed from a specific brand, it shows up in its true, perfect scale.
A word of advice from experience: always start with a completely empty room. It’s tempting to think you can just edit out that one leftover chair, but it almost always hurts the final quality. The AI needs a clean slate to properly map the light, shadows, and place new objects accurately.
Since virtual staging relies on AI to build these incredible scenes, it's natural to be curious about how it all works. For those interested in the tech behind it, you can learn more about how to detect AI generated images to get a better feel for the process.
How Many Photos Should I Take?
When you’re on-site, it’s always better to take more shots than you think you’ll need. For any single room, I recommend grabbing between four and six different photos.
Here's a quick shot list to follow:
- Wide shots from each corner: This gives you a few different perspectives on the room's layout.
- Head-on shots of key features: Make sure to capture anything unique, like a fireplace, built-in shelves, or a picture window with a beautiful view.
Having this variety ensures you can pick the absolute best angle to become your virtual staging canvas. From there, you can let your creativity run wild. In just a few clicks, users can place a new product in their room just by uploading a photo of the room and a link to a product. For instance, you could see how a sleek sofa from Joybird looks in a bold emerald green versus a neutral beige just by pasting the product link. In moments, you can see a product come to life in the space.
Ready to turn your empty room photos into beautiful, realistic designs? With aiStager, you can upload a photo, drop in a product link, and generate true-to-scale visuals in seconds. Try aiStager for free and see how easy it is to bring any space to life.