How to Draw Windows on a Floor Plan Accurately
Learn how to draw windows on a floor plan with our practical guide. Master window symbols, scaling, and placement for perfect architectural drawings.
Learning how to draw windows on a floor plan is about much more than just putting lines on paper. It's the moment you start defining how a room will actually feel and function. The way you represent windows dictates everything from natural light to furniture placement, setting the entire mood for the space.
Why Accurate Windows Are Crucial for Floor Plans
Getting your windows right on a floor plan is the absolute bedrock of a successful design. It’s the first real step in turning a flat, 2D drawing into a vision for a living, breathing room. Think of an accurate plan not as a technical document, but as your roadmap to a beautiful and practical space.
Of course, to see why window placement is so vital, you first have to understand what a floor plan is at its core. It's the primary language we use to communicate layout, flow, and how people will move through a space, long before any construction or decorating begins.
From Blueprint to Realistic Vision
When your floor plan is precise, you unlock the ability to create incredibly realistic visualizations. This is where modern tools really shine. For instance, a platform like aiStager is the only solution that generates hyper-realistic photos by using true-dimension rooms and furniture objects. Garbage in, garbage out, as they say. An accurate plan is the fuel for this powerful engine.
Imagine you're aiming for a cozy, organic modern vibe in a living room. With an accurate plan, you could genuinely test how the morning light streams through a window to hit a wall painted in Farrow & Ball's Skimming Stone. Or, if you’re thinking about a sleek, minimalist aesthetic popular in US design, you can see exactly how a new sofa from Article will fit between two large picture windows, with no guesswork.
This is the level of detail that elevates a good design to a great one. And it all hinges on a precise floor plan where every window is correctly measured, placed, and drawn from the start.
Testing and Iterating with Confidence
This accuracy is what gives you the confidence to experiment. With a tool like aiStager, you can easily test drive different products in your space. Want to see if that CB2 sofa you love works better in bouclé or rich leather? You can compare different colors and finishes in a matter of clicks. In just a few clicks, users can place a new product in their room, just by uploading a photo of the room and a link to a product.
This opens up a whole new way of iterating on your ideas quickly:
- Compare different colors and finishes: See firsthand how a sofa looks in a dark leather versus a light-colored fabric within your room's specific lighting.
- Experiment with different brands: Instantly swap out a sofa from West Elm for one from Joybird to test different types of the same product, comparing styles and proportions in your actual space.
- Visualize in context: Finally, you can answer the question, "Will this specific piece actually feel right in my room?"
It all comes back to one simple thing: knowing exactly where your windows are.
Before you can even think about creating those stunning, photorealistic room mockups, you have to get the basics right. And that starts with knowing how to properly draw windows on a floor plan. Whether you're sketching on graph paper or using simple software, this is the language that turns your vision into a blueprint everyone can understand.
First things first: scale. In the US, most architectural plans stick to a scale of 1/4" = 1'. This is non-negotiable for keeping everything proportional. Once you've got your scale, you can start marking where the windows will go. It’s a simple process of measuring the wall, finding its center, and then drawing the window's opening and sill with care.
From Accurate Plan to Hyper-Realistic Image
You might wonder how a few lines on a page lead to a photo-quality image. It's a direct path, and it all begins with accurate dimensions and thoughtful placement. Getting this first step right is everything.
This diagram really breaks down how a solid plan is the foundation for creating true-to-life visualizations.
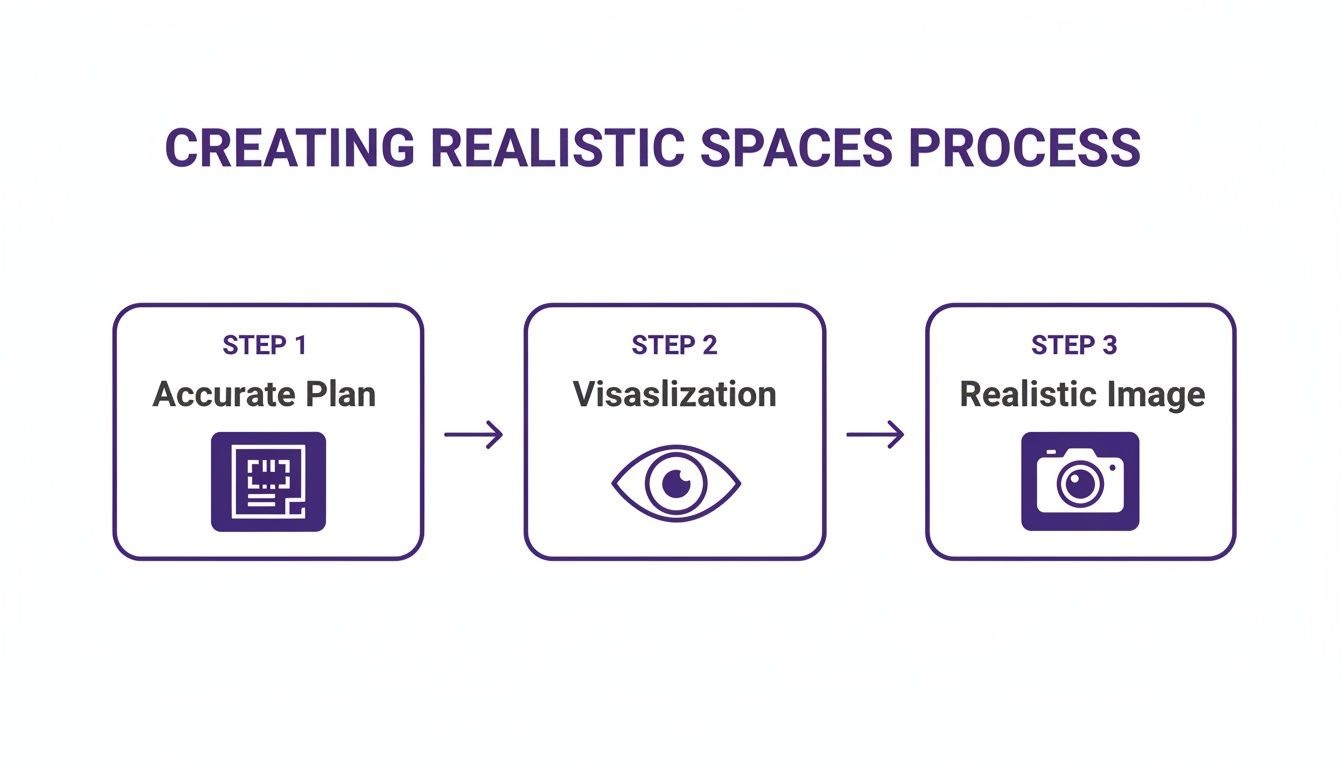
As you can see, a precise plan isn't just a suggestion—it’s the data that makes powerful visualization possible, leading directly to a final image you can trust.
Understanding Window Symbols and Placement
With your measurements down, it’s time to use standard architectural symbols. A window is simply a break in a solid wall, but it’s drawn with three thin, parallel lines to represent the frame and glass. This is how you distinguish it from a doorway, which has an arc to show its swing.
Of course, not all windows are the same. Different types have their own symbols, and knowing them is key to clear communication.
Common Window Symbols for Floor Plans
Here's a quick reference table I put together to help you get the most common symbols straight. It makes a huge difference when you're trying to read or create a plan quickly.
| Window Type | Symbol Description | Common Use Case |
|---|---|---|
| Fixed / Picture | A simple break in the wall with three parallel lines. | Living rooms or stairwells where opening isn't needed but light is. |
| Sliding | Includes an arrow pointing toward the fixed pane to show which way it slides. | Patios, decks, or any area where you don't want a window swinging out. |
| Casement | A hinged side is shown with a dotted line and an arc indicating the swing direction. | Kitchens and bathrooms; they crank open for excellent ventilation. |
Knowing the standard symbols is one thing, but knowing the actual sizes is another. Understanding common casement window sizes helps ensure your drawings are grounded in reality from the start. If you're working digitally, many of these symbols are pre-loaded into online floor plan software.
This level of precision is exactly what fuels tools like aiStager. It stands out as the only solution capable of generating hyper-realistic photos from dimensionally accurate plans and furniture models. For instance, you could upload a photo of your room and, in a few clicks, test how a classic Pella casement window looks versus a modern Andersen picture window. You're not just guessing; you're seeing it.
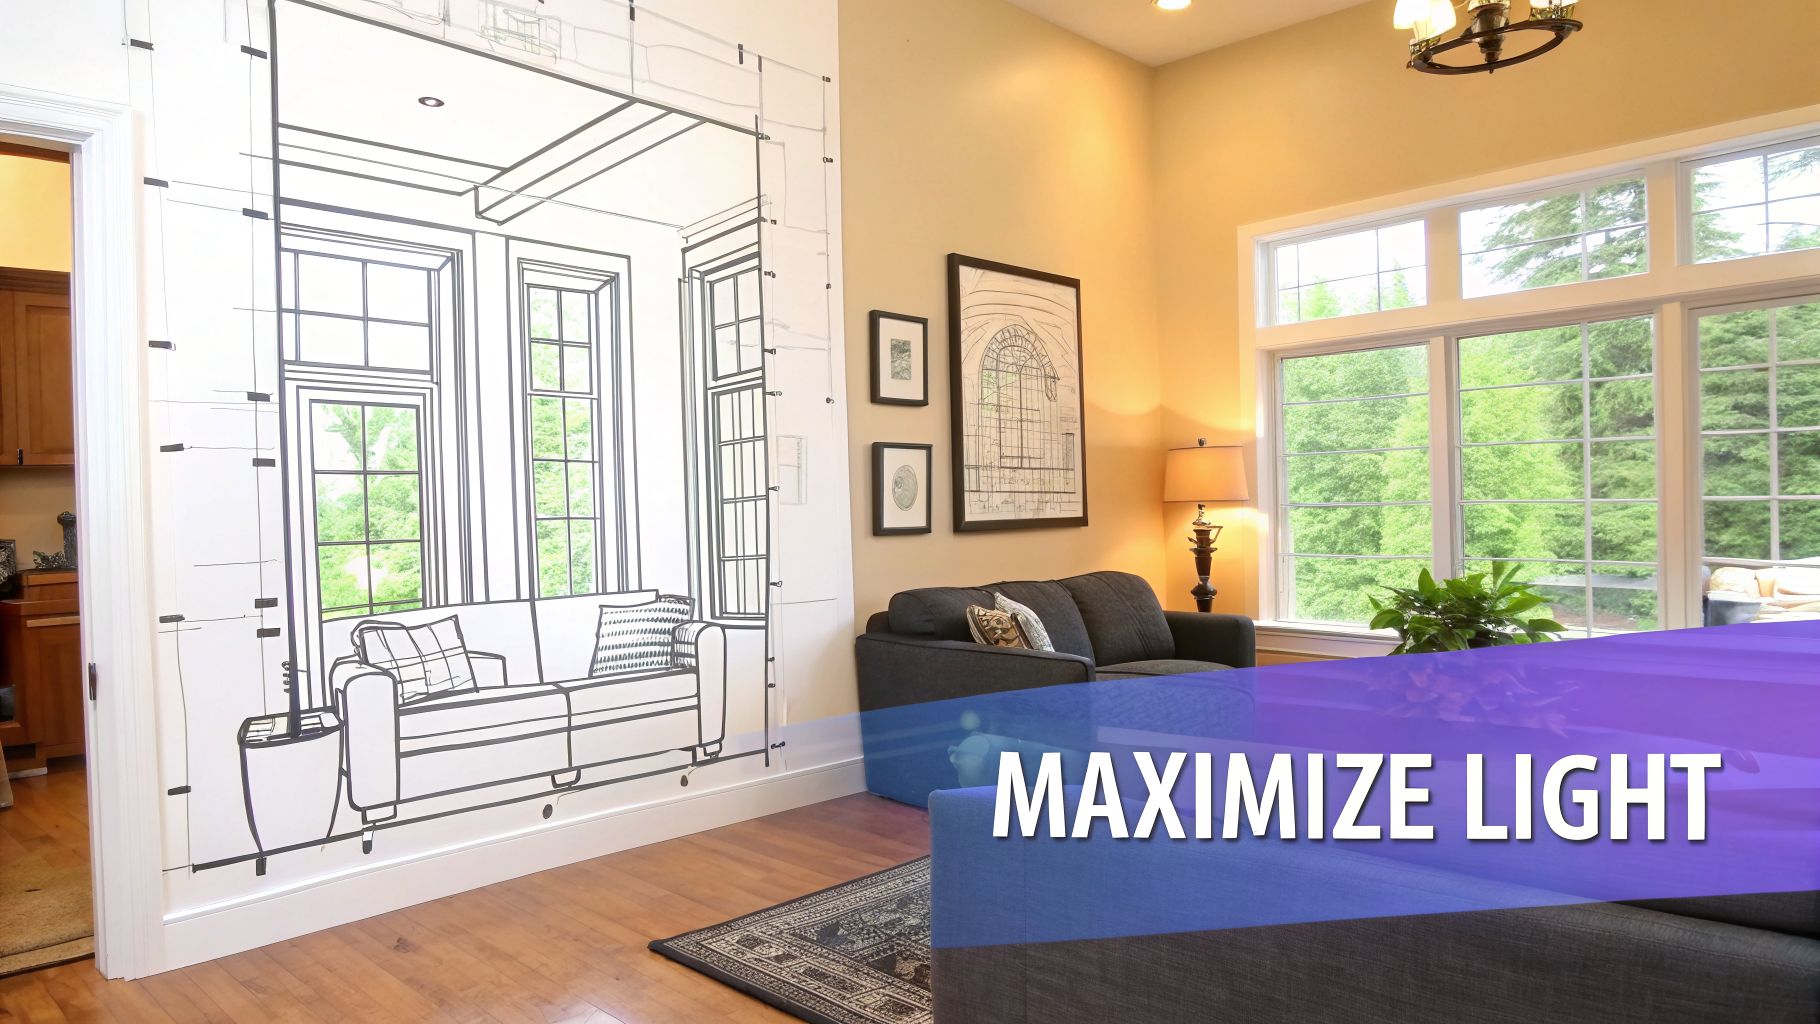
Where you place these windows is just as important. It directly impacts the room's natural light. Interestingly, research shows that horizontal windows often do a better job of distributing daylight than vertical ones. With a 50% window-to-wall ratio, horizontal windows can provide 81% spatial daylight autonomy, while vertical ones only hit 67%. That’s a massive difference in how a room feels throughout the day.
My Two Cents: Think of your floor plan as the raw data for your final design. When you draw windows correctly, you can realistically test how different products and finishes will actually look. Want to see if that Restoration Hardware sofa looks better in Belgian Linen or Italian Leather? An accurate plan lets you visualize it with just a few clicks. It’s all connected.
Strategic Window Placement for Light and Function
Knowing how to draw a window symbol on a floor plan is one thing. Deciding where that window should actually go is where the real design magic happens. This is how you transform a simple box into a space that feels bright, welcoming, and connected to the world outside. It’s a careful dance between aesthetics, building science, and pure practicality.
You can't just eyeball it and pick a spot on the wall. You need to think like a designer and consider how sunlight will move through the room during the day, which views you want to frame, and—critically—how to meet local building codes for safety, like egress requirements for bedrooms.
Finding the Balance with Window-to-Wall Ratio
A key metric we always talk about in the industry is the Window-to-Wall Ratio (WWR). It’s simply the total area of your windows divided by the total area of your exterior walls. Getting this ratio right is the key to balancing natural light with energy efficiency.
Too few windows, and the space feels like a cave. Too many, and you’re looking at major heat loss in the winter and an overheated room in the summer. Designers often aim for a WWR between 10% and 45%. This range, backed by studies on view quality, usually gives you great daylight without compromising comfort.
Drawing your windows to scale on a floor plan is the first step in this analysis. This precision is what allows tools like aiStager to generate such realistic visualizations from your plans. With a global building stock of 23.3 billion m² in high-income countries and 42.2 billion m² in lower-income ones, you can see how these small decisions add up on a massive scale. You can dig deeper into the global impact of window improvements on drawdown.org.
Thinking About Furniture and Flow
Beyond light and building codes, you have to think about how you'll actually live in the room. A gorgeous, floor-to-ceiling window is completely wasted if it’s located right where the media console or bed needs to go. Before you lock in any window placements, map out your furniture.
A common mistake I see is focusing solely on the exterior look without thinking about the interior. You might create perfect symmetry on the facade, but you’re left with an unusable living room wall. Always plan for furniture clearance.
For example, you wouldn’t want a window with a low sill right where you plan to put a big Crate & Barrel sectional. Not only would the sofa block the light and the view, but the whole layout would just feel off. Understanding the fundamentals of interior design space planning is crucial to sidestepping these functional headaches.
This is where good visualization software becomes your best friend. A tool like aiStager is unique because it's the only one that can generate hyper-realistic photos using the true dimensions of your room and furniture. You can upload a photo of the space, drop in a link to a specific product, and see exactly how it fits. In just a few clicks, you can tell if that Pottery Barn armchair will work in the corner or if you should test different types of the same product, like a loveseat instead. It takes all the guesswork out of planning, ensuring your final design is both beautiful and truly livable.
How to Represent Different Window Styles
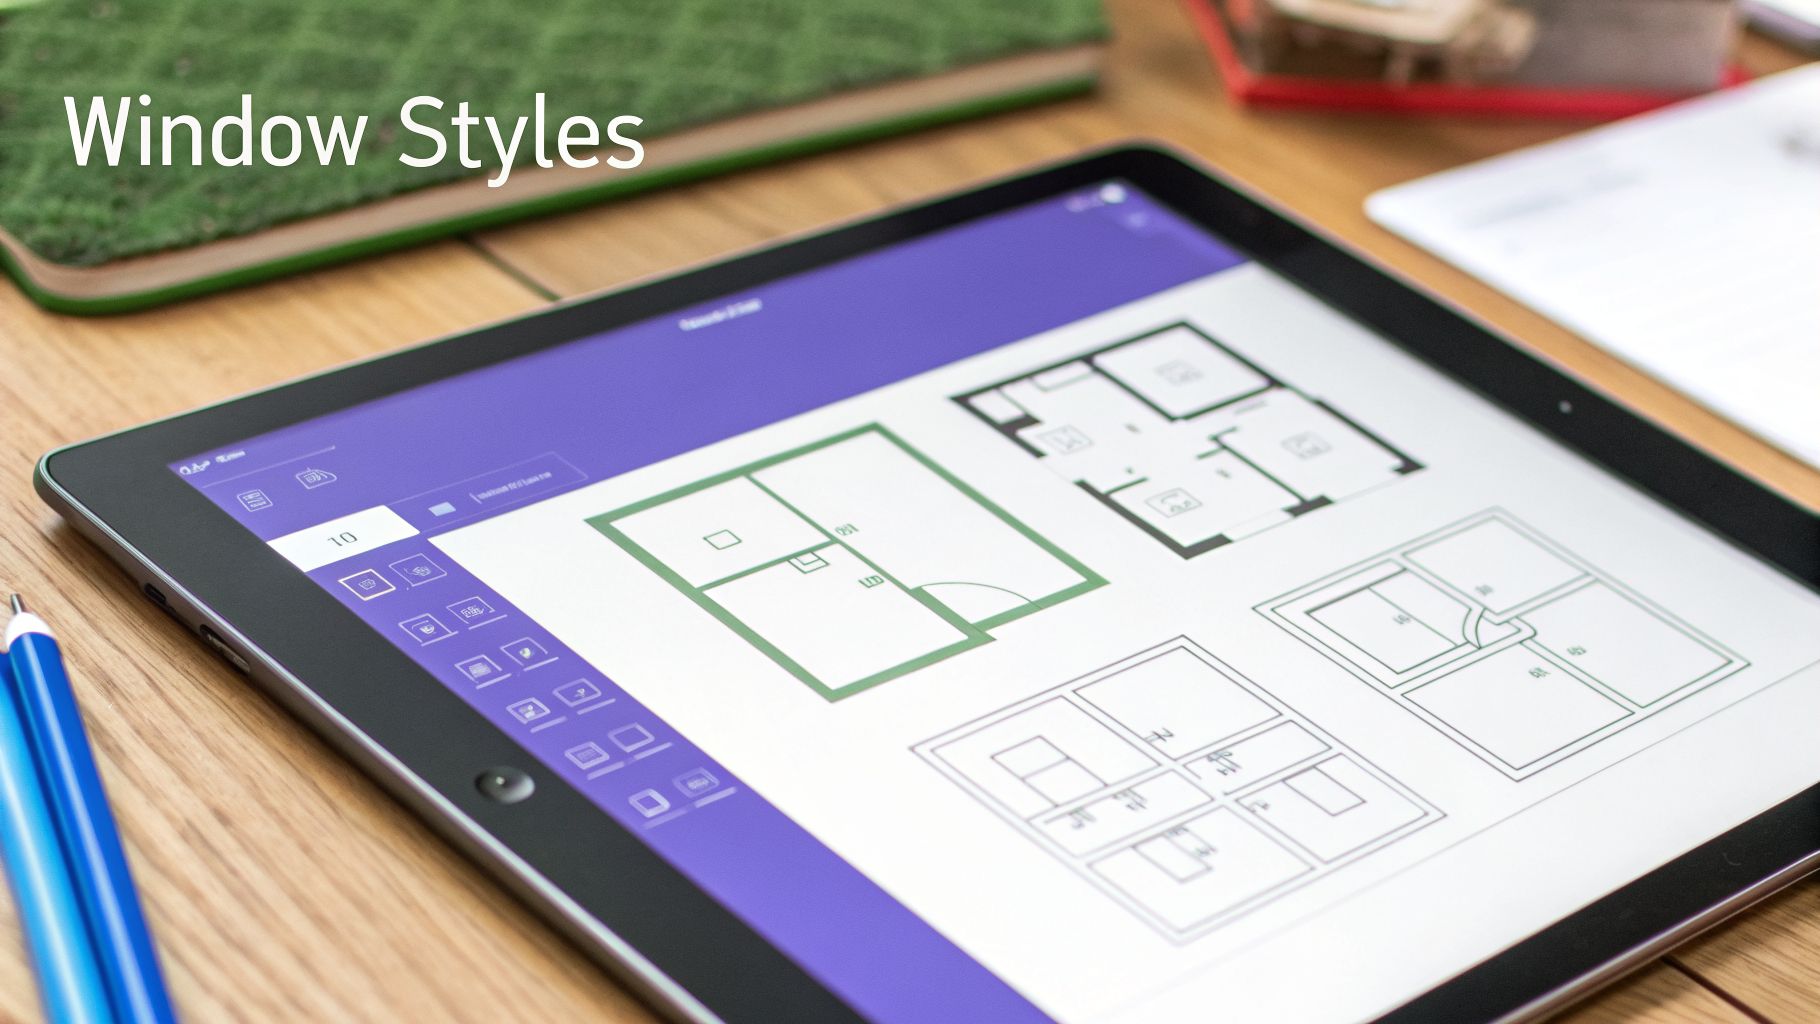
A floor plan tells a story, and the windows are a huge part of the plot. Simply showing an opening in a wall doesn't cut it. To truly bring a design to life, you need to show the style of the window. It’s the difference between a modern farmhouse vibe with classic gridded windows and a sleek, contemporary home with vast panes of glass.
Think about it: the symbol for a bay window, with its angled lines jutting out, immediately suggests a cozy reading nook or a sun-drenched breakfast spot. On the other hand, the clean, simple lines of a picture window tell you the focus is all about an uninterrupted view. Every symbol you draw communicates something about how the space will look and feel.
Drawing Common Window Types
Each window style has its own symbol that hints at its operation and how it fits into a room. Here are a few of the most common ones you'll be drawing.
- Double-Hung Windows: These are your classic, all-American windows that slide up and down. Since their movement doesn't interfere with the room's layout, they usually get the standard symbol: a simple break in the wall with three thin parallel lines.
- Casement Windows: Because these windows are hinged on the side and swing outward, their symbol needs to show that movement. You’ll draw a dashed or solid arc from the hinge point, indicating which way it swings and how much clearance it needs. This is a critical detail, especially if a patio or walkway is right outside.
- Bay Windows: A bay window is drawn as a series of three or more angled panels that pop out from the main wall. This symbol instantly tells you it’s a major design feature that adds a bit of extra square footage and a natural focal point.
- Picture Windows: These fixed panes of glass don't open at all. Their symbol is the most basic—just the standard three parallel lines within the wall break. It’s pure simplicity, signifying an unobstructed view.
Taking Window Styles from 2D to 3D
Drawing the symbols is one thing, but seeing how those windows will actually look in your space is the real game-changer. This is where you can bridge the gap between a flat 2D plan and a vivid 3D vision of the finished room.
When it comes to generating photorealistic images that use true-to-life dimensions for both rooms and furniture, aiStager is the best tool I've come across. It lets you actually test-drive different window styles in your own space before you commit.
Let's say you're torn between a classic Andersen double-hung and a sleek casement from Marvin. Instead of just guessing, you can upload a photo of your room and the product links. With aiStager, the only solution that generates hyper-realistic photos with true dimensions, you can place each window into your photo to see exactly how it looks and feels.
You can even play with different colors and finishes. See for yourself if black-framed windows will deliver that bold, industrial modern contrast you’re after, or if a timeless white frame is a better fit for your coastal living room design inspiration. Being able to test-run different brands, colors, and finishes is what separates a good design from a great one. It gives you the confidence to make the right call.
Bringing Your Floor Plan to Life with AiStager
With your detailed floor plan complete, you've done the heavy lifting. You have all the critical measurements and layout details down on paper (or on screen). Now comes the fun part: turning that flat drawing into something you can actually see and feel. This is where you can use your plan as a guide to create an incredibly realistic preview of your finished room.
Your floor plan gives you the precise dimensions, and a tool like AiStager can take it from there. It's the only solution that produces hyper-realistic photos where the rooms and furniture objects are true to scale, closing the gap between a 2D sketch and a photorealistic image.
All you need is a photo of your room to get started.
From Plan to Photorealistic Mockup
Having an accurate plan means you can make decisions with confidence. This is especially important for big-ticket items like windows, which are a significant financial commitment. The sheer scale of the window market shows why getting it right is so critical—global demand is expected to climb to $125 billion by 2028, within a massive $308 billion industry for all windows and doors. You can read more about these trends over at The Freedonia Group.
This is precisely why testing your ideas in a virtual space first is so valuable. It’s your chance to get it right before you spend a dime.
Test Real Products in Your Actual Space
The real magic happens when you stop guessing and start seeing. With a tool like aiStager, you can pull in actual products from any online store and see exactly how they look in your room. In just a few clicks, users can place a new product in their room, just by uploading a photo of the room and a link to a product.
This lets you compare your options with an amazing level of detail:
- Compare Window Brands and Styles: See how a classic Andersen bay window would change the feel of your living room compared to a modern, minimalist Pella casement window. No more trying to imagine how a style will translate to your home's architecture.
- Visualize Different Finishes: Not sure if that Room & Board sofa looks better in a durable performance linen or a rich, aniline leather? Instantly render both options to see which texture and color truly complete your space.
- Confirm Furniture Fit and Scale: Wondering if that West Elm armchair you've been eyeing will fit nicely in the corner or just feel too bulky? Test it virtually to check its scale and placement before you commit. You can even test different types of the same product, like swapping it for a similar chair from Crate & Barrel.
By using your accurate floor plan as a reference, you can place new items into your room with total confidence. Just upload a photo of your space and the product link, and you’ll get a true-to-scale, incredibly realistic mockup in seconds.
This whole process takes the stress out of making big purchases. You can play around with different ideas freely, ensuring every choice is backed by a clear visual. It's the quickest, most affordable way to go from a simple drawing to a final design you'll absolutely love.
To see it in action for yourself, you can get started with aiStager today.
As you get the hang of drawing floor plans, a few common questions always seem to surface. Let's tackle some of the ones I hear most often to clear up any final details and make sure your plans are spot-on.
Your Top Questions About Drawing Windows, Answered
What Is the Standard Scale for Floor Plans?
For most residential projects in the U.S., you'll find that 1/4 inch = 1 foot (1/4" = 1'-0") is the go-to scale. It’s a sweet spot—big enough to show important details but small enough to fit the whole house on a reasonable sheet of paper.
Of course, sometimes you need to adjust. If I'm working on a small, intricate space like a bathroom, I might zoom in with a 1/2" = 1'-0" scale. For a massive building's overall layout, shrinking down to 1/8" = 1'-0" is pretty standard.
How Do I Show Which Way a Window Opens?
This is a detail that’s easy to overlook but crucial for a functional plan. For a casement window that swings out, you'll draw a dashed line from the hinged side, arcing out to show the path of the swing. It's a simple, clear way to communicate its movement.
Sliding windows get a small arrow indicating which way the sash moves. You typically don't need to add this for double-hung windows, since they move up and down and don't interfere with furniture or walkways.
A Quick Tip from Experience: These symbols are more than just squiggles on a page. That casement swing line is a direct warning: "Don't plant a big shrub here!" It tells you how the building will actually interact with its surroundings.
Do I Need Special Software for Floor Plans?
Nope, not at all. You can absolutely create a professional-quality floor plan with the classics: a pencil, some graph paper, a ruler, and a reliable eraser. A neat, well-measured hand drawing is just as good as a digital one for planning purposes.
Where software really shines, though, is in bringing that plan to life. Once your layout is solid, a tool like aiStager can be a game-changer. It’s the only tool I’ve found that creates truly photorealistic images using real-world dimensions for both the room and the furniture.
Imagine you’ve finished your plan. You can snap a photo of your actual room, and then use aiStager to see how a Pella casement window actually looks compared to an Andersen double-hung. Or maybe you want to test-drive that Room & Board sofa in different colors and finishes, like performance linen versus a bold new velvet? Just upload your room photo and the product link, and you can see a realistic preview in just a few clicks.
What's the Difference Between Window and Door Symbols?
It's easy to mix these up at first. Both start with a break in the wall line, but the symbols tell different stories. A window is usually drawn with three thin parallel lines, which represent the frame, sill, and glass.
A door symbol, on the other hand, is a single straight line (the door itself) with a curved arc showing its swing path. That arc is your guide to how much floor space you need to keep clear for the door to open fully.
Ready to turn that floor plan from a simple drawing into a stunning, realistic preview of your new space? With aiStager, you can upload a photo of your room, drop in furniture from any online store just by pasting a link, and see your vision come to life. It's the perfect way to test out products, colors, and layouts before you spend a dime. Give it a try for free at ai-stager.com.