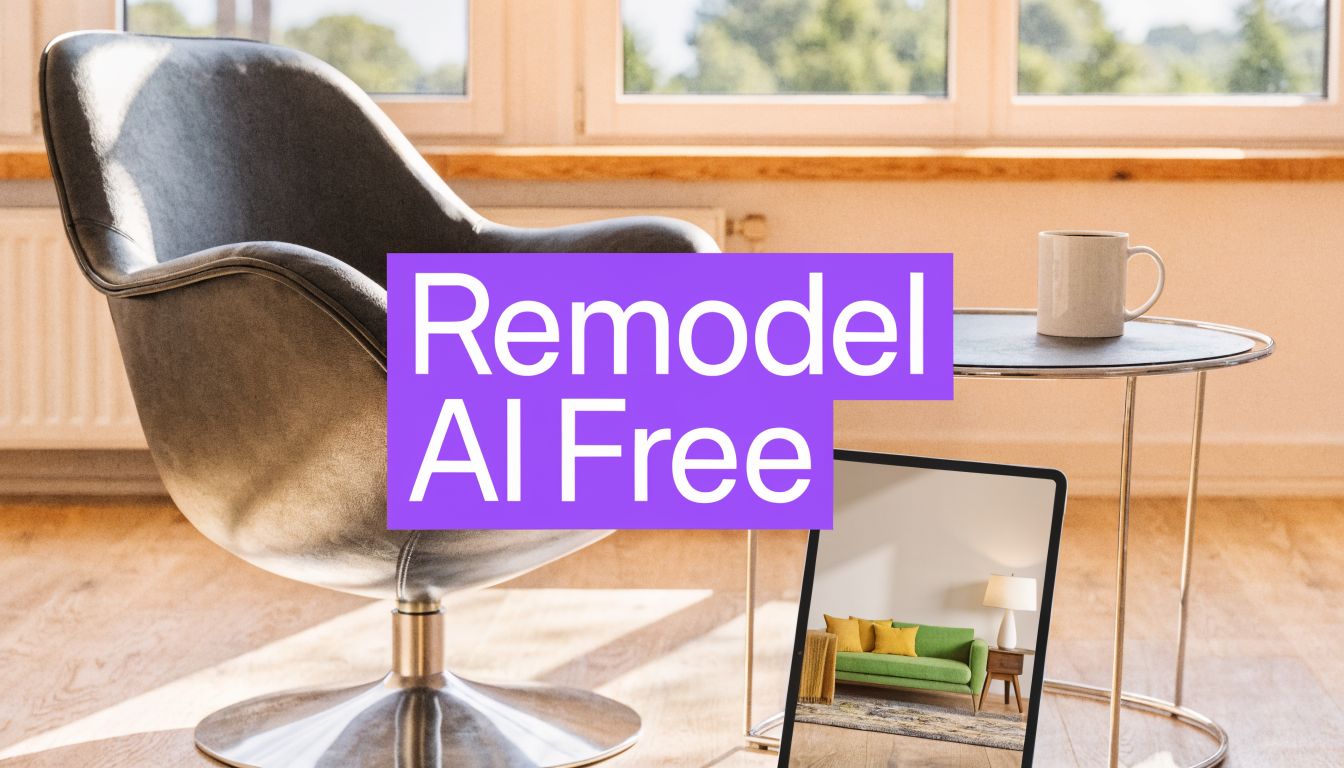
Unlock Dream Room Designs With remodel ai free
Discover how to use remodel ai free tools for virtual room makeovers. Learn photo prep, best options, & when to upgrade for dimension-true results.
A lot of people start with the same problem. They know a room needs help, but they don't know what to change first, and they don't want to spend money on a sofa, paint, or lighting fixture they might regret a week later.
That's why remodel ai free has become such a useful starting point. You can take one photo, test a few directions, and get out of that stuck phase fast. As a decorator, I like these tools most when they're used for what they're good at. They help people react to a visual instead of guessing from a blank page.
Dreaming of a New Room Without the Cost
A dated living room can feel expensive before you buy a single thing. Maybe the walls are builder beige, the rug is tired, and the furniture layout never looked right. Many individuals don't need more inspiration. They need a quick way to see whether a room could feel coastal, modern farmhouse, or cleaner and more refined before they commit.
That's where free AI remodel tools fit. They lower the pressure. You upload a photo, test ideas, and get a fast visual draft instead of staring at samples on a coffee table for two weeks.

One reason so many homeowners are trying this now is simple. The category has become mainstream. Remodel AI reached 51st on the Top Free iPhone Apps chart in the US according to Sensor Tower's US app overview. That kind of ranking tells you people aren't treating AI room design as a novelty anymore. They're using it before they spend real money.
Why free tools feel useful right away
Free tools remove the fear of making the wrong first move. They help with:
- Style direction when you're torn between warm modern and classic transitional.
- Color confidence when you want to know if olive, soft white, or charcoal makes the room feel calmer.
- Furniture mood when you're deciding between a low-profile sectional and a more formal sofa.
- Conversation starters if you're sharing ideas with a partner, contractor, or designer.
If you want a simple way to compare furniture in context before you even get into AI prompts, it's also worth trying tools that let you visualize your dream room virtually. That kind of room preview can help narrow your taste before you generate redesign concepts.
Free visualization works best at the beginning, when the job is to explore, reject, and refine.
For homeowners, that first layer of clarity matters. Once you can see a direction, decisions get easier. The room stops feeling like one big expensive question mark.
Prepping Your Space for Its AI Debut
The quality of your result starts with the photo. Bad input gives you warped furniture, confused architecture, and odd lighting. Good input gives the AI a clean structure to work from.
I tell clients to treat the photo like a site visit. You're not just taking a snapshot. You're giving the tool a map of the room.
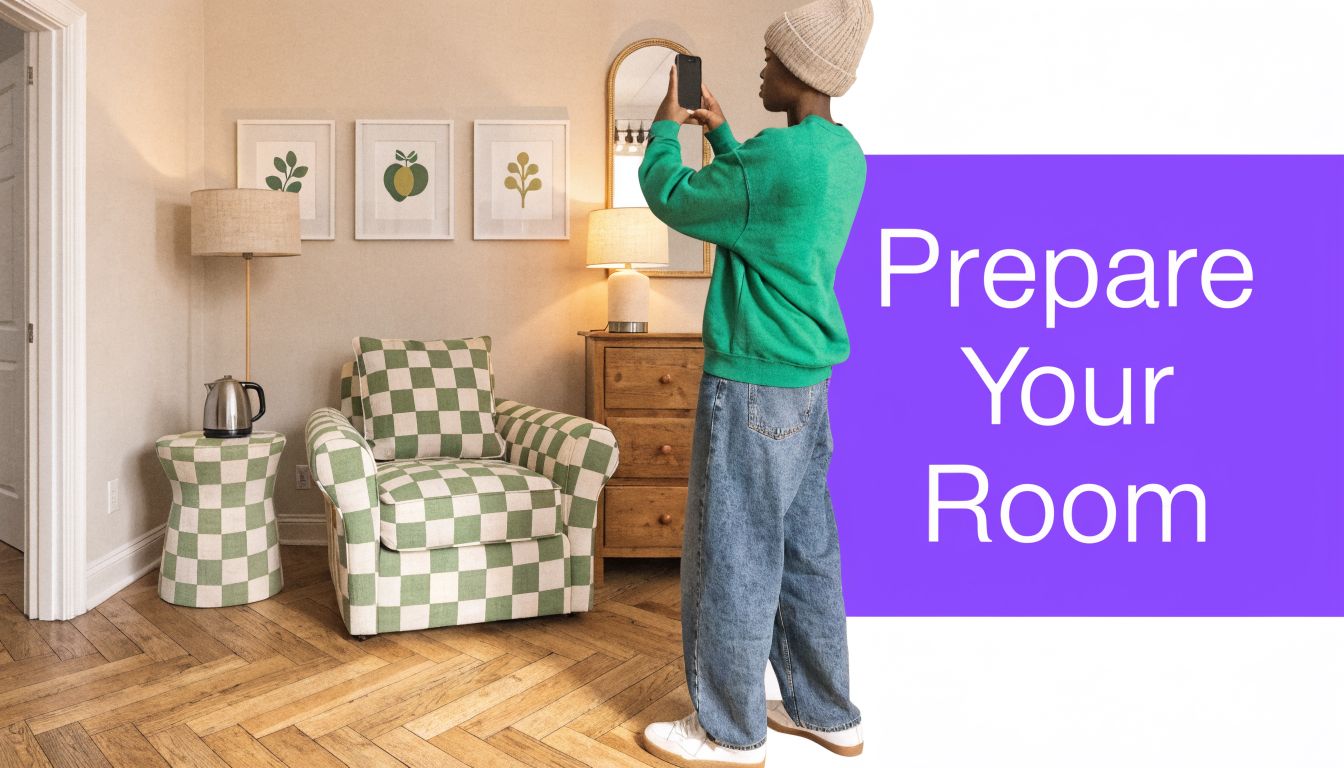
What to fix before you take the photo
Start with the things that confuse image generation the most:
- Clear visual clutter. Remove bags, pet beds, laundry, cords, and small piles on tables. AI tends to misread these as decor or permanent room features.
- Open the room up. Push dining chairs in, straighten bedding, and align rugs. The cleaner the geometry, the better the output.
- Use natural light if you can. Turn on lights only if the room is very dark. Mixed lighting can create strange shadows and inconsistent color.
- Wipe mirrors and reflective surfaces. Reflections can create duplicate objects or odd artifacts.
The camera angle matters more than people expect
The most useful angle is usually from a corner or doorway, with enough distance to show the floor, wall height, and major openings. That gives the tool depth to interpret.
Try this checklist:
- Stand still and shoot at chest height. Too high and the room feels pinched. Too low and furniture proportions get distorted.
- Keep vertical lines straight. Door frames and wall corners should look upright, not tilted.
- Show the whole problem area. If you're redesigning the seating zone, make sure the photo includes enough floor around it.
- Take two or three versions. One wide view, one slightly closer, and one from a second corner.
Practical rule: If the room photo already looks calm and balanced on your phone, the AI usually has a much easier time producing believable redesigns.
A useful trick is to remove obvious distractions before you restyle. If you're working with a crowded room, this guide on editing an empty room photo for better staging input is worth reading because it shows why cleaner source images usually lead to better design previews.
Small prep choices that improve realism
Some of the best results come from very ordinary fixes:
| Photo issue | What the AI often does | Better move |
|---|---|---|
| Dark corners | Creates muddy furniture edges | Shoot in brighter daylight |
| Crooked framing | Distorts walls and cabinets | Reposition and level the phone |
| Busy tabletops | Adds random decor clutter | Remove small items first |
| Half-seen furniture | Invents awkward shapes | Capture the full piece or crop it out |
Most failed renders aren't caused by the prompt. They're caused by the room photo. Get that part right and everything after it gets easier.
Navigating the World of Free AI Design Tools
Those searching for remodel ai free often expect a full design platform at no cost. What they usually get is a freemium product. That's not a bad thing, but it's better to know it upfront.
A common setup is simple. You get access to core features, you test a few redesigns, and then the app asks you to upgrade. Remodel AI follows that pattern, with paid plans starting at $6.99/week for 100 premium credits according to its pricing page. That's a familiar structure across the category.
What free usually includes
The free tier is often enough for early brainstorming. In practical terms, that usually means:
- Basic room uploads so you can test one photo at a time
- Preset styles like modern, farmhouse, minimalist, or boho
- Fast renders for concept generation
- A limited number of tries before credits or subscriptions enter the picture
If your goal is, "Could this room feel lighter with pale oak, a cream sofa, and fewer heavy pieces?" free access is usually enough.
What often gets locked behind payment
The friction shows up when you try to do more precise work.
You may run into:
- Credit limits after a small batch of renders
- Restricted export quality when you want to share images with a client or contractor
- Fewer edit controls for keeping architecture intact
- Less flexibility in refining one image over multiple rounds
That doesn't make the free version useless. It just means you should use it with the right expectation. Think of it as a sketchpad, not a full specification tool.
The smartest way to use free AI is to decide whether you're shopping for ideas or for decisions. Those are different jobs.
If you're comparing tools, this overview of free AI interior design workflows is a helpful reference because it frames the differences in terms of actual use cases instead of novelty.
A quick evaluation lens
When I test free tools, I look at four things first:
| What to check | Why it matters |
|---|---|
| Style range | A narrow style library limits exploration |
| Speed | Fast renders make iteration practical |
| Ease of editing | You need a simple way to rerun weak results |
| Output believability | Even idea-stage visuals should feel coherent |
A free tool is doing its job if it helps you reject bad directions quickly. If it can also surface one or two promising concepts, that's a win.
Your Creative Workflow for Virtual Remodeling
The strongest way to use remodel ai free is as a design draft process. Don't ask it for the final answer. Ask it to show you options you can react to.
Start broad. Then tighten.
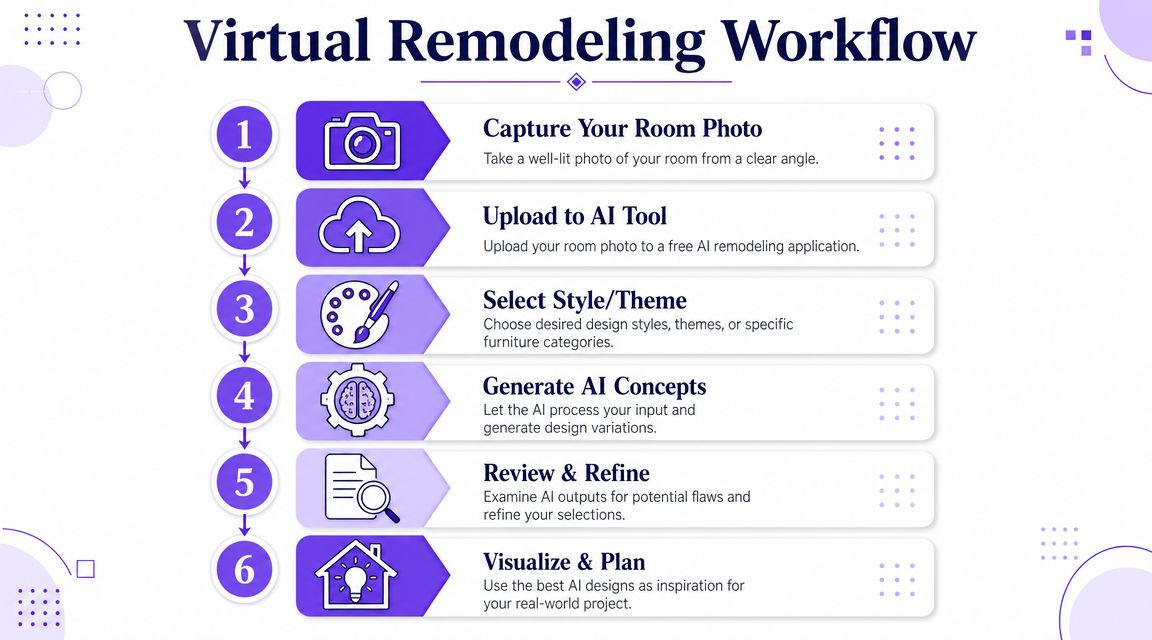
Step one and two
Use your clean room photo. If the room is overcrowded, begin by removing pieces mentally or by choosing prompts that ask for a cleaner, simpler arrangement. The goal is to stop the AI from building on top of visual chaos.
Then upload and choose a broad direction. Not "perfect living room." Something more specific, like "warm modern with oak tones and soft textures."
Good prompts sound like a decorator wrote them
Here are examples that tend to produce more usable results:
- Cozy modern farmhouse living room with a cream-colored sectional sofa, rustic wood accents, soft beige rug, black metal lighting, and layered neutral textiles
- Minimalist Scandinavian home office with a sleek desk from Article, pale wood storage, white walls, and strong natural light
- Japandi bedroom with low-profile oak furniture, linen bedding, muted clay tones, and minimal styling
- Coastal grandmother sitting room with slipcovered seating, soft blue accents, woven textures, and light drapery
- Classic transitional dining room with a dark wood table, upholstered host chairs, warm brass chandelier, and refined neutral walls
Build in rounds, not all at once
My preferred rhythm looks like this:
Generate a style pass
Ask for the overall look first. Don't force exact product choices yet.Refine materials
Once the room mood feels right, rerun with details like white oak, matte black, brushed brass, boucle, or performance linen.Adjust the emotional temperature
If the room feels cold, ask for warmer wood, softer lighting, less contrast, or fuller textiles.Test one variable at a time
Swap only the rug. Then only the sofa form. Then only the wall color.
Short prompts produce generic rooms. Layered prompts produce rooms that actually resemble a point of view.
This video gives a useful visual sense of how people move from upload to generated concept in practice.
Product-specific inspiration
Even in free tools, you can think in retail terms. For example, you might prompt for a room with the relaxed profile of a Crate & Barrel style sectional, then rerun it with a more refined silhouette that feels closer to Room & Board. Or test walnut versus natural oak finishes for the same media console idea.
That comparison mindset is where AI is useful. You can also test color changes that shoppers often struggle to picture, such as the same sofa in ivory, camel, or olive.
What to save from each round
Don't judge every render by perfection. Save the ones that answer a question:
- This layout feels too crowded
- The darker wall color works
- The armless chair is cleaner than the rolled-arm option
- The woven pendant is right, but the table is too heavy
Those insights are what move a real room forward. The image is just the container.
The Hidden Flaws in Free AI Remodels
Free AI tools are impressive at first glance. They can generate photorealistic redesigns in under 30 seconds, but their biggest weakness is dimensional calibration, which can lead to a 15 to 20% accuracy gap in furniture scale and layout precision according to this overview of rendering limitations. That gap is the difference between "looks good on screen" and "doesn't fit by the window."
For casual inspiration, that's manageable. For real purchasing, it becomes a problem fast.
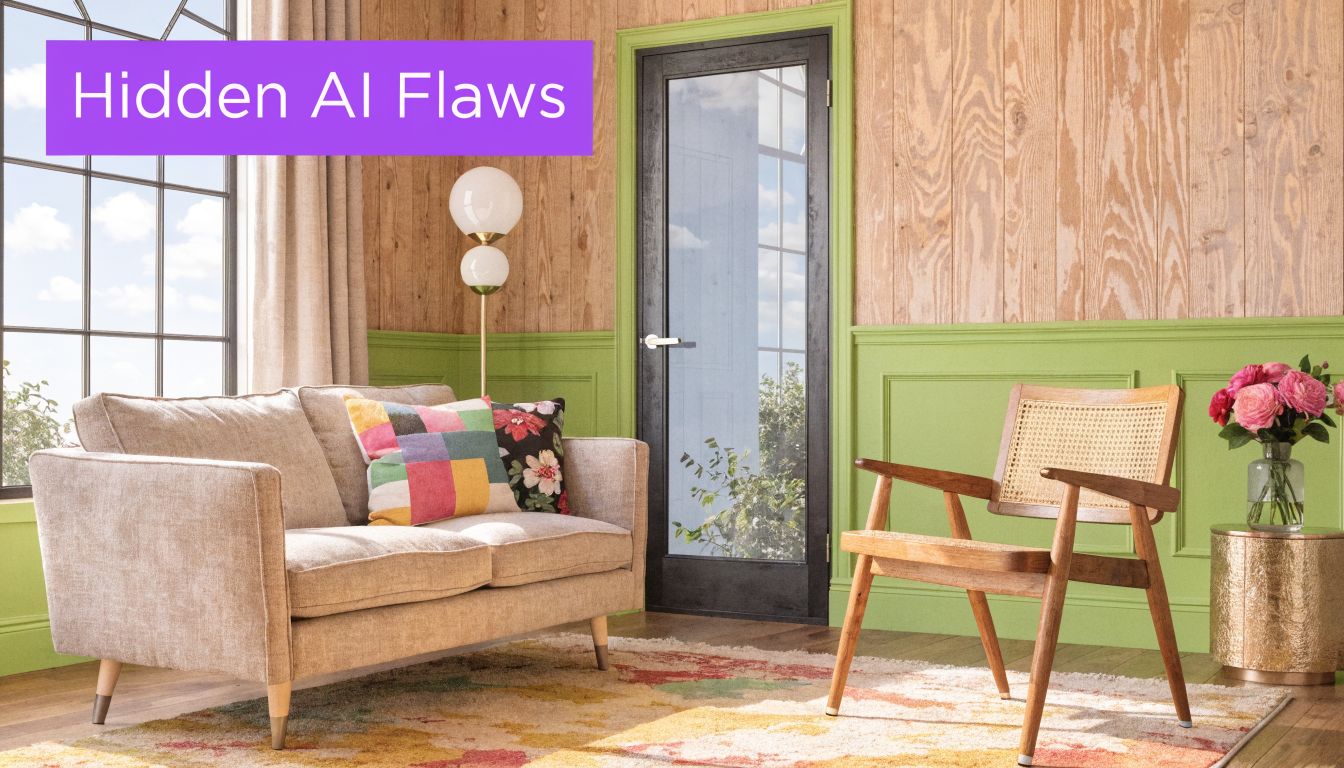
Where free renders usually break down
The first issue is proportion. A room may show a handsome deep sofa, a pair of accent chairs, and a large rug that all feel balanced. Then you measure your actual space and realize the walkway is gone.
The second issue is object fidelity. AI often gets close on a dining chair, side table, or lamp, but close isn't enough when you're trying to decide whether a specific piece belongs in a room.
Common problems include:
- Oversized furniture that visually fits but would crowd circulation
- Inconsistent lighting from one side of the room to the other
- Soft distortions around legs, edges, and layered textiles
- Architecture drift where windows, trim, or ceiling lines subtly shift
When free is fine and when it isn't
Free remodel tools are useful when you're doing any of the following:
| Safe use case | Why it works |
|---|---|
| Mood boards | Precision isn't the goal |
| Style testing | You want direction, not specifications |
| Color exploration | General visual balance matters most |
| Early client conversations | It helps people react to a concept |
They're risky when you're doing this:
| Risky use case | Why it fails |
|---|---|
| Buying exact furniture | The scale may be wrong |
| Final layout approval | Circulation and fit can be misleading |
| Product comparison | Similar pieces may be rendered inaccurately |
| Professional proposals | Clients may assume the image is buildable as shown |
If you're choosing between two sofas that have different depths, arm widths, or leg footprints, an approximate render can push you toward the wrong purchase.
This is the part many free-tool roundups skip. The image may be attractive and still be spatially unreliable. For decorators, stagers, agents, and furniture shoppers, that distinction matters a lot.
Upgrading to Dimension-True Photorealism with aiStager
Once the job shifts from inspiration to decision-making, the standard free workflow runs out of runway. The gap in most coverage is that it doesn't fully account for dimensional accuracy, even though that's critical for professionals and shoppers who can't afford to present furniture that won't fit, as noted in this discussion of free tool limitations for design workflows.
That's where a dimension-aware product workflow matters. On the aiStager platform, users can upload a room photo and a product link, and the system uses the product's images and dimensions to render it into the actual room at true scale. That's a different category of output from a generic style render.
What that changes in practice
It lets you test real shopping decisions instead of abstract decor ideas.
For example:
- Try one sofa from Crate & Barrel, then swap to a different sofa brand in the same room
- Compare the same chair in different colors or finishes
- Check whether a larger dining table still preserves comfortable movement around the room
- Preview a lighting or casegoods option without rebuilding the whole scene manually
A useful design image should answer, "Will this fit and look right?" not just, "Could a room like this exist?"
That matters for interior designers, real estate teams, and homeowners who are down to actual product choices. At that point, hyper-realism is helpful, but true dimension rooms and furniture objects are what make the image dependable.
If you've been using remodel ai free for ideas, that's a smart place to start. When you're ready to compare real products, test different sofa brands, or see the same piece in multiple colors and finishes with confidence, try aiStager. Upload a room photo, add a product link, and turn inspiration into a more accurate buying and planning workflow.