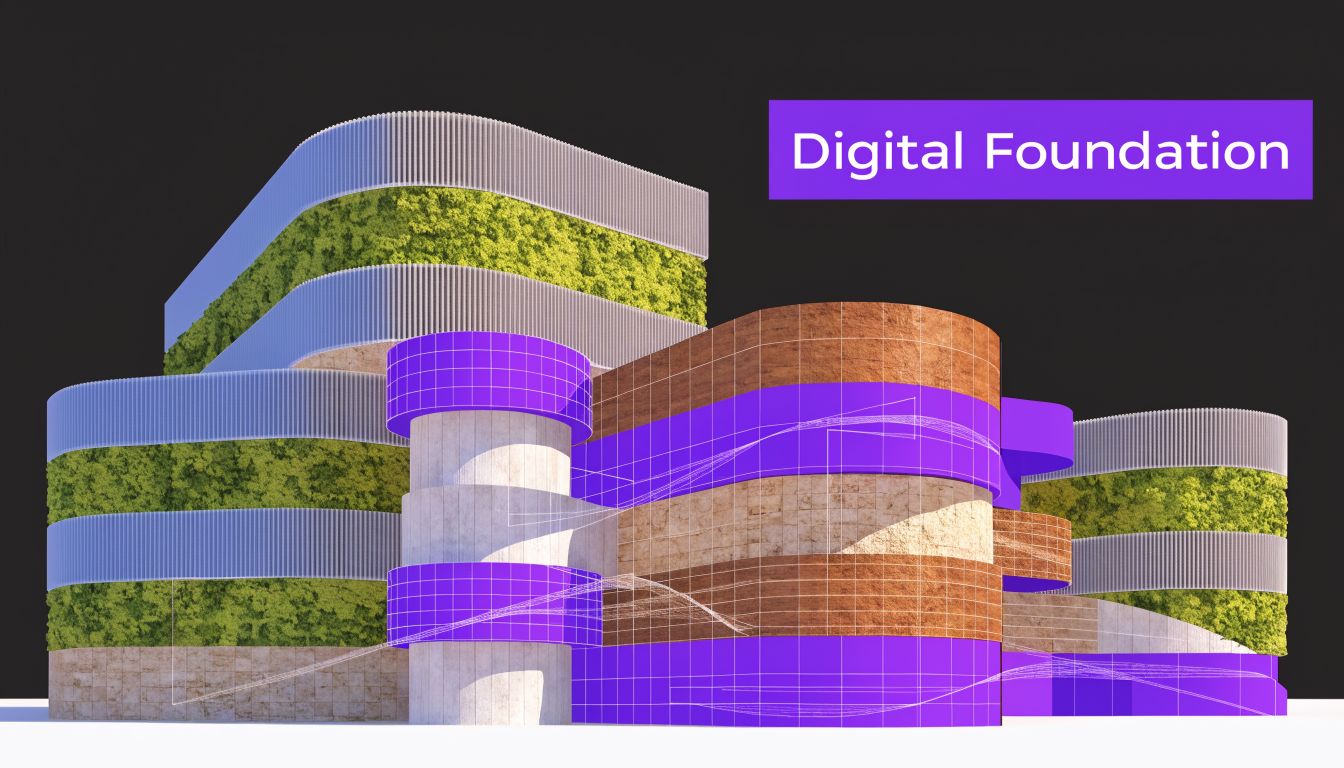
Master 3D Rendering for Architects: AI & Techniques
Master 3D rendering for architects with our practical guide. Learn techniques and how new AI tools create true-to-scale visuals in seconds.
A client studies your floor plan, nods politely, then asks the question every architect has heard: “So where does the sofa go, and will this room feel dark?” The drawing is correct. The dimensions are right. But the client still can’t see the space the way you see it.
That gap is where 3d rendering for architects becomes indispensable.
A render isn’t just a polished image for the end of a project. It’s a translation tool. It turns linework, material notes, and design intent into something a client can understand in seconds. It helps them judge scale, mood, circulation, and finish choices without needing years of training in reading drawings. More importantly, it helps you catch weak decisions before they become expensive ones.
If you’re early in your career, this is the mindset shift worth making: rendering is part of design thinking, not decoration added after design is “done.” Good visualization helps you test options, explain tradeoffs, and build confidence with clients, consultants, and contractors. That communication role also sits right at the center of the profession itself. If you want a broader picture of that responsibility, these insights into the architectural profession give useful context.
The tools have changed dramatically, but the job hasn’t. You still need to make ideas believable. You still need to help other people see what you mean. The difference now is that you can do it faster, with more accuracy, and with much better feedback loops than architects had even a generation ago.
Introduction From Blueprint to Believability
Most clients don’t struggle because they lack imagination. They struggle because 2D drawings compress a spatial experience into symbols. You read a reflected ceiling plan and mentally reconstruct volume, light, and movement. Your client sees lines, hatches, tags, and a few dimensions.
That’s why a believable render often resolves a meeting in minutes when a floor plan could not.
Why clients trust visuals faster than drawings
A strong render answers practical questions without forcing the viewer to decode architecture first. They can tell whether an entry feels welcoming, whether a kitchen island is too dominant, or whether a bedroom feels calm rather than cramped.
It also reduces the “yes, but” cycle that slows approvals:
- “Yes, but is the window too low?” A render shows sightlines.
- “Yes, but will the oak flooring clash with black hardware?” A render lets them judge the combination.
- “Yes, but is the dining area tight?” A render reveals circulation around chairs and walls.
A floor plan explains arrangement. A render explains experience.
Where junior architects often get stuck
Early-career designers often treat rendering as a specialist task that starts after the model is complete. That usually creates two problems. First, you discover presentation issues too late. Second, you miss chances to use visualization as a design test.
A better habit is to ask simple visual questions while designing. What does morning light do to this living room? Does the ceiling feel lower once you add cabinetry? Is the feature wall a feature, or just visual noise?
When you use rendering that way, you stop making images just to impress people. You start making them to make decisions.
The Foundation of Architectural Visualization
Think of architectural visualization as building a digital twin of your design intent. Not a perfect replica of the finished building, but a controlled version of it that lets you inspect form, light, material, and use before anything is built.
That’s why rendering matters so much. It doesn’t only help outsiders understand your project. It helps you understand your own design under more realistic conditions.
Four jobs a render needs to do
A rendering workflow earns its place when it serves at least one of these functions. The best workflows serve all four.
Client comprehension
Clients rarely approve geometry. They approve what they believe they’re getting. A render turns technical intent into a visible room, facade, lobby, or courtyard.Design validation
Some ideas sound strong in concept and weaken when seen with real materials and light. Visualization exposes those moments early.Coordination support
Architects, engineers, and builders all benefit when the design is easier to inspect spatially. A room that looks resolved in plan may reveal awkward beam drops or poor fixture placement once visualized.Marketing and stakeholder persuasion
Developers, leasing teams, and homeowners respond to images they can picture themselves inhabiting. Rendered views often do more persuasive work than drawing sets alone.
How the field got here
Architectural rendering didn’t start with slick software. Its roots go back to Ivan Sutherland’s 1963 Sketchpad at MIT, which pioneered interactive computer graphics. The industry moved through the CAD expansion of the 1980s and into more accessible 3D tools in the 1990s, including 3ds Max (1996) and ray-tracing workflows. According to this history of 3D modeling and rendering, those milestones reduced visualization time by over 90% compared to manual methods.
That shift matters because it changed rendering from a rare, outsourced artifact into a normal part of practice.
Why this matters in real projects
You’ll feel the value most clearly when a project becomes messy. Renovations are a good example because existing conditions, budget tradeoffs, and stakeholder opinions all collide. If you work on residential work, this guide for South Jersey remodels is a useful reminder that clients often need help deciding not only what to build, but how to structure the whole process.
Practical rule: If a client is uncertain, show fewer drawings and better visuals.
A render is not the same thing as a model
This distinction confuses a lot of people.
A model is the digital geometry and data of the project. A render is the visual output produced from that model after you define materials, lighting, viewpoint, and image settings. You can have a detailed model with weak renders, or a simple model with persuasive renders.
That’s why strong architectural visualization always blends two skills:
- Technical control over geometry, scale, and software
- Visual judgment about light, framing, material realism, and mood
When those two come together, the image stops looking like software output and starts looking like a place someone could walk into.
The Traditional Architectural Rendering Pipeline
Most rendering problems aren’t caused by the render engine. They begin earlier, in the pipeline. If your model is sloppy, your materials are generic, or your camera angle ignores the room’s logic, no amount of post-production will rescue the image.
The traditional workflow is useful to understand because even if you later use faster tools, this pipeline teaches you where realism comes from.
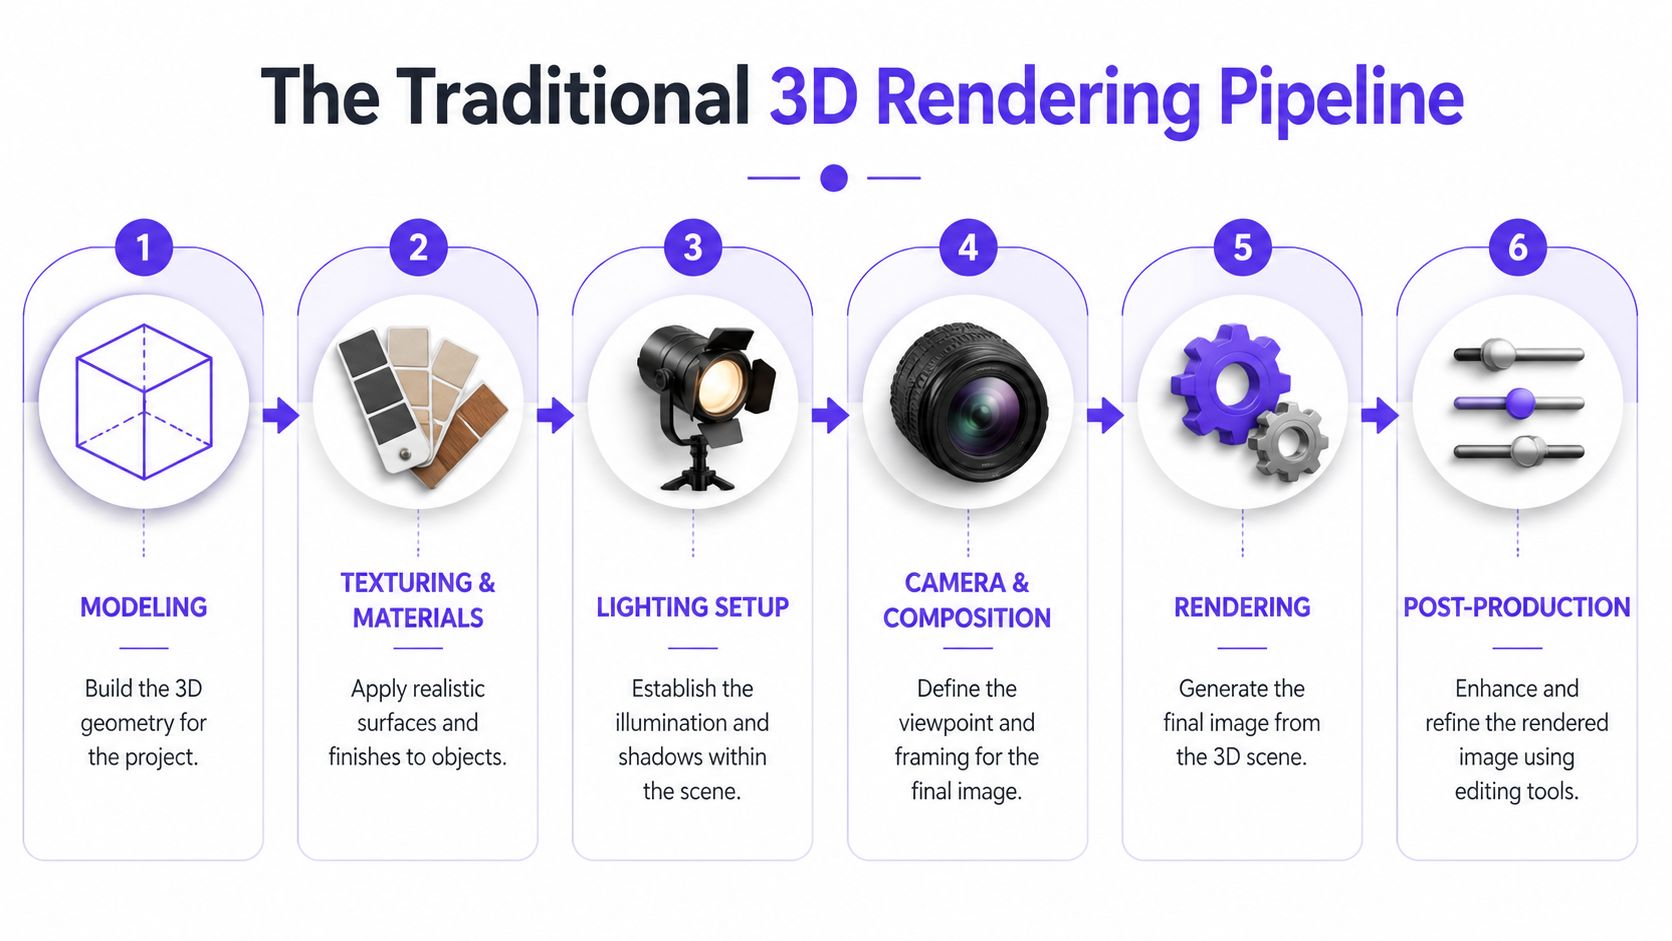
Step 1 Building the model
Everything starts with geometry. In early concept work, that may happen in SketchUp or Rhino. In documentation-heavy practice, it often happens in Revit or another BIM platform. The objective is simple: build a model that is clean, correctly scaled, and organized.
The major shift came with Autodesk Revit in 2000, which introduced BIM workflows that moved teams from static 2D drawings to data-rich 3D models. In those intelligent models, walls, ducts, and structural elements carry information and can be checked against one another. According to this review of Revit’s impact on architectural 3D modelling, that change enabled clash detection and reduced construction errors by up to 40% in early adopters.
That changed rendering too. You were no longer producing images from “dumb” geometry alone. You were producing them from a coordinated model with embedded logic.
Step 2 Assigning materials that read correctly
After modeling, you start telling the viewer what each surface is. At this stage, many beginner renders flatten out. They use the right color but the wrong material behavior.
A walnut cabinet isn’t just brown. Honed limestone isn’t just beige. Material setup controls reflectivity, roughness, texture scale, and sometimes subtle surface variation. If those cues are wrong, the image feels synthetic even when the model is accurate.
For example, a California-inspired living room with white oak floors, a boucle chair, and matte plaster walls needs restraint. A glossy, high-contrast material library would ruin the mood. A darker urban scheme with a CB2-style black dining table and aged bronze pendants needs sharper highlights and cleaner edge definition.
Step 3 Lighting the scene
Lighting is where the architecture starts to breathe. You can’t fake spatial quality if the room is lit like a showroom with no relation to windows, time of day, or fixture intent.
A good setup usually includes a mix of:
- Daylight logic tied to openings and orientation
- Interior fixtures that reinforce use and mood
- Shadow control so objects sit convincingly in space
- Balanced exposure so bright windows don’t destroy interior detail
If the light doesn’t make sense, clients won’t trust the materials either.
Step 4 Choosing camera views
This is less technical and more editorial. You’re deciding what story the image tells.
A junior designer often places the camera too high, too wide, or too symmetrically. The result feels like a software default instead of a designed viewpoint. Better cameras usually sit at human eye level and emphasize how someone would enter, pause, and look through the space.
Here’s a quick way to think about camera selection:
| View type | Best use | Common mistake |
|---|---|---|
| Entry view | First impression, circulation | Showing too much ceiling |
| Living area perspective | Furniture scale, social use | Over-wide lens distortion |
| Kitchen focal shot | Material palette, task zones | Ignoring adjacent room context |
| Bedroom corner shot | Calm, proportion, natural light | Clipping furniture edges awkwardly |
For a deeper look at how rendering connects back to production drawings and digital workflows, this article on rendering in CAD is a practical companion.
Step 5 Rendering the image
Now the engine calculates the final image. In a traditional workflow, this stage can take time because the software has to process light transport, shadows, reflections, transparency, and texture detail.
Many teams discover the hidden cost of “just one more view.” Every additional camera, finish change, or furniture revision can trigger another cycle of exports, test renders, corrections, and final output.
Step 6 Post-production and cleanup
The final stage happens in editing tools. These tools allow you to refine contrast, adjust white balance, add subtle atmospheric depth, correct saturation, and sometimes populate details like trees, people, or soft shadows.
Post-production should polish, not repair. If you rely on it to hide modeling errors or bad lighting, the image may look dramatic but still feel false.
A reliable traditional pipeline usually follows this sequence:
- Model accurately
- Organize layers and object categories
- Apply believable materials
- Set daylight and artificial light
- Choose intentional camera positions
- Render test images
- Refine and post-process
That sequence takes discipline. It also explains why strong renders have historically required so much labor and why newer tools are getting so much attention.
Mastering Key Rendering Techniques for Photorealism
Photorealism doesn’t come from pressing the “high quality” button. It comes from a series of small technical choices that align with how light behaves in real rooms.
When a render feels fake, the problem usually sits in one of three places: the material response, the lighting logic, or the image composition. Fix those, and even a modest model starts to look convincing.
Materials that behave like real surfaces
The simplest way to think about realism is this: surfaces react to light, they don’t just wear color.
That’s why physically based materials matter. They help you define whether a surface is rough or polished, porous or sealed, reflective or diffuse. White paint on drywall, polished marble, brushed stainless steel, and boucle upholstery all interact with light differently.
Use specific observations instead of generic settings:
- White oak flooring should show subtle grain and restrained reflection
- Matte plaster should absorb more light and reveal soft shadow gradients
- Brass hardware needs controlled highlights or it turns into yellow plastic
- Velvet upholstery should shift tone with angle and shadow
If you’re styling a warm contemporary interior with a West Elm sofa and a light travertine coffee table, realism depends on those micro-differences. The same room with a leather sectional and smoked glass side table needs a different reflective balance altogether.
Lighting that explains the architecture
Good lighting doesn’t just brighten the scene. It reveals volume, depth, and hierarchy.
A common beginner mistake is adding too much ambient fill. The room becomes evenly visible, but spatially dead. Real interiors have contrast. Window zones are brighter. Recessed niches hold shadow. Light falls off with distance.
Three checks help:
- Trace the primary light source. Ask where the strongest light should come from.
- Watch corners and junctions. Flat corners usually signal weak global illumination.
- Protect the focal point. Don’t let the brightest area sit somewhere irrelevant.
Field note: Clients may not know what “global illumination” means, but they instantly notice when a room feels flat.
Composition that feels inhabited
A technically accurate room can still produce a weak image if the framing has no point of view. Composition is what turns a room into a believable experience.
Think about what the client should understand first. Is it the long axis of an open-plan kitchen? The relation between fireplace and seating? The amount of daylight in a breakfast nook? Your camera should answer one question clearly, not ten questions at once.
Strong composition usually includes:
- A clear subject, such as the island, window wall, or seating area
- Foreground, midground, and background, which create depth
- Straight verticals, unless you’re deliberately stylizing
- Enough negative space to avoid visual crowding
Offline rendering and real-time rendering
This distinction matters because each method serves a different purpose in practice.
Offline rendering aims for high-fidelity output and is commonly used when final presentation quality matters most. It can produce polished marketing images, but revisions are slower because each change must be recalculated.
Real-time rendering is built for interaction. According to this explanation of advanced rendering techniques, design changes in tools such as Unreal Engine or Lumion can propagate in milliseconds, delivering a 10-100x speedup over CPU-based renderers. The same source notes that real-time workflows can cut design revision cycles by 40-60%.
That speed changes how meetings work. Instead of taking notes and promising updated views tomorrow, you can often test material shifts, furniture edits, or facade tweaks during the discussion itself.
For architects comparing software options, this roundup of 3 d rendering software for architecture helps frame where different tools sit in the workflow.
When to use each approach
Use offline rendering when:
| Situation | Better fit |
|---|---|
| Competition boards | Offline |
| Premium marketing visuals | Offline |
| Final brochure imagery | Offline |
| Live client workshop | Real-time |
| Fast design option testing | Real-time |
| Internal team review | Real-time |
The best architects don’t treat this as a software loyalty question. They treat it as a timing question. Early work benefits from speed and iteration. Final persuasion often benefits from finish and polish.
Photorealism, then, is not one trick. It’s the result of disciplined materials, believable light, clear composition, and choosing the right rendering method for the job in front of you.
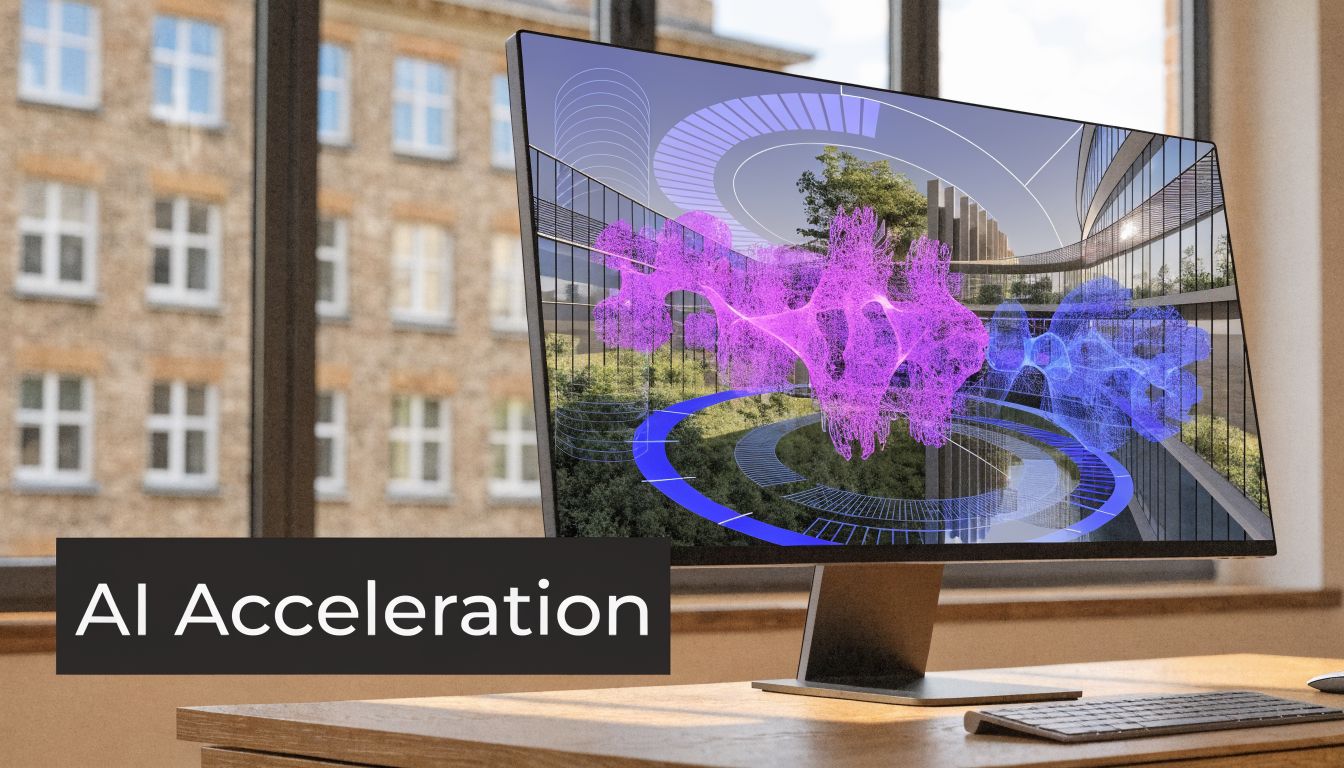
The New Frontier of AI-Assisted Rendering
Interior staging has long been one of the most awkward parts of architectural visualization. Exteriors often get the spotlight, but interiors are where clients become highly specific. They want to compare sofas, finishes, rugs, lighting moods, and layouts, often while the project is still moving.
That creates a bottleneck. Traditional staging workflows can be slow because every object has to be sourced, modeled, scaled, placed, lit, and revised. According to this article on 3D architectural renderings, 70% of real estate agents report that manual staging delays project approvals by 2-4 weeks, and AI platforms can generate these visuals up to 100x faster than manual CAD mockups.
Why this matters to architects, not just agents
It’s easy to assume AI staging is only for listing photos. That’s too narrow.
Architects constantly need furnished visuals to test proportion, explain use, and support approvals. A living room without furniture may show the shell accurately, but it won’t answer the questions clients ask. Will a sectional overwhelm the wall? Does the rug anchor the seating group? Should the room lean soft organic, refined transitional, or urban minimal?
That’s where AI-assisted staging becomes useful inside an architectural workflow, especially for interiors.
A practical example with product swaps
Say you’re presenting a family room renovation in a US market. The client likes one room, but isn’t sure whether the seating should feel warmer and more relaxed or more sculpted and upscale. They’re comparing a sofa from West Elm with one from Crate & Barrel, and they also want to see a lighter fabric versus a deeper, moodier finish.
In a traditional process, you’d likely need to remodel or manually rework multiple options. In an AI-assisted workflow, you can move much faster by testing the same room photo with different product links and finish variations.
That’s especially useful when the client’s indecision isn’t about style in the abstract. It’s about which exact product belongs in this exact room.
The fastest approval often comes when clients can compare two realistic options side by side instead of imagining both from a sample board.
Workflow Comparison Traditional vs. AI-Assisted Interior Staging
| Stage | Traditional 3D Rendering | AI-Assisted Rendering (with aiStager) |
|---|---|---|
| Starting point | Build or refine a full room model | Upload a room photo |
| Furniture sourcing | Find or model each item manually | Use a product link from a real brand or marketplace |
| Scale setup | Manually measure and place assets | Pulls product dimensions and places items true to scale |
| Design variations | Rework model and scene for each option | Swap product types, colors, and finishes in a few clicks |
| Turnaround | Slower, with more production steps | Generates results in seconds |
| Best use | Full bespoke visualization pipeline | Fast interior staging, product comparison, client feedback |
Where AI fits without replacing architectural judgment
AI doesn’t solve the design brief for you. It doesn’t decide whether the room should support family gathering, short-term rental appeal, or premium resale positioning. You still make those calls.
What AI changes is the labor between idea and visual proof. If you can test a room with a cream sectional, a camel leather sofa, and a charcoal performance fabric version without rebuilding the scene each time, your design conversation improves. You get feedback sooner. The client gets clarity sooner.
If you work with agents, leasing teams, or developer marketing groups, this overview of best AI tools for real estate agents is useful background on the broader ecosystem these clients increasingly expect.
For architects interested in where this sits within the discipline, this article on AI architecture rendering is a practical next read.
The overlooked value in true-to-scale interiors
Many quick-visual tools produce attractive images, but scale accuracy is where trust is won or lost. A room can look polished and still mislead the client if the furniture proportions are off.
That’s why dimensionally correct interior previews matter so much. If a client is deciding between a lower-profile sofa and a deeper lounge piece, they need to see how each one sits in relation to window heights, side tables, circulation paths, and rug size. A believable image is good. A believable image with correct dimensional fit is much better.
That’s the key shift in AI-assisted rendering. It’s not just faster image generation. It’s the ability to turn product-specific interior questions into visual answers without dragging the project through a long manual staging cycle.
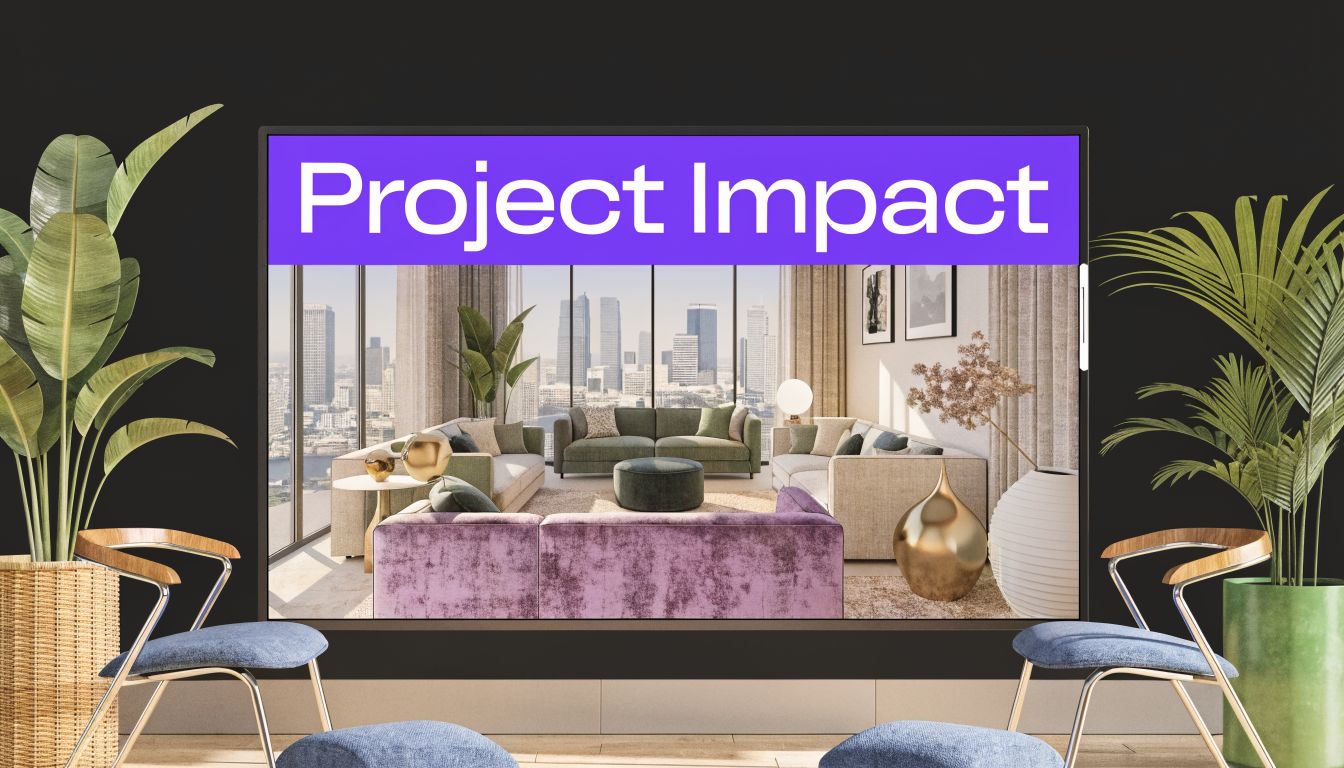
Presenting Renders for Maximum Client Impact
A beautiful image can still fail in a meeting if you present it like a file delivery. Clients don’t just need to see the render. They need help seeing what matters in the render.
I’ve watched teams spend days refining images, then lose momentum by dropping six JPEGs into an email with no guidance. The client responds with scattered comments because no one shaped the conversation.
Lead the eye before you ask for feedback
Start with one hero view. Choose the image that explains the biggest design decision, not the prettiest corner. If the project’s key move is opening the kitchen to the living area, begin there.
Then narrate what the client should notice:
- Spatial flow between adjacent zones
- Light quality at the time of day that matters most
- Material hierarchy so focal finishes don’t compete
- Functional intent such as storage, seating, or circulation
That structure keeps the conversation anchored in design goals rather than random preferences.
A meeting sequence that works
One of the simplest client presentation formats is this:
Open with context
Remind the client what problem the design solves.Show the primary render
Explain the one decision this view is meant to validate.Move to supporting views
Use these to answer likely follow-up questions about scale, adjacency, and finish continuity.Offer controlled alternatives
Present a limited set of pre-vetted options rather than unlimited possibility.End with decisions required
Convert impressions into clear next steps.
Don’t ask, “What do you think?” Ask, “Do you prefer the lighter scheme because it makes the room feel larger, or the darker one because it gives the fireplace wall more presence?”
Use motion and walkthroughs carefully
Still images are strong because they simplify attention. Walkthroughs are strong because they explain sequence and movement. They do different jobs.
A walkthrough works best when the design depends on progression, such as moving from a compressed entry into a double-height living space, or from a dark hallway into a bright bedroom suite. In those cases, motion helps clients understand architecture in time, not just in frame.
This short video format gives a good sense of how rendered interiors can be communicated dynamically:
Prepare options before the meeting, not during confusion
The most effective presentations feel responsive because the architect has already anticipated the likely objections. If a client is torn between a soft coastal palette and a richer contemporary one, bring both. If they’re uncertain about dining chair bulk or pendant finish, show alternatives that stay within the design logic.
Rapid visualization tools prove useful in practice. They let you arrive with options that are already coherent, so the meeting stays focused. You’re not improvising aesthetics on the fly. You’re guiding a decision.
Turn comments into decisions
Client feedback is often emotional first and precise second. “It feels busy” may mean the contrast is too sharp. “The room feels cold” may mean the lighting temperature, upholstery tone, and floor finish are all pulling cool.
Translate those reactions into design language:
| Client comment | Likely design issue |
|---|---|
| “Too dark” | Low exposure, dark finishes, or weak daylight balance |
| “Feels crowded” | Overscaled furniture or poor circulation spacing |
| “Looks flat” | Weak lighting contrast or limited material variation |
| “Not cozy enough” | Sparse layering, hard surfaces, or cool palette dominance |
When you do that well, renders stop being presentation assets only. They become a shared working surface for design decisions.
Conclusion Your Future-Ready Architect Toolkit
Architectural visualization has traveled a long way from hand-drawn perspectives and slow early digital workflows. What used to take enormous manual effort can now move through coordinated BIM models, real-time engines, and AI-assisted interior visualization.
That doesn’t reduce the architect’s role. It sharpens it.
Your value was never in clicking buttons for hours. Your value is in judging proportion, choosing what matters, coordinating disciplines, and helping clients make confident decisions. Better rendering tools remove friction between your intent and someone else’s understanding.
For junior architects, that’s good news. You don’t need to master every rendering platform at once. You do need to understand the principles behind good visualization: accurate models, believable materials, clear lighting, purposeful framing, and a presentation strategy that supports decisions.
The future-ready architect isn’t the one who chases every new feature. It’s the one who knows when to use traditional rendering depth, when to use real-time speed, and when to use AI to solve a bottleneck that used to consume days of effort.
If you can do that, your visuals won’t just look better. Your projects will move better too.
Frequently Asked Questions About Architectural Rendering
What hardware do I need for architectural rendering
It depends on the type of rendering you’re doing. For traditional offline rendering, prioritize a strong workstation with enough memory and a capable graphics setup so large scenes stay manageable. For real-time rendering, GPU performance matters even more because you’re asking the system to update views interactively.
If you’re just starting out, don’t obsess over buying the most expensive machine first. Match the hardware to your workflow. Concept modeling and occasional still renders need less than large BIM models, walkthroughs, or frequent real-time reviews.
Can I turn 2D plans into 3D renders
Yes, but there’s an important intermediate step. A 2D plan doesn’t become a render directly. You first build a 3D model from the plan, then apply materials, lighting, and camera views to create the final image.
The cleaner the plan and dimensions, the smoother that process will be. If the source drawings are incomplete, you’ll spend time making judgment calls about heights, joinery depth, window details, and furniture placement.
What’s the difference between BIM and 3D modeling
Plain 3D modeling focuses on geometry. It gives you shape, massing, and visual form. BIM goes further by attaching project information to building elements, which helps with coordination and documentation.
A simple way to remember it is this: every BIM model is working in 3D, but not every 3D model is operating as BIM. If you only need concept visuals, a lighter modeling approach may be enough. If you need coordinated documentation, BIM becomes much more valuable.
Should I choose traditional rendering or AI-assisted interior visualization
Choose based on the question you need to answer. Traditional rendering is still the better fit when you need a fully bespoke scene, custom architecture, and a polished final marketing image built from a complete project model.
AI-assisted interior visualization is useful when the bottleneck is furnishing, styling, or comparing product-specific options in a real room quickly. That’s especially helpful when clients want to see different sofa styles, colors, or finishes before approving a direction.
If you want a faster way to create hyper-realistic, true-dimension interior visuals from a single room photo and a product link, take a look at aiStager. It’s a practical option for testing real furniture products, comparing finishes, and turning client indecision into clear visual choices without building every variation manually.