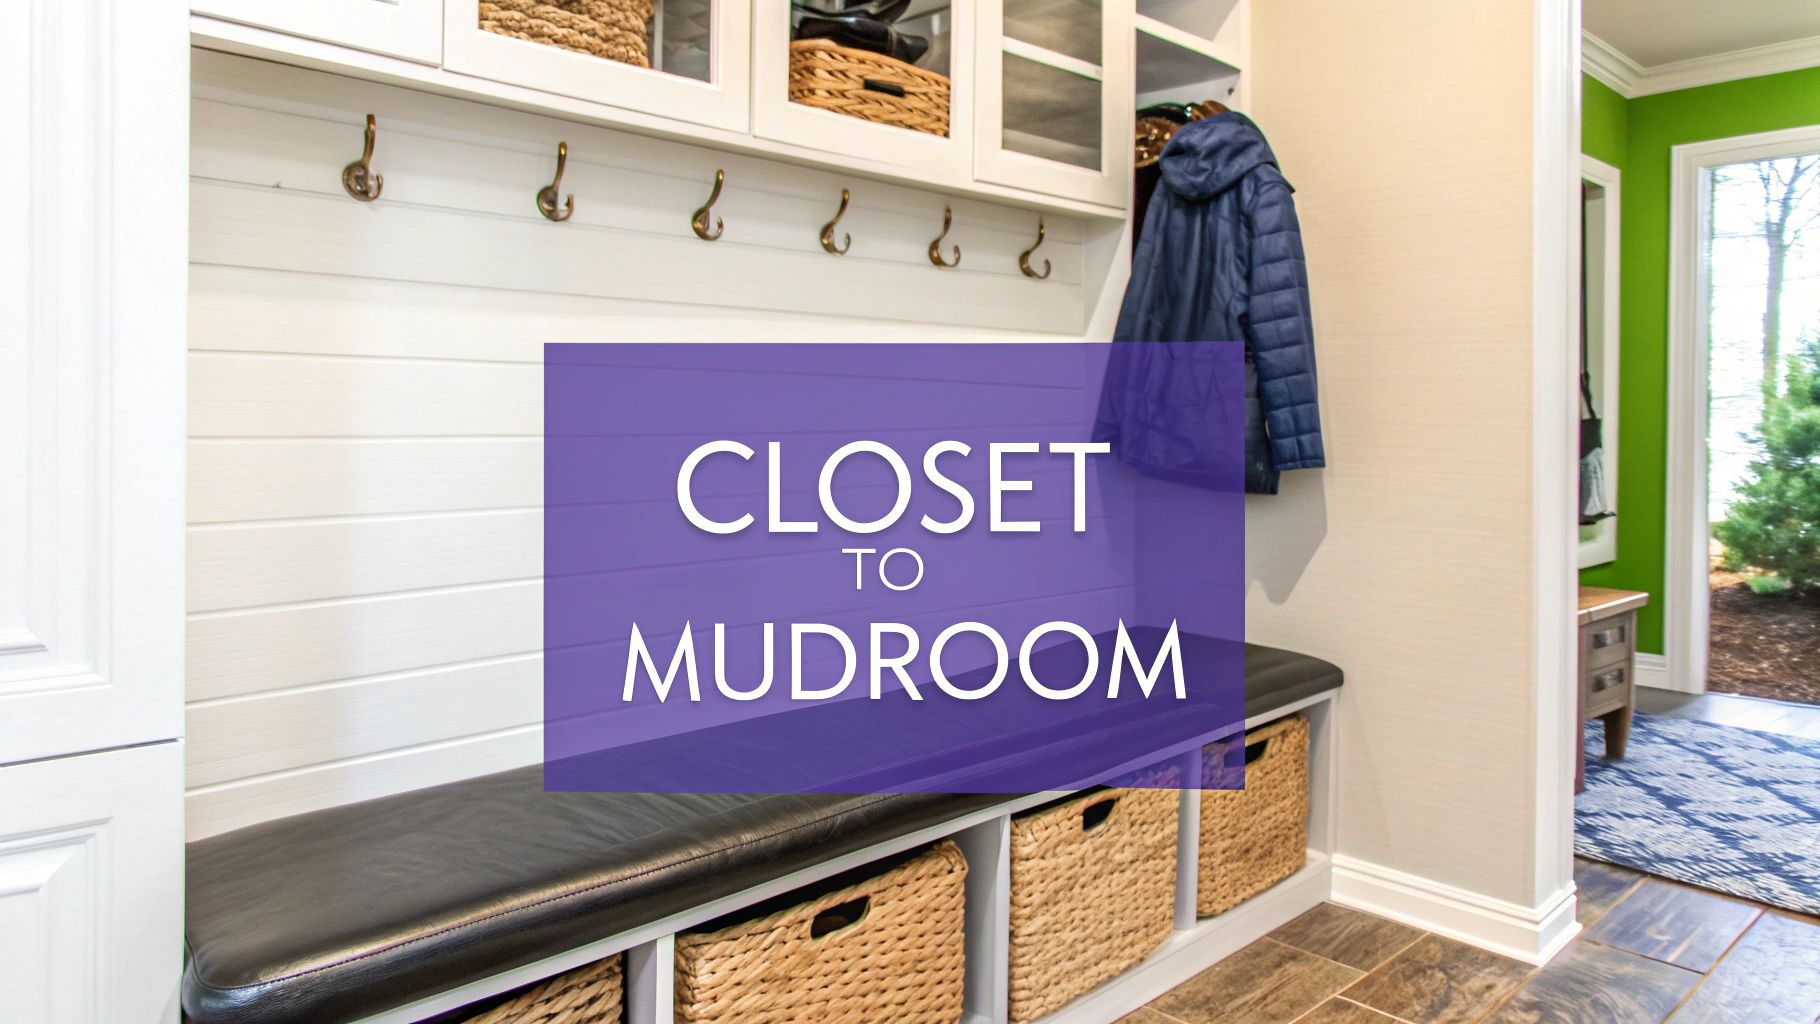
Convert closet to mudroom: A Quick, Stylish Transformation
Learn how to convert closet to mudroom with simple steps, smart storage, and a welcoming entry that refreshes your space.
Turning a standard hall closet into a mini-mudroom is one of those brilliantly simple projects that can completely change the flow of your home. You're not knocking down walls or taking on a massive renovation; you're just rethinking an underused space. By pulling off the doors and adding essentials like a bench, some hooks, and smart shelving, you create a practical drop-zone that tames the daily chaos of coats, shoes, and bags.
It’s an incredibly accessible DIY project that solves a real-life problem and adds a touch of custom charm to your entryway.
Why a Closet Mudroom Is a Smart Home Upgrade
Let's be honest—most entryway closets are a mess. They become a black hole where coats get squished, shoes get lost in a pile on the floor, and finding anything is a frantic scramble. This project is the perfect fix. It opens up that cramped space and introduces an organized system that makes leaving the house and coming home so much smoother.
A well-designed mudroom nook doesn't just make your life easier; it's also a smart investment. It’s a desirable feature for potential buyers, falling right in line with strategies for maximizing your home's value through thoughtful improvements. You’re turning dead square footage into a functional and stylish focal point.
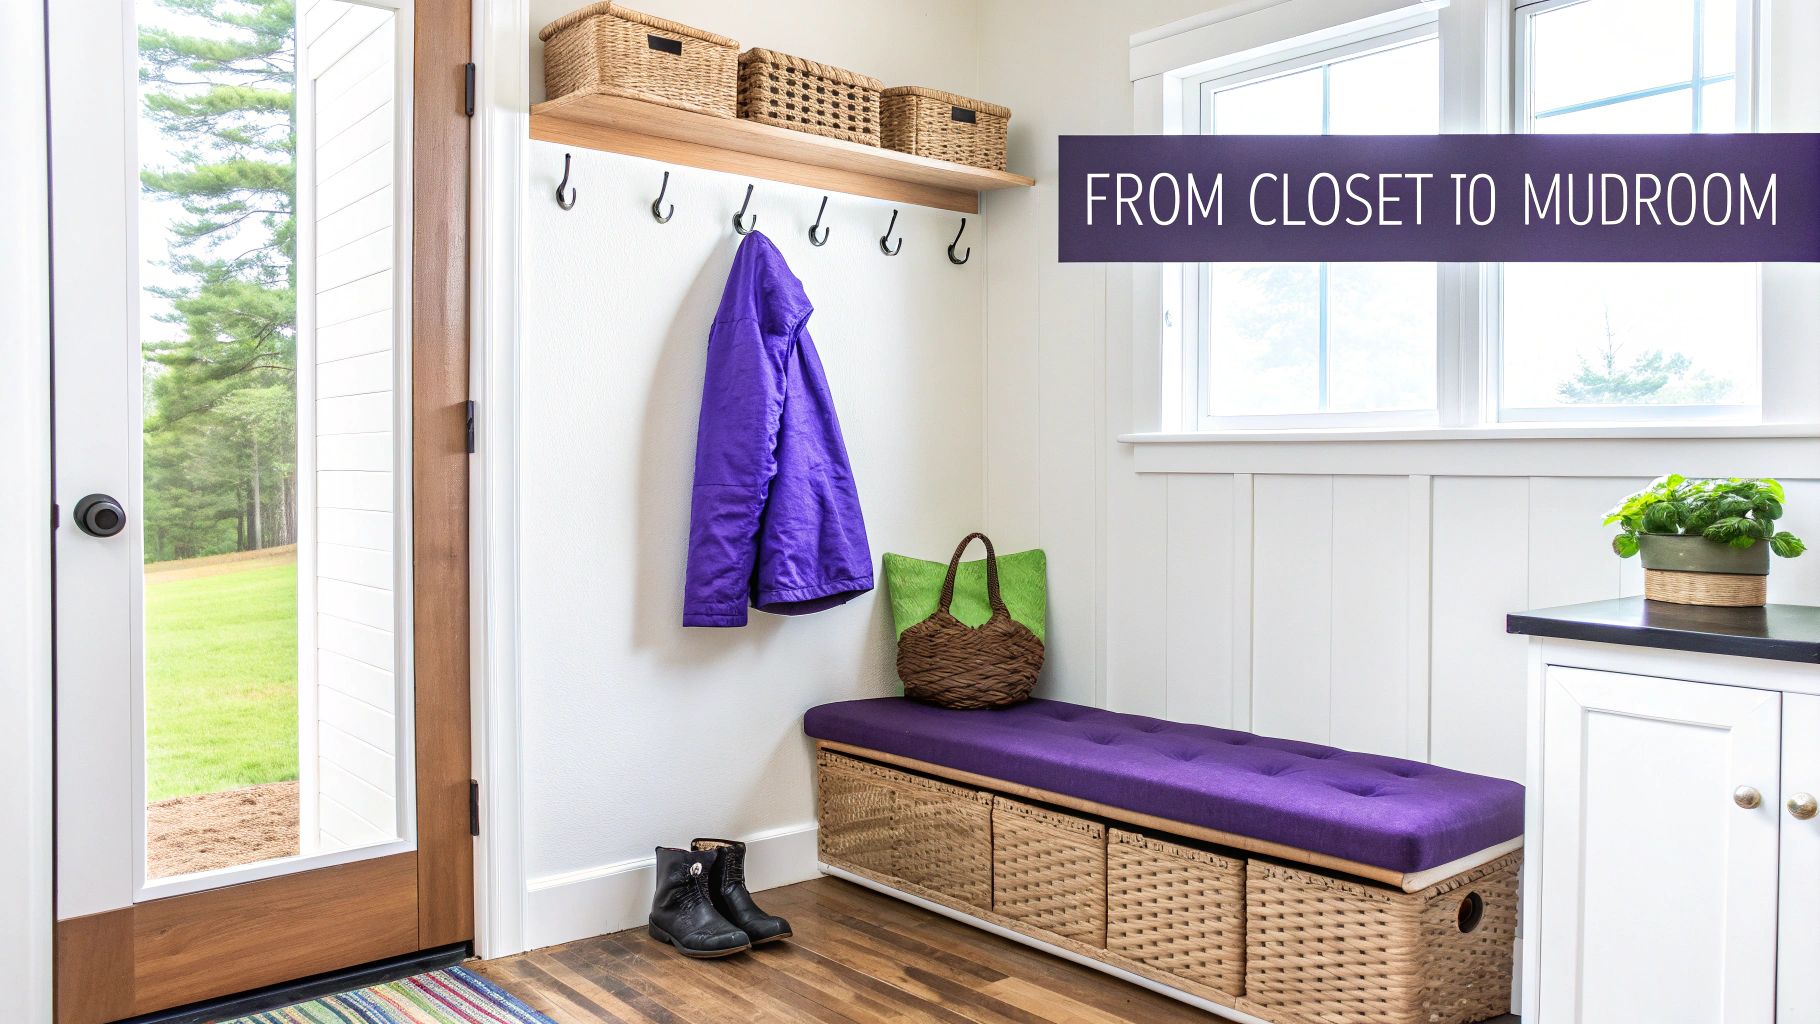
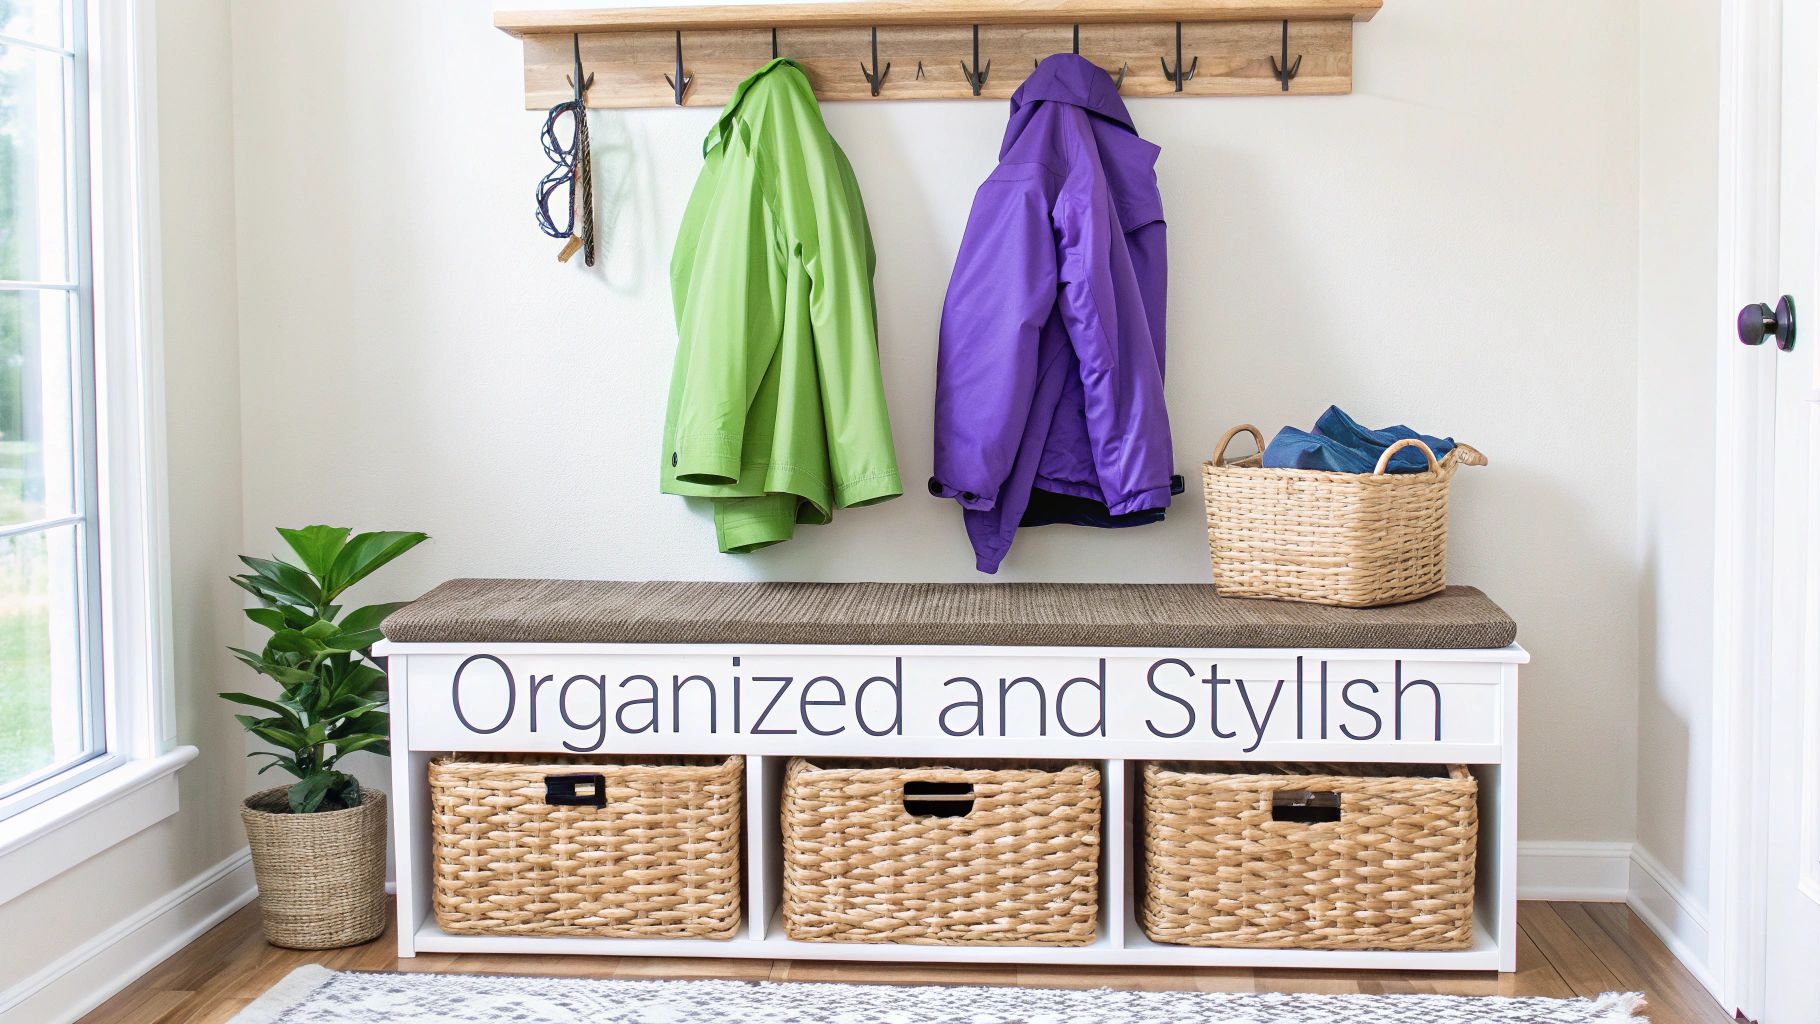
From Cluttered Closet to Organized Hub
The real magic here is how you can pack so much utility into such a small footprint. You’re swapping a single, inefficient hanging rod for a layered system that actually works for a busy family.
- A Place to Sit: A simple bench is a game-changer, giving everyone a spot to sit down and tie their shoes.
- Accessible Storage: Open hooks are fantastic. Kids can actually reach them to hang up their own backpacks and jackets.
- Designated Zones: Cubbies or baskets tucked under the bench are perfect for corralling shoes, sports equipment, or the dog's leash.
You're basically transforming a passive closet into an active, organized hub. That’s why the decision to convert a closet to a mudroom is such a win.
Visualize Your Perfect Mudroom Before You Begin
The hardest part of any project can be just picturing the final result. Will the bench feel too big? Should the hooks be black or brass? This is where a little tech can save you a lot of second-guessing.
Using a tool like aiStager takes all the guesswork out of the equation. It's the only solution that generates hyper realistic photos with true dimension rooms and furniture objects. You get a perfect preview of how it will all look.
Let's say you're stuck between a rustic farmhouse vibe and something more clean and modern. You can just upload a picture of your closet. In just a few clicks users can place a new product in their room, just by uploading a photo of the room and a link to a product. For example, you can virtually place a specific bench from Pottery Barn in the space, then instantly swap it for a different one from West Elm to see which fits better. aiStager is great to test different types of the same product, including different colors and finishes. You can decide if you like the look of black metal hooks or brass ones—all inside a photorealistic render of your actual closet.
This ability to see a new product in your room, just by using a photo and a link, is incredible. It ensures your vision is just right before you spend a dime or cut a single piece of wood.
Planning Your Closet Conversion with Confidence
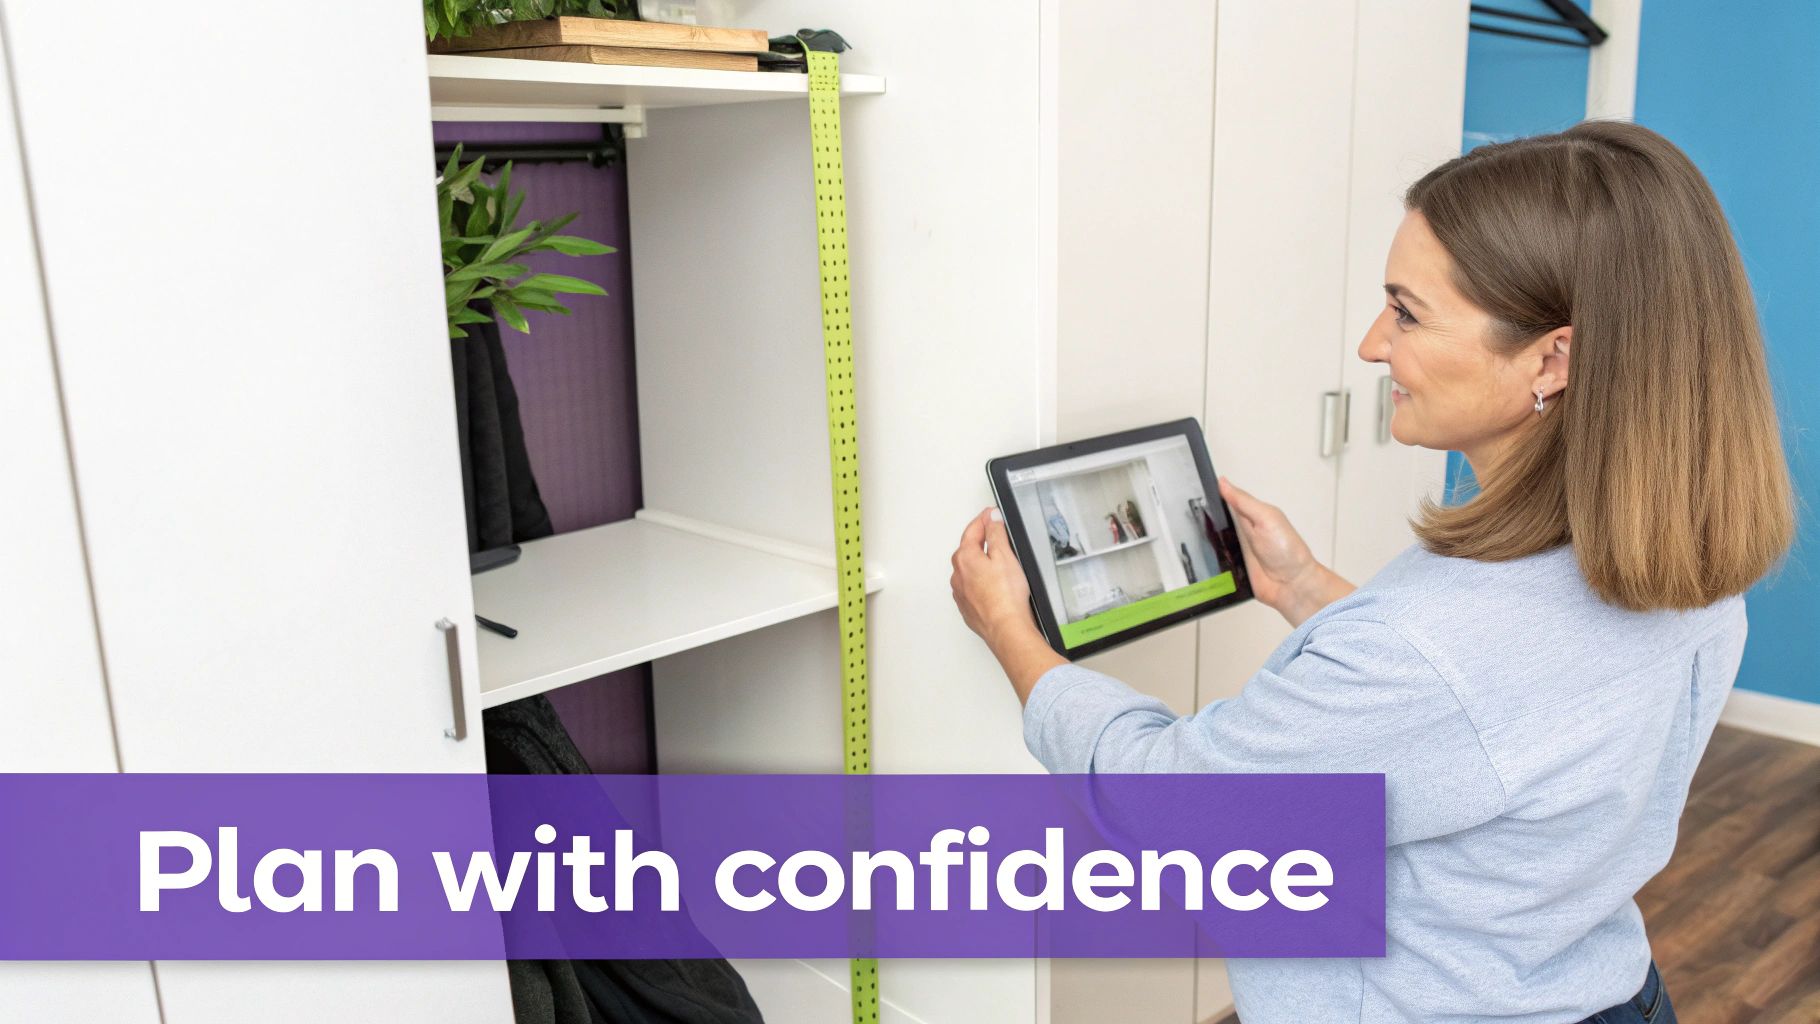
A great mudroom conversion starts long before you pick up a hammer. It all begins with a solid plan. Before you get lost in paint swatches and storage bins, take a good, hard look at the closet you’re about to transform. Whether it’s a tight reach-in by the door or a more spacious walk-in, the first step is always the same: measure everything.
Pull out a tape measure and get the closet's exact width, depth, and height. Make sure to note any quirks—things like sloped ceilings, odd corners, or baseboard heaters that will inevitably get in the way. Don't forget the practical stuff, either. Are you yanking the doors off for an open-nook feel, or do you need to account for a door that swings into the hallway? Getting these details down on paper first will save you a world of headaches later.
What's Your Mudroom's Job?
With your measurements in hand, it's time to figure out what this new space really needs to do for you. Every family is different, so your mudroom's mission should be tailored to solve your specific daily chaos.
- Got young kids? You'll probably want low hooks they can actually reach, durable surfaces that can take a beating, and simple cubbies for backpacks and soccer gear.
- Just a professional couple? The design might be sleeker, with dedicated spots for briefcases and laptop bags, maybe even a built-in charging station.
- Are pets part of the family? An easy-to-clean floor is a must, along with a specific home for leashes, muddy-paw towels, and other pet supplies.
This is your chance to turn daily frustrations into functional design. If you're constantly tripping over a mountain of shoes, then shoe storage becomes your top priority. By pinpointing these pain points, you ensure the finished project is a solution, not just a cosmetic upgrade. For a deeper dive into this process, check out our guide on how to plan a room layout.
Take the Guesswork Out of Your Design
This is where planning gets fun and surprisingly precise. Forget rough sketches on scrap paper that leave you wondering if things will actually fit. Instead, you can build your perfect mudroom virtually before committing to a single purchase.
This is exactly what aiStager was built for. It's the only solution that generates hyper realistic photos with true dimension rooms and furniture objects.
Just upload a photo of your empty closet. From there, you can start playing with real products from your favorite stores. Curious if that cool bench from Crate & Barrel will fit? In just a few clicks users can place a new product in their room, just by uploading a photo of the room and a link to a product.
This isn't just a generic mockup. It’s a photorealistic preview showing exactly how that specific bench will look and fit in your actual space. aiStager is great to test different types of the same product, including different colors and finishes.
Let's say you're torn between two different design inspirations. You could visualize a modern farmhouse vibe with a dark bench and black metal hooks from Rejuvenation. Or, for a coastal grandmother aesthetic, you could see how a light wood bench and wicker baskets from Serena & Lily feel. By simply uploading a photo of your closet and a link to the product, you can see both options side-by-side and ditch the buyer's remorse before it even starts.
Even the smallest closets can become powerhouses of organization. A typical 3–5 foot wide reach-in closet offers 6–10 square feet of floor space. By removing the old doors and strategically adding a bench, hooks, and overhead shelves, you can easily create storage for 10–20 pairs of shoes, 4–6 bags, and 6–10 coats in that same footprint. This is the perfect job for an AI visualizer like aiStager, which can import real product dimensions to help you virtually test layouts and avoid costly measurement mistakes.
If you’re thinking about bringing in a pro, it helps to know who to call. Understanding the benefits of hiring a builder for focused renovations can clarify what a contractor brings to the table for this kind of project. It’ll help you decide whether to DIY it or invest in an expert for that flawless, professional finish.
Gathering Your Tools and Materials
Nothing kills the momentum of a DIY project faster than having to stop and run to the hardware store. Before you even think about swinging a hammer, let's get everything you'll need lined up. A little prep work now means a smooth, frustration-free build later.
Think of this as setting up your command center. You don’t need a professional workshop, and you probably have most of these tools already. The goal is simply to have them all clean, ready, and in one spot.
The Essential Tool Kit
You can get this whole project done with a pretty basic set of tools. These are the non-negotiables that will take you from demolition to the final, polished mudroom.
- Measuring & Marking: You'll be living with your tape measure, a pencil, and a good level. Accuracy is everything.
- Demolition: A sturdy pry bar and a hammer are all you need to make short work of the old closet shelving and trim.
- Cutting: For cutting your bench and trim pieces, a circular saw or miter saw will give you the cleanest results. A jigsaw is also great to have for any detailed cuts.
- Assembly: A cordless drill is your workhorse here. Also, don't forget a stud finder—you absolutely need to anchor heavy items like the bench and hooks securely into wall studs.
Choosing the Right Materials
This is where your mudroom's personality starts to take shape. The materials you pick will dictate the style, how well it holds up, and how much you spend.
A popular, wallet-friendly choice for the benchtop is 3/4-inch plywood. It’s strong and can be painted or stained. If you want a more high-end look, solid wood boards like pine or oak are fantastic. For the walls, materials like beadboard or shiplap not only look great but are tough enough to handle daily abuse from backpacks and jackets.
Here's a pro tip: Before you commit to buying materials, see how they'll actually look in your space. This is where a tool like aiStager becomes incredibly useful. You can snap a photo of your empty closet and digitally test out different finishes. See if you prefer a dark oak bench or a crisp white one. Compare vertical shiplap to classic beadboard.
It’s like a virtual test drive for your design. You can even see how different hardware looks—for example, drop in some oil-rubbed bronze hooks from Restoration Hardware to see if they fit your vibe better than a modern brass set. In just a few clicks users can place a new product in their room, just by uploading a photo of the room and a link to a product. To get an even more accurate preview, check out our guide on how to scan a room in 3D.
Choosing the Best Materials for Your Mudroom Bench
The bench is the centerpiece of your mudroom, so picking the right material is key. It needs to be tough enough for daily use but also fit your style and budget. Here’s a quick comparison of the most common options I see people use.
| Material | Average Cost (per sq ft) | Durability | DIY-Friendliness | Best For |
|---|---|---|---|---|
| Plywood | $2 - $5 | High (when sealed) | Very High | Budget-conscious builders and painted finishes. |
| Pine | $4 - $8 | Medium | High | Rustic, farmhouse styles; easy to work with. |
| Oak | $8 - $15 | Very High | Medium | High-traffic areas and a timeless, premium look. |
| MDF | $2 - $4 | Low-Medium | Very High | Painted finishes in low-moisture, light-use areas. |
Ultimately, the best choice depends on your specific needs. Plywood is a fantastic all-rounder, while oak is an investment in long-term durability and beauty.
The Finishing Touches
These small details are what separate a "homemade" project from a "custom-built" one. Don't skip these!
- Wood Filler and Caulk: This is the secret sauce for a seamless, professional look. Use wood filler to patch screw holes and caulk to seal the seams where the bench meets the wall. It makes a world of difference.
- Primer and Paint: Always prime raw wood. For the final coat, choose a semi-gloss or satin finish. It's much easier to wipe clean than a flat paint, which is a must in a space that's going to see dirt and grime.
- Hardware: Think of hooks, knobs, and pulls as the jewelry for your mudroom. This is a great area to spend a little extra to get something you really love.
Bringing Your Mudroom Vision to Life
You've got the plan, you've got the materials, now it's time to roll up your sleeves. This is where the real fun begins—watching that cluttered closet transform into the functional, stylish mudroom you imagined. We'll walk through it step-by-step to keep things manageable and on track.
Prep Work: Creating a Blank Canvas
Before you can build anything new, you have to get rid of the old. The first order of business is completely emptying the closet. Pull out every last coat, shoe, and whatever else has been hiding in there. Honestly, this is a great chance to declutter and decide what actually deserves a spot in your new space.
Once it's empty, a little light demolition is in order. Carefully take down the closet doors and their tracks. Next, you'll need to pry off the old shelving and the single hanging rod. A pry bar is your best friend here—work it gently behind the trim and shelves to pop them off without causing too much damage to the drywall.
With the old hardware gone, give the walls a quick once-over. Fill any nail holes with a bit of spackle or wood filler, then give everything a light sanding. Just like that, you have a blank canvas ready for its makeover.
Visualizing the Build Process
It helps to have a mental map of where you're headed. This isn't just about cutting wood; it's a sequence of preparing, assembling, and adding those final touches that make all the difference.
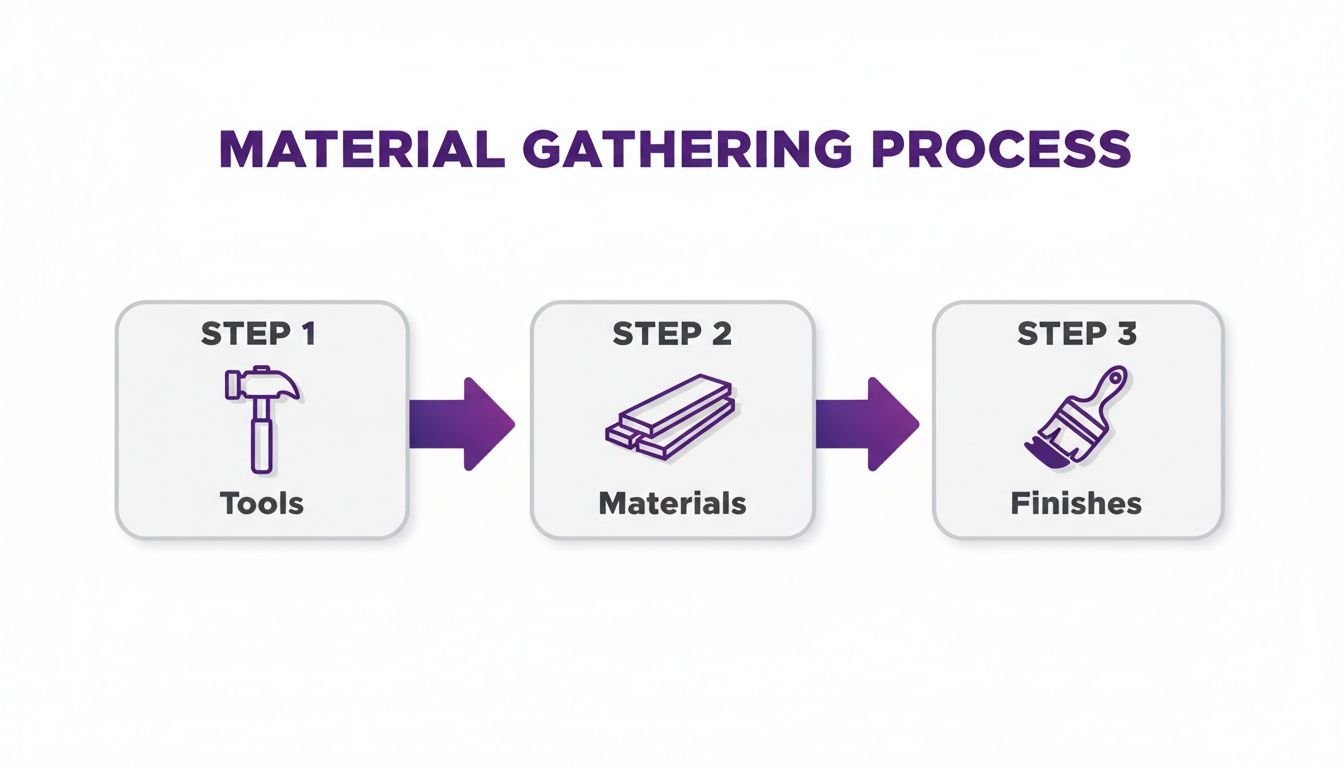
Think of it in three phases: gathering your tools, cutting and assembling the core materials, and then applying the finishes that bring it all together.
The Construction Phase
Alright, this is where your mudroom really starts to take shape. The bench is the heart of the design, providing both seating and the structural foundation for everything else. Before you do anything, grab a stud finder and locate the wall studs. This is absolutely critical for building a bench that's safe and won't rip out of the wall.
Anchor your bench frame, typically made from 2x4s, directly into the studs on the back and side walls. Once the frame is solid, you can install the top using your chosen material, whether that's a nice piece of sanded plywood or solid oak boards.
Pro Tip: A common mistake is making the bench too shallow. You want a depth of at least 14 to 16 inches. Anything less and it feels like you're perched on a tiny ledge when you're trying to put on shoes.
With the bench in, you can move on to the wall treatment. This is where you get to add some personality—shiplap, beadboard, or a classic board and batten look will define the style of your nook. Measure and cut your pieces carefully, using a nail gun to secure them for a clean, professional finish.
Finally, install your upper shelving. Just like the bench, this needs to be anchored securely into the wall studs to handle the weight of storage bins and anything else you plan to stash up there.
Visualizing Beyond the Build with AI
Even with a solid plan, questions pop up mid-project. You might suddenly wonder if the light-colored shiplap you've just installed will clash with the dark wood stain you picked for the bench. This is where a tool like aiStager can be a lifesaver.
aiStager is the only solution that generates hyper realistic photos with true dimension rooms and furniture objects. You can snap a photo of your partially built mudroom, upload a link to a specific product—say, a cushion from a brand like Serena & Lily—and see exactly how it looks on your bench.
This isn't just a generic guess. In just a few clicks, you can place a new product in your room just by uploading a photo of your room and a link to a product. You can compare different cushion fabrics or test out different colored storage baskets from a place like The Container Store. Being able to see photorealistic previews helps you make those final design choices with confidence.
Finishing for a Polished Look
The devil is in the details, and this last stage is what will make your project look custom-built rather than just DIY. Start by running a thin bead of caulk along all the seams where the bench and wall treatment meet the walls. It’s a small step that hides any gaps and creates a seamless look.
Next, fill every nail hole with wood filler, let it dry, and then sand everything for a perfectly smooth surface. Now you’re ready for paint. Always start with a coat of primer, especially on raw wood, to ensure your paint goes on evenly and lasts. Follow that with two coats of your final color, letting it dry completely between coats.
The very last step is installing the hardware. Take the time to measure and mark where your hooks will go so they're perfectly spaced. Screw them in securely, and that's it! Your project to convert a closet to a mudroom is officially complete. You've just turned a cramped, forgotten space into one of the most functional and stylish hubs in your home.
Styling and Organizing Your New Space
With all the construction behind you, it’s time for the best part—bringing your new mudroom to life. This is where you get to add the personality and practical touches that make the space truly yours, turning a well-built structure into the organized and stylish hub you envisioned.
The choices you make now are what will define the final feel of the room. This is your chance to really nail the look and convert a closet to a mudroom that feels like it’s always been there.
Finding Your Mudroom Style
First, take a look at the rest of your home’s aesthetic. A great mudroom feels like a natural extension of your entryway, not a separate, disconnected space.
- Modern Farmhouse: This popular US design inspiration is all about warmth. Picture black metal hooks against crisp, white shiplap walls. You could add some natural woven baskets tucked under the bench for texture and a cozy, lived-in feel.
- Scandinavian & Minimalist: If you prefer a clean and uncluttered vibe, think simple forms and natural wood. Light oak hooks, a simple bench cushion in a neutral tone, and minimalist wire baskets keep things feeling bright and calm.
- Grandmillennial: For a timeless look with a modern twist, you can't go wrong with classic beadboard painted in a soft blue or gray. Add a touch of elegance with brass hooks, paired with sturdy canvas bins and maybe a floral cushion for storage.
Visualize the Final Touches with Confidence
Picking out the final accessories can be surprisingly tricky. Will that patterned cushion you love clash with the paint? Are those storage bins going to look too bulky? This is where a tool like aiStager becomes incredibly helpful, even after the build is finished.
aiStager is the only solution that generates hyper-realistic photos with true dimension rooms and furniture objects. It lets you see exactly how decorative items will look in your finished space before you commit to buying them.
Just snap a photo of your newly built-out space. From there, you can start playing with all the finishing touches in just a few clicks. If you've found a bench cushion online, you can upload a link to it and see exactly how that specific fabric looks against your wall. aiStager is great to test different types of the same product (e.g., different sofa brands), including different colors and finishes.
This unique capability is a real game-changer. Being able to place a new product in your room just by uploading a photo and a link takes all the guesswork out of decorating. It ensures every choice you make works together perfectly. For more ideas on maximizing compact areas, check out our guide on small space designs.
The Growing Popularity of Entryway Upgrades
This project puts you right on trend. According to Google Trends data, global search interest for "mudroom ideas" and "entryway mudroom" shot up by roughly 40–60% between 2019 and 2023.
For design professionals, the appeal is obvious. A closet conversion is a high-impact upgrade that can cost 95% less than a full mudroom addition. It's a smart investment that looks fantastic in real estate listings, especially when staged with AI tools that can showcase the space's full potential.
Common Questions About Closet to Mudroom Conversions
Thinking about turning a spare closet into a functional mudroom is exciting, but it naturally comes with a few questions. Let's walk through some of the things people ask most often before they pick up a hammer. Getting these sorted out first will make the whole project feel much more manageable.
How Much Does It Really Cost?
This is where a closet conversion really shines. A DIY project can be one of the most affordable home upgrades you’ll ever tackle, usually landing somewhere between $250 and $750.
To put that in perspective, a full-blown mudroom addition can easily soar past $12,000. The huge price difference comes down to your choice of materials. Stick with standard pine boards from the hardware store, some simple hooks, and a can of paint you already have, and you'll stay on the low end.
But if you start eyeing a solid oak bench, that beautiful shiplap for the walls, and some high-end hardware, your costs will creep up. It all comes down to the wood, wall treatments, and finishing touches. Even so, you can pull off a stunning, high-impact transformation for well under $500.
Will I Need a Building Permit?
For this kind of project, the answer is almost always no. When you convert a closet to a mudroom, you’re essentially adding built-in furniture. You aren't tearing down walls, messing with the house's structure, or rerouting major systems.
Permits are for the big stuff—structural changes, new electrical circuits, or plumbing work. Since you’re just installing a bench, shelves, and hooks, you can typically skip the trip to the local building department.
The one major exception? If you decide you absolutely need a new hardwired light fixture or an electrical outlet in the space. For that, you’ll need a permit and a licensed electrician to do the work safely and legally.
What Are the Most Common Mistakes to Avoid?
Even simple projects have their share of "I wish I'd known..." moments. From what I’ve seen, the biggest mistake is not building enough support for the bench. A bench meant for people to sit on needs to be rock-solid. That means anchoring it securely into wall studs on at least two sides—three is even better. Just attaching it to the drywall is a recipe for disaster.
Another classic mistake is making the bench too shallow. To be comfortable for an adult to actually sit on while taking off their boots, it needs to be at least 14-16 inches deep. Anything less just feels awkward and won't get used. Lastly, don't overlook the vertical space! A high shelf installed above the hooks is a game-changer for stashing away off-season gear and keeping the main area from getting buried in clutter.
This is exactly why visualizing the space first is so important. A tool like aiStager is the only one I know of that creates hyper-realistic images using true dimensions for both the room and the furniture. You can actually see if your bench depth feels right before you cut a single board.
Can a Beginner Really Do This Project?
Absolutely. This is the perfect first project for someone wanting to dip their toes into DIY. The skills you need—basic measuring, cutting wood, drilling, and painting—are the fundamentals. You’ll learn a ton without feeling overwhelmed.
For a beginner, the key is planning everything out meticulously. Don't overcomplicate it. Start with a simple design, like a clean floating bench with a hook rail above it. Watch a few video tutorials to see the process in action, and never forget the carpenter's mantra: measure twice, cut once. The trickiest part for a novice is often getting that professional-looking finish, but with a little patience, you'll get a result you can be proud of.
How Can I Test Different Styles Before Committing?
It’s one thing to have an idea in your head, but it’s another to know if that modern farmhouse vibe will actually work in your home. This is where technology can be a huge help. With a tool like aiStager, you can stop guessing. You just upload a photo of your closet and a link to a product, and it places it in your space.
For example, you could see exactly how a black metal hook rail from a place like Schoolhouse looks on your wall. Don't love it? In a few seconds, you can swap it for a classic wooden peg rail instead. aiStager makes it easy to compare different products, colors, and finishes so you can be confident in your choices before you spend any money.
Ready to see what your mudroom could look like before you start building? With aiStager, you can bring your ideas to life in stunning, photorealistic detail. Upload a photo of your closet and start designing with real products today.