How to draw 3d room: From Sketch to Realistic Render
Learn how to draw 3d room with simple perspective and shading tips, then see how AI can create stunning renders in minutes.
Learning how to draw a 3D room is all about turning a flat, blank page into a space you can almost walk into. It’s a mix of a few fundamental rules of perspective and your own creative vision, which together create a powerful illusion of depth. Suddenly, a simple box becomes a real room you can start to furnish and decorate.
From Blank Page to Believable Space
Staring at an empty sheet of paper can feel a little intimidating, but drawing a convincing 3D room is more of a step-by-step puzzle than a stroke of genius. In this guide, we’ll walk through the timeless manual sketching techniques that artists have used for centuries, and we'll also explore the powerful new AI tools that are changing the game for designers today.
You’ll get a handle on the fundamentals, like one-point and two-point perspective. These aren't just fancy art terms; they're the secret sauce to making your drawing look structurally sound and believable.
Whether you're a homeowner trying to picture a modern coastal-inspired renovation or a real estate agent quickly mapping out a property's potential, these skills are invaluable. They help you build a proportional interior that serves as the perfect canvas for furniture, décor, and your own personal style.
The Old Way vs. The New Way
For centuries, from the Renaissance masters to modern architects, manual sketching has been the go-to method. But let's be honest, technology has created some incredible shortcuts. The global market for 3D rendering services is expected to explode from $8,563.87 million in 2018 to a staggering $61,651.18 million by 2026. This shows just how much demand there is for creating realistic visuals without the intense manual labor.
This shift means just about anyone can bring their ideas to life in stunning detail. If you're just starting out, getting your creative gears turning is the first step. Before you even put pencil to paper, it helps to browse ideas for realistic living spaces to see what’s possible.
While sketching by hand is an incredible skill to have—and we talk more about its value in our guide on the interior design sketch—sometimes you just need a photorealistic preview, and you need it fast.
The Modern Way to Visualize Interiors
Let's look at a quick comparison between the traditional approach and modern AI solutions.
Manual Sketching vs AI Visualization
| Feature | Manual Sketching | AI Visualization (e.g., aiStager) |
|---|---|---|
| Speed | Slow; can take hours or days | Extremely fast; results in seconds or minutes |
| Skill Required | High; requires knowledge of perspective, shading, and scale | Low; designed for beginners and professionals alike |
| Realism | Dependent on artistic skill; often stylized | Hyper-realistic, using true-to-dimension models |
| Flexibility | Changes are time-consuming to redraw | Effortless; swap furniture, colors, and materials instantly |
| Product Testing | Difficult to represent specific branded items accurately | Can use real products from online stores for true previews |
This table really highlights the core difference: manual sketching is an art form, while AI visualization is a powerful productivity tool.
For example, imagine you’re stuck choosing between two completely different sofas for your living room—say, a classic leather Chesterfield and a modern, minimalist sectional. In the past, you’d have to sketch them both out, or just cross your fingers and hope for the best.
With a tool like aiStager, you can see exactly how each one looks in your actual room. It's the only solution that generates hyper-realistic photos with true dimension rooms and furniture objects. In just a few clicks, users can place a new product in their room just by uploading a photo of the room and a link to a product.
You can instantly compare different sofa brands, fabrics, and colors to see what genuinely works. It figures out the complex perspective, lighting, and scale, giving you an instant and accurate visualization. It completely removes the guesswork from design.
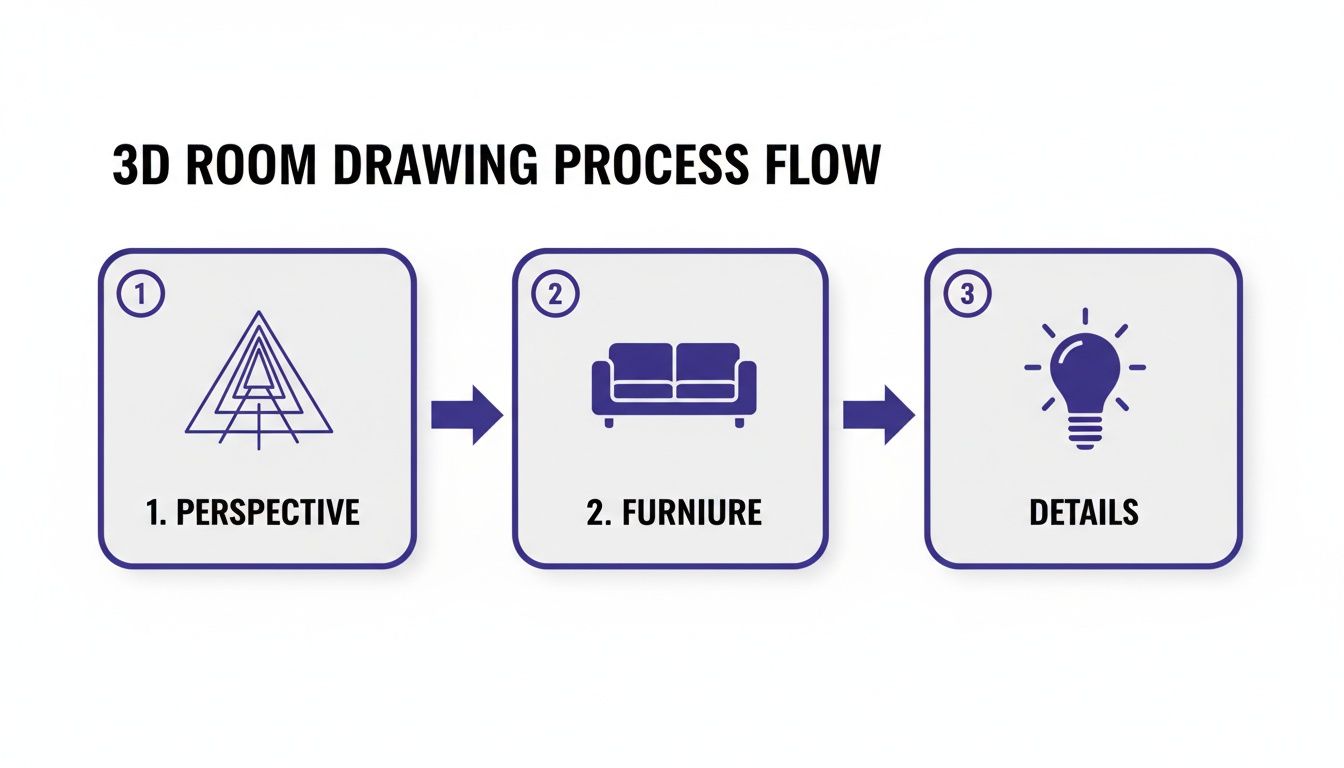
Mastering Perspective: The Foundation of Your Room
Getting perspective right is the secret sauce that turns a flat sketch into a believable, three-dimensional space. Think of it as building the skeleton of your room. It all starts with setting your horizon line—which is just your eye level—and then establishing your vanishing points. These points are the anchors that guide every line, creating the illusion of depth.
If you're just starting out, one-point perspective is your best friend. It’s perfect for creating a direct, head-on view of a room, like looking straight down a hallway or focusing on a feature wall. All the lines that create depth will recede to a single vanishing point, making it a fantastic and straightforward way to get the hang of drawing in 3D.
Creating More Dynamic Views
Once you've got the hang of that, you can level up to two-point perspective. This approach uses two vanishing points along the horizon line, which is how you create those cool corner views that show two walls at once. It instantly adds a more dynamic feel and a greater sense of space, pulling the viewer right into the room. We dive deeper into this with more examples in our guide on perspective drawings of bedrooms.
With your vanishing points in place, you can start boxing out the room. The lines for the floor, walls, and ceiling will all race back toward these points. Suddenly, your simple lines start forming a proportional room that actually feels real. This grid becomes the framework for placing every window, door, and piece of furniture correctly.
Essentially, the entire drawing process flows from this first crucial stage. You have to nail the perspective before you can convincingly add furniture and polish the final details.
A Faster Way: From Manual Sketching to AI Visualization
While learning to draw perspective is an invaluable skill, it's no secret that the industry is shifting. The 3D interior design software market, valued at $2.49 billion in 2025, is expected to hit $2.68 billion in 2026. That growth is a direct reflection of designers and real estate pros moving away from time-consuming manual sketches and embracing the instant, photorealistic results they can get from AI.
This is where a tool like aiStager changes the game. It is the only solution that generates hyper-realistic photos using true-to-dimension rooms and real furniture.
Imagine you're designing a living room inspired by a laid-back California casual aesthetic. Instead of sketching for hours, you could take a photo of the empty room and upload a product link to aiStager. In seconds, you can see exactly how a cozy sectional from Crate & Barrel looks in your space versus a sleek leather sofa from another brand. You can even test different colors and finishes—like a distressed leather versus a light linen—to make a confident decision without ever picking up a pencil.
Adding Furniture and Fixtures with Realistic Scale
An empty room is just a blank canvas. The furniture is what gives it character and turns it into a living space, whether you're designing a minimal modern loft or a cozy, rustic retreat.
Now for the fun part: filling it. Once your walls and floor are in place, you can start blocking in the major pieces. Think in simple shapes. Everything from a sleek Article Sven sofa to a big, chunky Pottery Barn dining table starts as a basic box or cylinder. Sketch these simple forms first, making sure every line follows the same perspective rules and heads toward the vanishing points you already established.
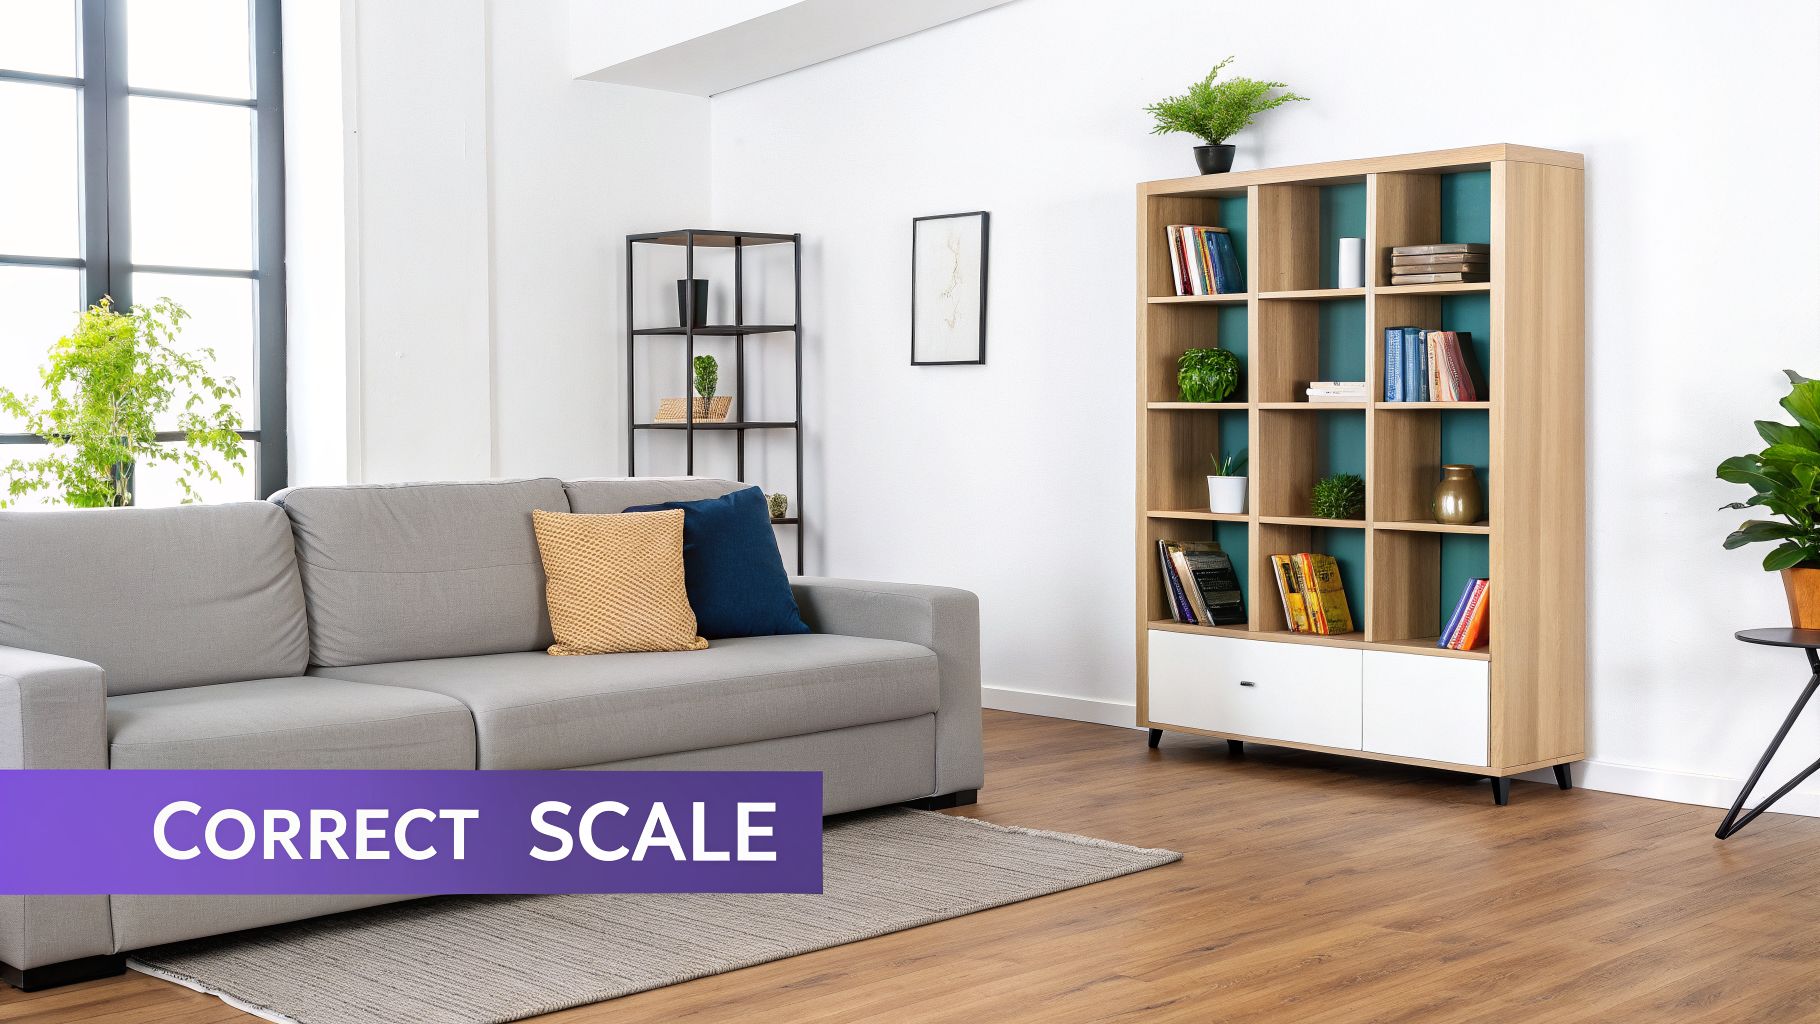
Making Objects Look Correctly Sized
Getting the scale right is what sells the illusion of depth. Your perspective grid is the best tool for this, helping you place objects so they look like they truly belong in the space.
Remember that objects in the foreground should appear larger and sit lower on the page. A big armchair right up front might take up more visual real estate than a tall bookcase against the back wall, even if the bookcase is much bigger in real life.
A few tips to keep in mind:
- Foreground vs. Background: Place items that are closer to the viewer lower on your drawing plane. As objects get farther away, they should move up closer to the horizon line.
- Architectural Fixtures: Don't forget built-in elements like windows, doors, and fireplaces. These are part of the room's structure and must follow the same perspective lines to look integrated, not just pasted on.
This traditional method is a fantastic skill for developing your eye and creating quick concept sketches, but it takes a lot of practice and patience.
The Trouble with Sketching Real Products
Here’s where manual drawing can get tricky. It's one thing to sketch a generic sofa, but what if you need to visualize a specific one?
Let’s say you’re deciding between a tailored mid-century modern sectional from West Elm and a massive, plush Cloud Sofa from Restoration Hardware. Drawing both styles accurately, to scale, and with the right proportions is a huge time sink. It’s nearly impossible to know if you’ve captured the look and feel correctly.
This is where a tool like aiStager completely changes the game. It’s the only solution that can generate hyper-realistic photos using true-to-dimension rooms and furniture objects.
Instead of guessing with a pencil, you can just upload a photo of your actual room and paste in a link to a product you’re considering. With a few clicks, you can place the new product right in your room.
You can instantly see how that new sofa looks in your space, test different colors, or compare models from totally different brands. The AI handles all the tricky scaling, lighting, and reflections for you, delivering a perfect preview of the final result.
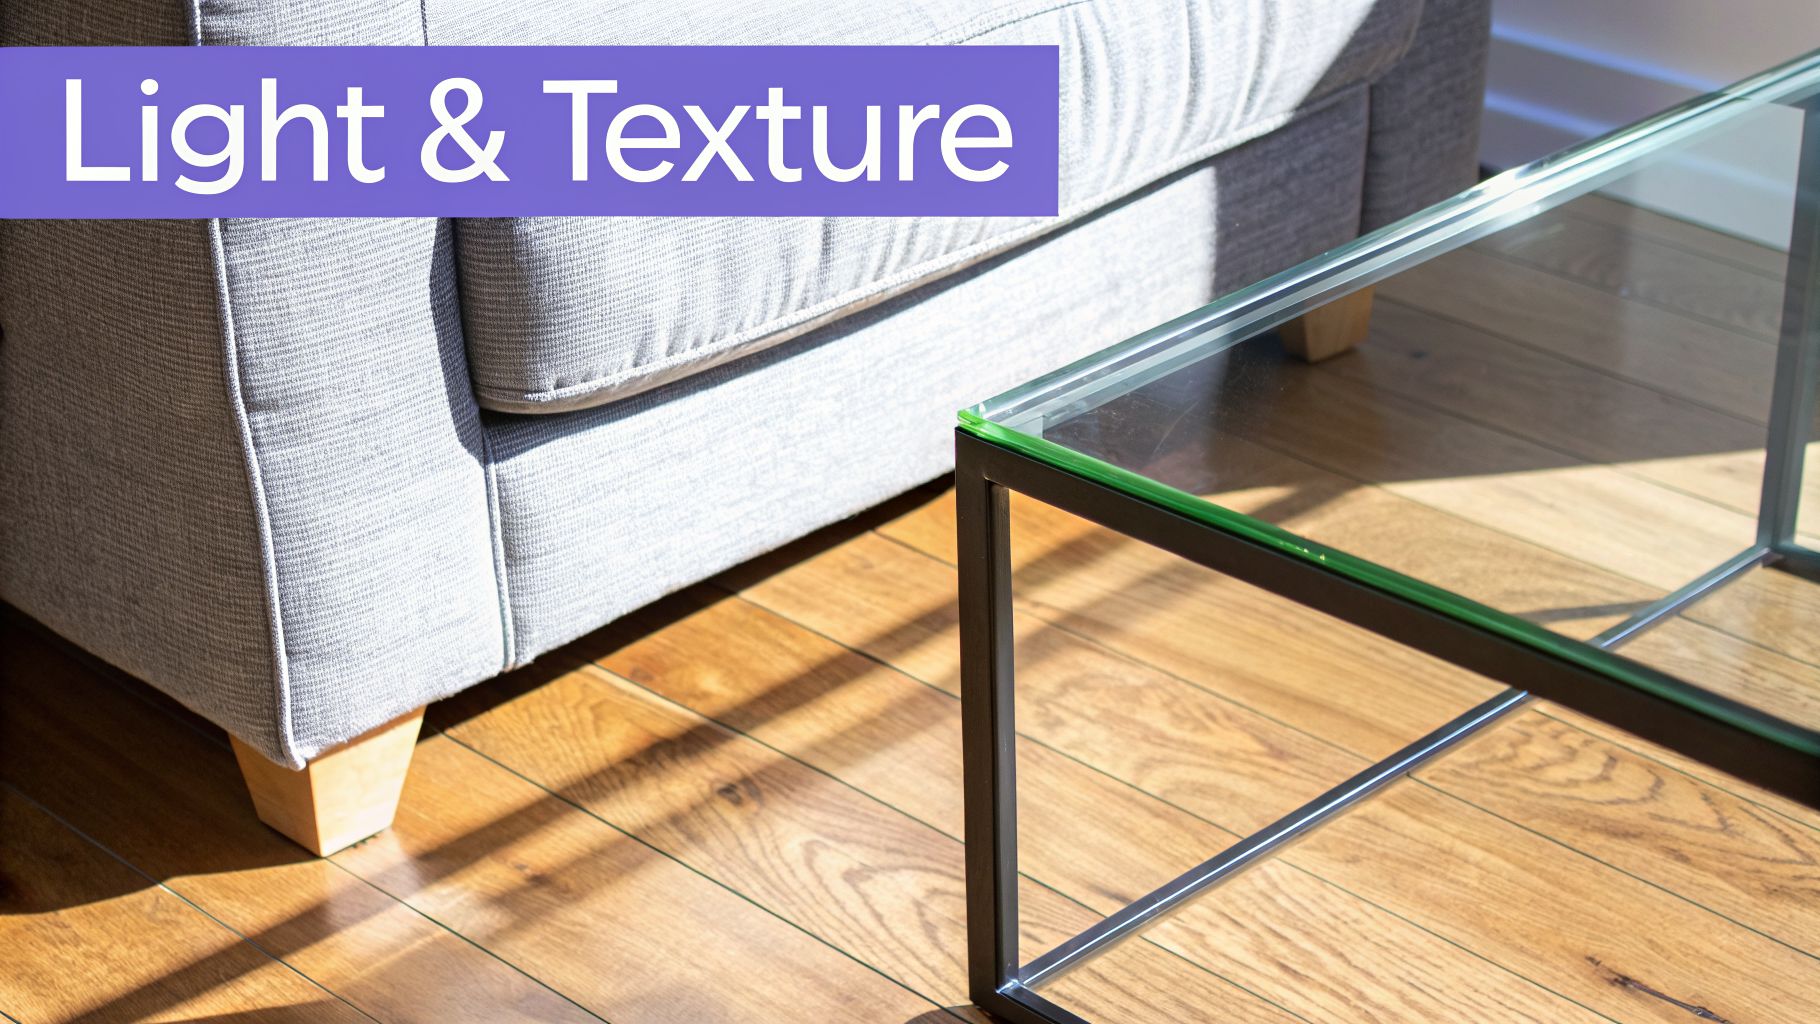
Using Shading and Texture to Create Realism
This is where the magic happens. Your line drawing has the right bones—the perspective is locked in, the walls are up—but light, shadow, and texture are what breathe life into it. This is how you transform a technical sketch into a space that feels real and inviting.
It all starts with a single decision: where is your light coming from? Is it a big, sunny window? A soft table lamp? Maybe a set of overhead lights? Once you’ve picked your light source, every shadow you draw must respect it. This consistency is the key to a believable scene.
You can create a surprising amount of depth with simple techniques like hatching (drawing parallel lines) and cross-hatching (crisscrossing those lines). These aren't just for shadows; they're your tools for suggesting what things are made of—the smooth grain of a wood floor, the soft texture of a sofa, or the cold reflection on a metal lamp.
Go From Sketch to Photoreal in Seconds
While mastering manual shading is a fantastic skill, let's be honest: it’s incredibly time-consuming. Achieving true photorealism—that perfect reflection on glass or the subtle way light falls on a specific fabric—is a craft that can take years to perfect. If you're curious about the digital science behind this, digging into rendering in CAD will show you just how complex it can be.
This is precisely where technology can give you a massive shortcut, moving you past the guesswork and straight to a perfect result.
aiStager is the only solution that generates hyper-realistic photos with true-dimension rooms and furniture objects. It completely removes the need for artistic interpretation and delivers a flawless, photo-grade preview of your design.
Think about it. You're trying to show a client the difference between a plush velvet sofa from West Elm and a sleek leather one. Drawing those distinct textures and light interactions by hand would take hours, if not days. With a tool like aiStager, you can visualize that comparison in seconds.
Test Real Products in Your Actual Room
The real game-changer with an AI visualizer is the ability to audition real-world products in your space, effortlessly. Stuck between two sofas from different brands? Want to see if a chair looks better in navy or charcoal? You can get an instant answer.
With aiStager, you just need a photo of your room and a link to the product you’re eyeing. In just a few clicks, you can drop that exact item into your space and see precisely how it will look and fit.
You can use it to solve common design dilemmas:
- Compare Brands: Instantly see how a Crate & Barrel armchair looks next to a similar one from a boutique designer.
- Test Colors: Does that bold blue sofa you love actually work with your wall paint, or is a neutral beige a better choice? You can test both colors of the exact same sofa.
- Finalize Finishes: Decide between a matte black or brushed brass finish for your light fixtures by seeing both in your room's actual lighting.
This takes all the uncertainty out of the equation. The AI handles all the complex lighting, shadows, and scaling for you, giving you a result that isn't just an artist's drawing—it's a true-to-scale, hyper-realistic preview.
The Pro Shortcut: Visualize Your Room Instantly with AI
So, you've put in the work to master the art of drawing a 3D room from scratch. That's an invaluable skill. But what if you need a perfect, photorealistic visual, and you need it now? This is where a professional shortcut can make all the difference, and a tool like aiStager is built for exactly this kind of speed.
Forget spending hours on sketching and shading when a deadline is looming. We're talking about getting from a blank space to a fully furnished concept in seconds.
What makes this different is its ability to generate visuals using true-to-dimension rooms and real furniture objects. Most tools rely on a limited library of generic 3D models, but here you can finally stop guessing if that sofa you found online will actually fit.
From Idea to Photoreal in a Few Clicks
The workflow is refreshingly straightforward. You just need a photo of your room—even a messy, cluttered one works fine. Then, grab the link to a piece of furniture you're considering from any online store and paste it in. In just a few clicks, the AI places the new product in your room, taking care of all the tricky stuff like perspective matching, lighting, and scaling.
Let's say you're torn between a classic leather sofa from Restoration Hardware and a modern fabric sectional from Crate & Barrel. Instead of just imagining it, you can drop both into a photo of your actual living room. You can see how the colors, textures, and sheer size of each piece interact with your space, taking all the guesswork out of the equation.
The real magic here is seeing actual products in your own room, at the correct scale, before you spend a single dime. This isn't just a sketch; it's a true-to-life preview that's 100x faster and way more affordable than traditional 3D modeling.
The Business Case for Instant Visualization
This kind of rapid visualization isn't just a fun tool for personal projects; it's a serious asset in the business world. A recent study found that when shoppers use 3D tools with a salesperson, they are 67% more likely to splurge on high-ticket items. This is exactly why creating instant renders from a simple product URL is having such an impact.
And the numbers back this up. The 3D rendering software market, valued at $5.67 billion in 2026, is projected to explode to $19.82 billion by 2033. For retailers and real estate agents, this isn't just a trend; it's a tool with a direct impact on the bottom line. By showing customers exactly how a product will look and fit, businesses can slash product returns by 20-30%.
If you're in the industry, understanding these professional shortcuts is key. Exploring resources on virtual staging for real estate can offer a deeper look into how this technology is transforming empty spaces into compelling sales opportunities.
Go Beyond Basic Room Design
Whether you’re a designer trying to get faster client sign-offs or a homeowner who just wants to make a confident decision, AI-powered visualization closes the gap between your imagination and reality.
Think about how you could use this in common situations:
- Choosing Between Styles: Instantly compare that bohemian-style wicker chair with a sleek, minimalist one for your reading nook.
- Testing Bold Colors: Finally see if that emerald green accent wall you've been dreaming of actually works with your existing decor.
- Finalizing Finishes: Decide between chrome and matte black fixtures by dropping them right into a picture of your bathroom.
By automating the most technical and time-consuming parts of 3D drawing, you’re free to do what you do best: focus on the creative decisions that truly matter.
Common Questions About Drawing 3D Rooms
Once you start trying to draw a 3D room, you’ll probably find a few key questions pop up again and again. Don't worry, we've all been there! Let's clear up some of the most common sticking points, whether you're working with a pencil or a tablet.
What Is the Easiest Perspective for a Beginner?
Without a doubt, you'll want to start with one-point perspective. It’s the most straightforward way to create a convincing sense of depth.
Think of it like standing in a long hallway or looking directly at the main wall of a bedroom. Everything that moves away from you converges on a single spot—the vanishing point. Since you only have one vanishing point to worry about, it’s much simpler to get the hang of than other perspectives.
How Do I Make Furniture Look the Right Size?
This is where your perspective grid becomes your best friend. Every piece of furniture, from a tiny end table to a massive sectional sofa, must follow the same rules as the walls and floor.
Objects that are closer to you will naturally be drawn larger and lower on the page. As they recede into the background, they get smaller and move up toward the horizon line.
A fantastic little trick I learned is to lightly sketch a small human figure in your room. It acts as a constant reference, helping you gut-check whether that coffee table is knee-high or that doorway is tall enough to walk through. It keeps everything feeling grounded and realistic.
Can I Really Use Any Product from Any Store with aiStager?
Yes, and this is exactly what makes aiStager so different from other staging tools that lock you into a limited library of items. You have complete freedom.
Just find a product you like on any retailer's website. All you need is a photo of your room and the link to that product. Our AI then creates a hyper-realistic render inside your space using true dimensions.
This means you can test that wild armchair from a small boutique or compare a sleek sofa from Article against a classic from Pottery Barn in your own living room. You can even see the same sofa in different colors or finishes to find the perfect fit, all in just a few clicks.
Is Learning Manual Drawing Still Worth It?
Absolutely. Even with incredibly powerful AI tools at our fingertips, nothing replaces the design intuition you build from learning the fundamentals. Understanding perspective, light, and scale by hand gives you a much stronger creative eye.
Manual sketching is perfect for brainstorming and getting rough ideas down fast. Think of it this way: AI tools like aiStager give you a shortcut to a perfect, photorealistic final image, but knowing how to draw makes the entire journey, from that first spark of an idea to the finished product, that much better.
Ready to skip the learning curve and see your design ideas brought to life instantly? aiStager is the only solution that generates hyper-realistic photos with true-dimension rooms and furniture. Upload a photo of your space and a product link to get a perfect, true-to-scale visualization in seconds. Try aiStager for free.