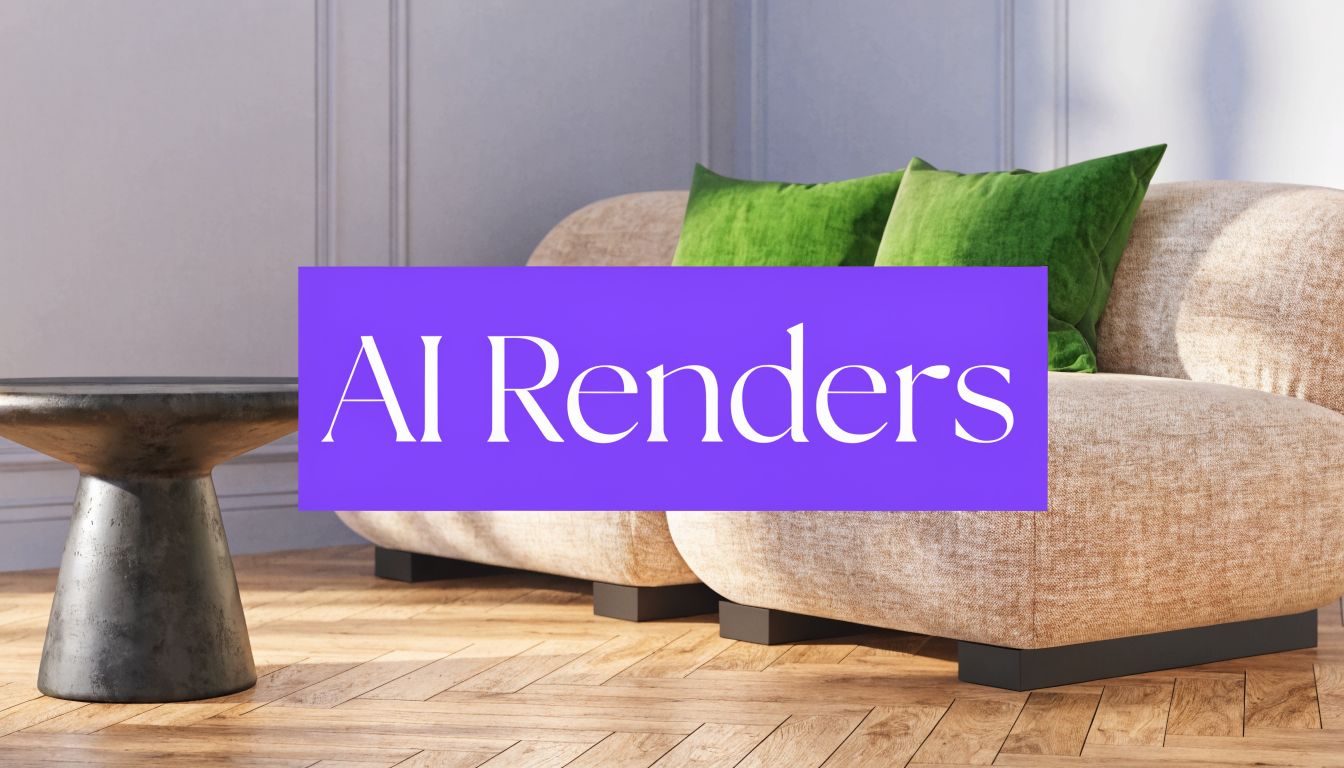
AI Renders Interior Design: Create Hyper-Realism
Learn how to use AI to create hyper-realistic renders interior design professionals trust. Get a true-to-scale workflow using just photos & URLs.
Your client approves the mood board, then stalls when it’s time to buy. They like the palette. They like the sofa choice. They still can’t see the room.
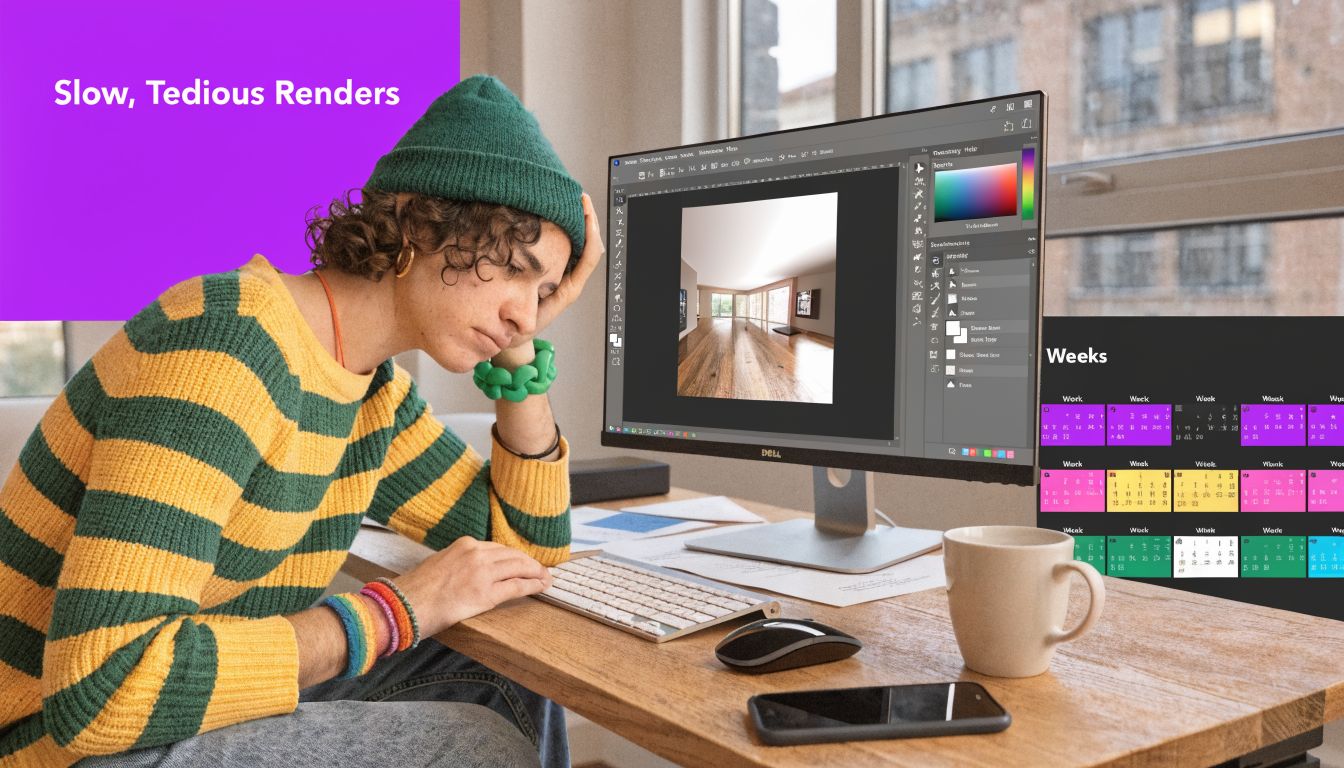
That gap is where most renders interior design work gets slow, expensive, and frustrating. You either build manual mockups that never quite look real, or you hand the job to a 3D specialist and wait while the timeline slips.
The shift happening now is simple. Designers no longer need to choose between speed and realism. They can work from actual room photos, test real products, and present options that look close enough to lived-in photography that clients stop asking, “But what will it really look like?”
The End of Slow, Expensive Interior Renders
A familiar project goes like this. A designer has a strong concept for a living room in a California casual style. The client likes a linen sectional, wants to compare a walnut coffee table against a lighter oak finish, and keeps changing their mind about the accent chair. Every revision means more Photoshop layers, more screenshots, more back-and-forth, and usually less confidence in the final presentation.
That workflow feels dated because it is. The rendering side of design has grown into a major category of its own. The global architectural and interior design 3D rendering market was valued at US$1,904.3 million in 2025 and is projected to reach US$7,581.7 million by 2033, with a projected 19.2% CAGR from 2026 to 2033, according to Grand View Research’s architectural and interior design rendering market outlook. That tells you something important. Visualization isn’t a nice extra anymore. It’s part of how design work gets sold.
Where older rendering workflows break
Traditional renders interior design workflows tend to fail in three places:
- They require specialist software: Many designers know what they want visually but don’t want to spend their week inside heavy 3D tools.
- They slow down product decisions: Comparing one sofa to another should be fast. In practice, it often becomes a mini production cycle.
- They weaken momentum with clients: A delayed visual often creates doubt, even when the design concept is solid.
Practical rule: If a client has to work hard to visualize the room, approvals slow down.
What works better is a workflow that starts from the actual room, keeps product exploration fluid, and makes revisions feel lightweight instead of painful. If you’re still relying on cloud render queues and manual scene building, it’s worth seeing how cloud rendering workflows are changing interior visualization.
Good design direction still matters. Product knowledge still matters. So does judgment about proportion, finish, and where to spend. For broader planning, sourcing, and layout thinking, designers can also lean on expert interior design guidance when they need a grounded reference point before translating ideas into visuals.
Preparing Your Canvas for an AI Masterpiece
The quality of the output starts with the room photo. Not with software settings. Not with prompts. The photo.
A strong source image gives the renderer clean perspective, believable lighting, and enough visual information to place products naturally. A weak photo usually creates avoidable friction. You’ll spend your time fixing preventable problems instead of testing design ideas.

What a usable room photo looks like
You don’t need a professional camera. You do need discipline.
A good room photo usually has a stable angle, visible floor area, and enough wall and ceiling context to read the space. If the room is too cropped, furniture placement tends to feel guessed rather than grounded.
Use this checklist before you upload anything:
- Stand at a corner or near one: That angle usually captures depth better than a flat wall shot.
- Keep the phone level: Tilted verticals make a room feel off before any furniture is added.
- Use even natural light: Midday or soft daylight works better than mixed lamp light and window glare.
- Show the floor clearly: The renderer needs visual context for placement and scale.
- Avoid extreme wide-angle distortion: A dramatic lens may show more room, but it can make proportions harder to trust.
Clean enough beats perfect
Many designers ask whether the room has to be empty. It doesn’t. A lived-in room can still produce strong results.
What matters is whether the main architecture reads clearly. Windows, doors, corners, and circulation paths should be visible enough to understand the space. If a room is crowded with temporary items, though, a cleaner base image usually makes the design exploration faster.
A room photo doesn’t need magazine styling. It needs readable geometry.
That’s why simple prep helps. Move the laundry basket. Clear the dining table if it blocks the view. Open blinds if the room is too dark. Small fixes on the front end make the output feel far more natural.
For teams working from listing photos or casual phone shots, this kind of input discipline matters even more. A practical reference is this guide to using an empty room photo for cleaner interior transformations.
Quick photo triage before you render
If you’re choosing between several room images, use a simple decision table:
| Photo trait | Keep it | Skip it |
|---|---|---|
| Straight vertical lines | Yes | No |
| Bright but not blown out | Yes | No |
| Furniture blocking walls | Sometimes | If it hides most of the room |
| Strong corner perspective | Yes | No |
| Heavy shadows or mixed light | Sometimes | Often |
The fast takeaway is this. Start with a room image that tells the truth about the space. The more honest the photo, the more convincing the final render will feel.
From Product URL to True-to-Scale Reality
The old rendering workflow asks you to build or source a model, assign materials, adjust textures, set lighting, and then hope the object feels right inside the room. That’s manageable for a visualization specialist. It’s a drag for a designer who just wants to answer a simple client question: “How will this actual sofa look in my room?”
The biggest practical change in renders interior design work is the move from manual asset creation to a URL-to-reality workflow. Instead of modeling a product from scratch, you upload a room photo and paste a product link from a retailer page. That means you can test a real West Elm sectional, a Pottery Barn armchair, or a dining table from a boutique brand without rebuilding the piece yourself.
Why the traditional route is so slow
Traditional rendering requires precise measurement, 3D modeling, texturing, and lighting setup, and it often takes 20 to 40 hours per image. The same source notes that even 5 to 10 percent inaccuracies in furniture scaling can lead to client perceptions of clutter or sparsity in 70 to 80 percent of cases, which then creates revisions and delays, according to Twinbru’s breakdown of common 3D interior rendering challenges.
Those numbers line up with what designers feel in practice. The software work isn’t just time-consuming. It creates decision fatigue. Every revision becomes technical.
The URL workflow in plain terms
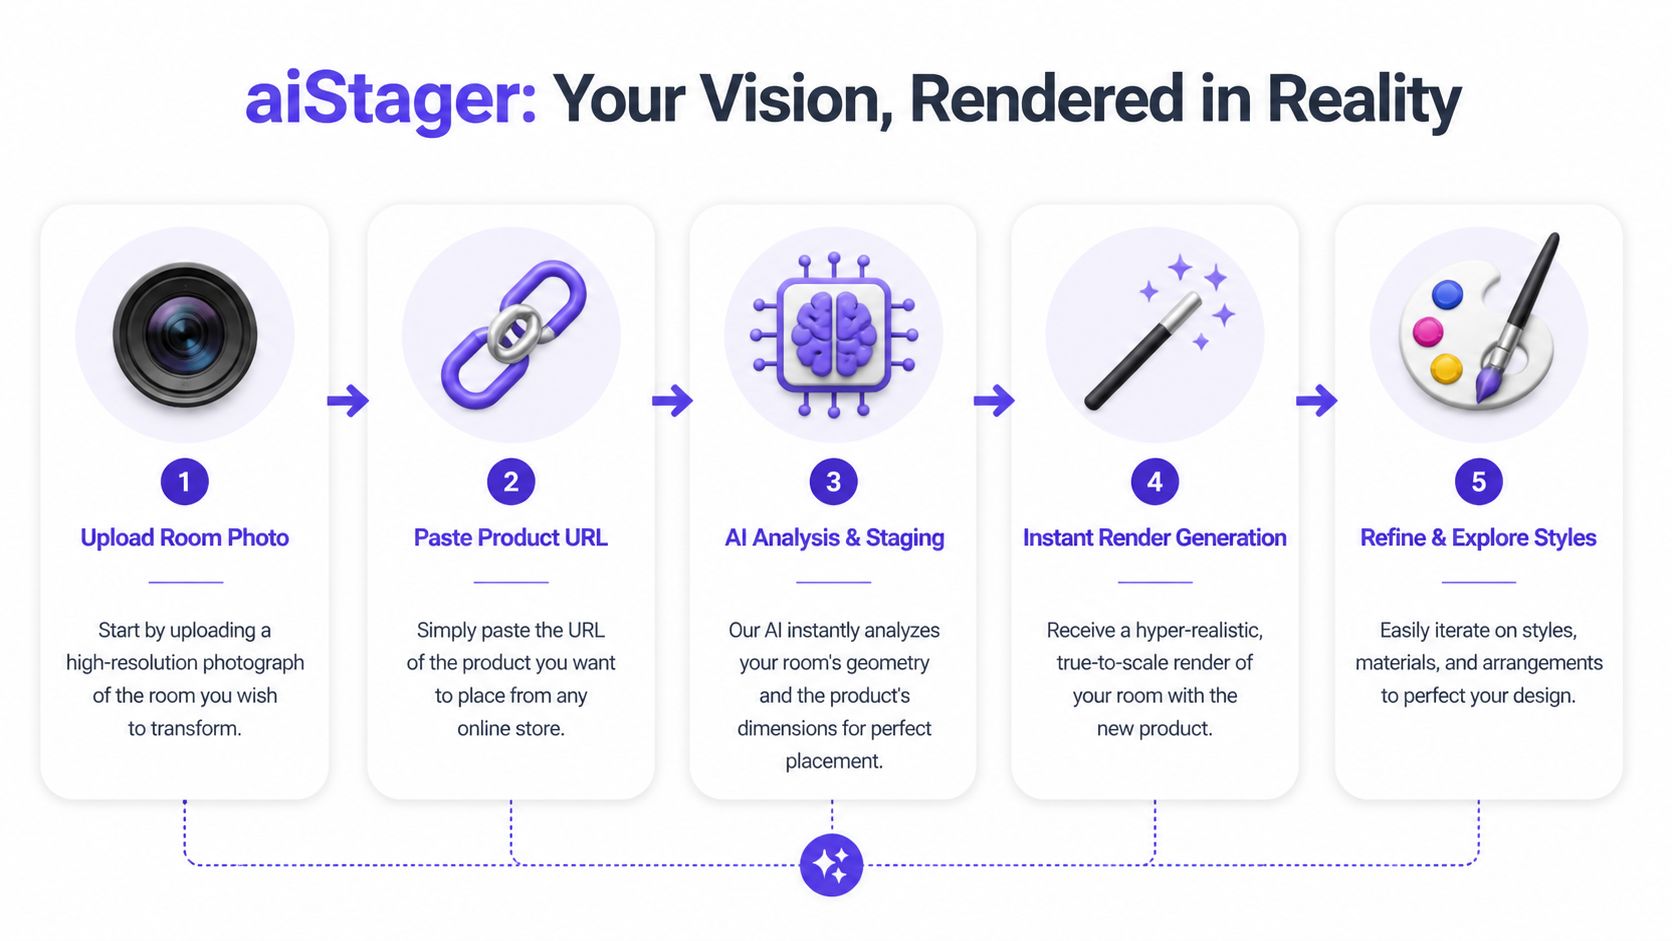
One practical option is aiStager, which works from a room photo and a product URL, pulls the product imagery and dimensions, and renders that item into the actual space at true scale. That changes the job from “build the object” to “evaluate the design.”
The everyday flow looks like this:
Upload the room photo
Use a clear image with visible walls, floor, and perspective.Paste a product link
This can be a real product page, not a handmade 3D file.Let the system place the item
The core value here is dimensional awareness. The object isn’t dropped in as a rough sticker.Review the first render
You check fit, balance, finish, and visual weight.Swap variations quickly
Try another sofa brand. Try the same chair in leather and fabric. Try blackened oak instead of natural oak.
Here’s the product in motion:
The aha moment for most designers is seeing a real retail product sit in the room at believable scale without building a model first.
What this changes in the design conversation
This workflow is especially useful when a client is choosing between near-equivalents. Think of a slipcovered sofa versus a structured track-arm sofa. On a mood board, both can work. In the room, one may block sightlines or feel too heavy against the windows.
A URL-based process lets you test the actual product, not a rough stand-in. That matters when dimensions are close, finishes are nuanced, and the room has little tolerance for proportion mistakes.
It also changes how you source. You can evaluate pieces from multiple brands in the same room without waiting on custom assets. That’s a much better fit for real-world design work, where products change, links update, and client preferences move fast.
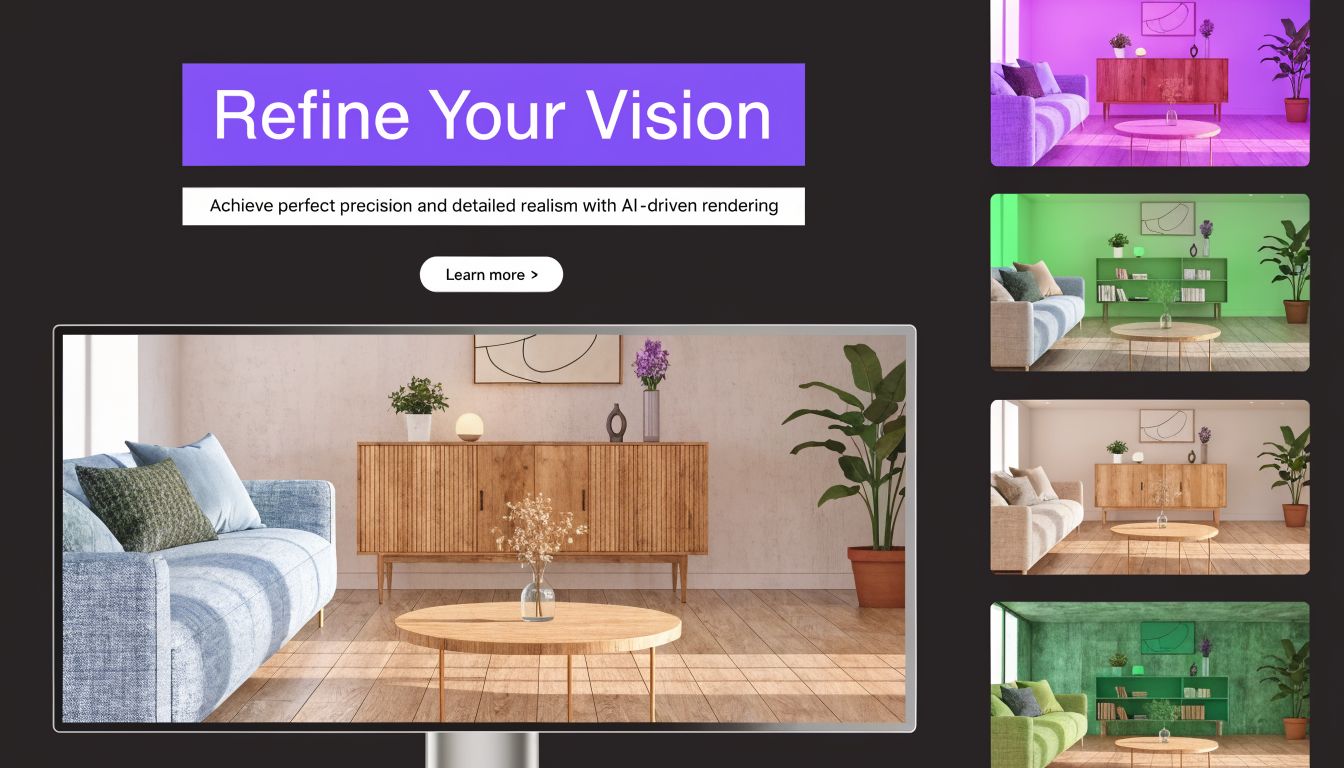
Refining Your Vision with Styles and Variations
The first render answers one question. The next few answer the questions clients ask.
What if the sofa were lighter? What if the room leaned more organic modern than mid-century? What if the wood tone had less red in it? These aren’t edge cases. This is the work.
Compare products like a designer, not a drafter
The useful shift is that you stop treating rendering as a final production step and start using it as a live decision tool.
Say you’re designing a warm contemporary living room for a US client who wants comfort first but still wants the room to photograph well. You might compare a low, relaxed linen sofa against a more structured performance fabric option. Then you test each piece in cream, camel, and olive. In a traditional workflow, that can become a chore. In a fast visual workflow, it becomes normal design exploration.
A few comparisons that tend to reveal a lot quickly:
- Same sofa, different upholstery: Bouclé may look rich in a mood board but too dense in a compact room.
- Same chair, different finish: A black oak frame can sharpen the room, while natural oak may soften it.
- Same layout, different style lens: A room can shift from coastal calm to modern farmhouse with surprisingly small material changes.
Use style presets carefully
Style tools are useful when they help you test direction, not when they flatten the room into a stereotype. “Minimalist,” “Mid-Century Modern,” or “Modern Farmhouse” should act like design starting points, not shortcuts that override the actual architecture.
A better approach is to keep fixed elements stable and vary only a few variables at a time:
| Keep fixed | Test actively |
|---|---|
| Main layout | Sofa silhouette |
| Camera angle | Fabric color |
| Room architecture | Wood finish |
| Rug size | Accent lighting mood |
That method makes feedback cleaner. Clients respond better when they can isolate what changed.
If you want to push visual direction further, this article on AI style transfer for interiors is useful for seeing how style overlays can help with mood exploration without forcing a full redesign.
One good habit: Change one major variable and one minor variable per round. If you change everything at once, clients react to noise instead of design.
Details that turn a render from “good” to useful
The strongest renders interior design teams produce don’t just show furniture. They show intent.
If the room needs art, test it. If the shelves feel blank, add objects with restraint. If the wall is doing too much visual work, simplify it. Designers often underestimate how much a single finishing layer affects buy-in. Even references outside furniture sourcing can help. This guide on choosing living room wall art is a useful reminder that scale, color, and placement matter as much as the piece itself.
One practical pattern I’ve seen repeatedly is this: clients hesitate on furniture when the room still feels unresolved. They decide faster when the scene looks coherent.
That’s why variation testing matters. You’re not just proving that a sofa fits. You’re helping the client recognize their room.
Putting Your Hyper-Realistic Renders to Work
A convincing render is only valuable if it changes a decision. Otherwise it’s decoration.
For interior designers, the immediate use is client communication. A realistic visual makes it easier to approve layouts, explain why one product works better than another, and show what a finish change does to the room. Designers can also use the render inside proposals, concept decks, and revision rounds without rebuilding the entire presentation each time.
Three professional use cases
Interior design studios use renders to reduce ambiguity. If a client is split between two dining tables or unsure whether a sectional is too deep, a realistic room-specific image usually resolves the debate faster than sketches and swatches alone.
Furniture retailers can use room-based visuals to help shoppers evaluate fit before purchase. A product page tells you dimensions. A room-specific render tells you whether the piece dominates the wall, leaves enough circulation, or visually fights the rug.
Real estate teams use staged visuals to make empty spaces legible. An unfurnished room often feels smaller and less useful in listing photos. A furnished image gives buyers a clearer sense of how the room lives.
The expectation problem nobody should ignore
There’s one trade-off professionals need to handle carefully. Clients can become too attached to the render.
The documented challenge is straightforward: clients often develop unrealistic expectations from polished visualizations, and the gap between render quality and real-world budget, material availability, and lighting conditions can create friction if nobody addresses it early, as discussed in Interior360’s overview of rendering and visualization in interior design.
That doesn’t mean you should soften the render. It means you should frame it properly.
Use language like this in presentations:
- Material note: Final fabric dye lots and wood grain variation may differ.
- Lighting note: Daylight, bulb temperature, and window orientation affect the room more than any static image can show.
- Procurement note: If a product goes out of stock, a substitute may be required.
- Budget note: The render shows design intent, not a locked purchasing guarantee.
A render should function like a high-clarity communication tool. It shouldn’t be treated as a construction promise.
That framing is especially important when you’re moving quickly. The faster your visuals get, the more disciplined your client communication needs to be.
Exporting Your Vision and Best Practices
The handoff matters almost as much as the render itself. If the image is going into a client deck, a product page, or a property listing, export choices should match the job.
For web use, keep the set consistent. Use the same camera angle for comparison slides, and avoid mixing lighting moods unless you’re intentionally showing alternatives. For print or premium presentations, higher-resolution outputs are worth using because fine material differences are easier to read when clients zoom in or review on larger screens.
A simple operating system for better outputs
Teams usually get cleaner results when they treat product links and render setups like reusable assets.
- Save winning product URLs: Build a shortlist of sofa, chair, table, and lighting links you return to often.
- Name versions clearly: “Cream linen option” is better than “final-final-2.”
- Export comparisons in pairs or trios: Clients make better decisions when the options are structured.
- Check lighting before sending: A daytime room and an evening room can change how a finish reads.
- Keep one approval image and one working image: One is polished for presentation. One stays flexible for edits.
The mistakes that cost the most
Expert analyses show that 60 to 75 percent of rendering failures stem from scaling errors and material mismatches, and in traditional commercial projects those issues can lead to post-installation rework costing 10 to 20 percent of the project budget, according to Genense’s analysis of precise 3D renderings in commercial interiors.
That’s why dimensionally aware workflows matter so much in practice. The visual has to do more than look good. It has to hold up as a decision-making tool.
The designers who get the most from renders interior design workflows usually do three things well. They start with a clean room photo. They compare real options instead of abstract stand-ins. And they communicate clearly about what the image represents.
If you want a faster way to turn room photos and product links into realistic, dimension-aware visuals, aiStager is worth trying for client presentations, furniture comparisons, and virtual staging workflows.