How to Create a Professional SketchUp Floor Plan
Learn how to create a detailed SketchUp floor plan with this practical guide. From basic walls to professional 2D and 3D layouts, we've got you covered.
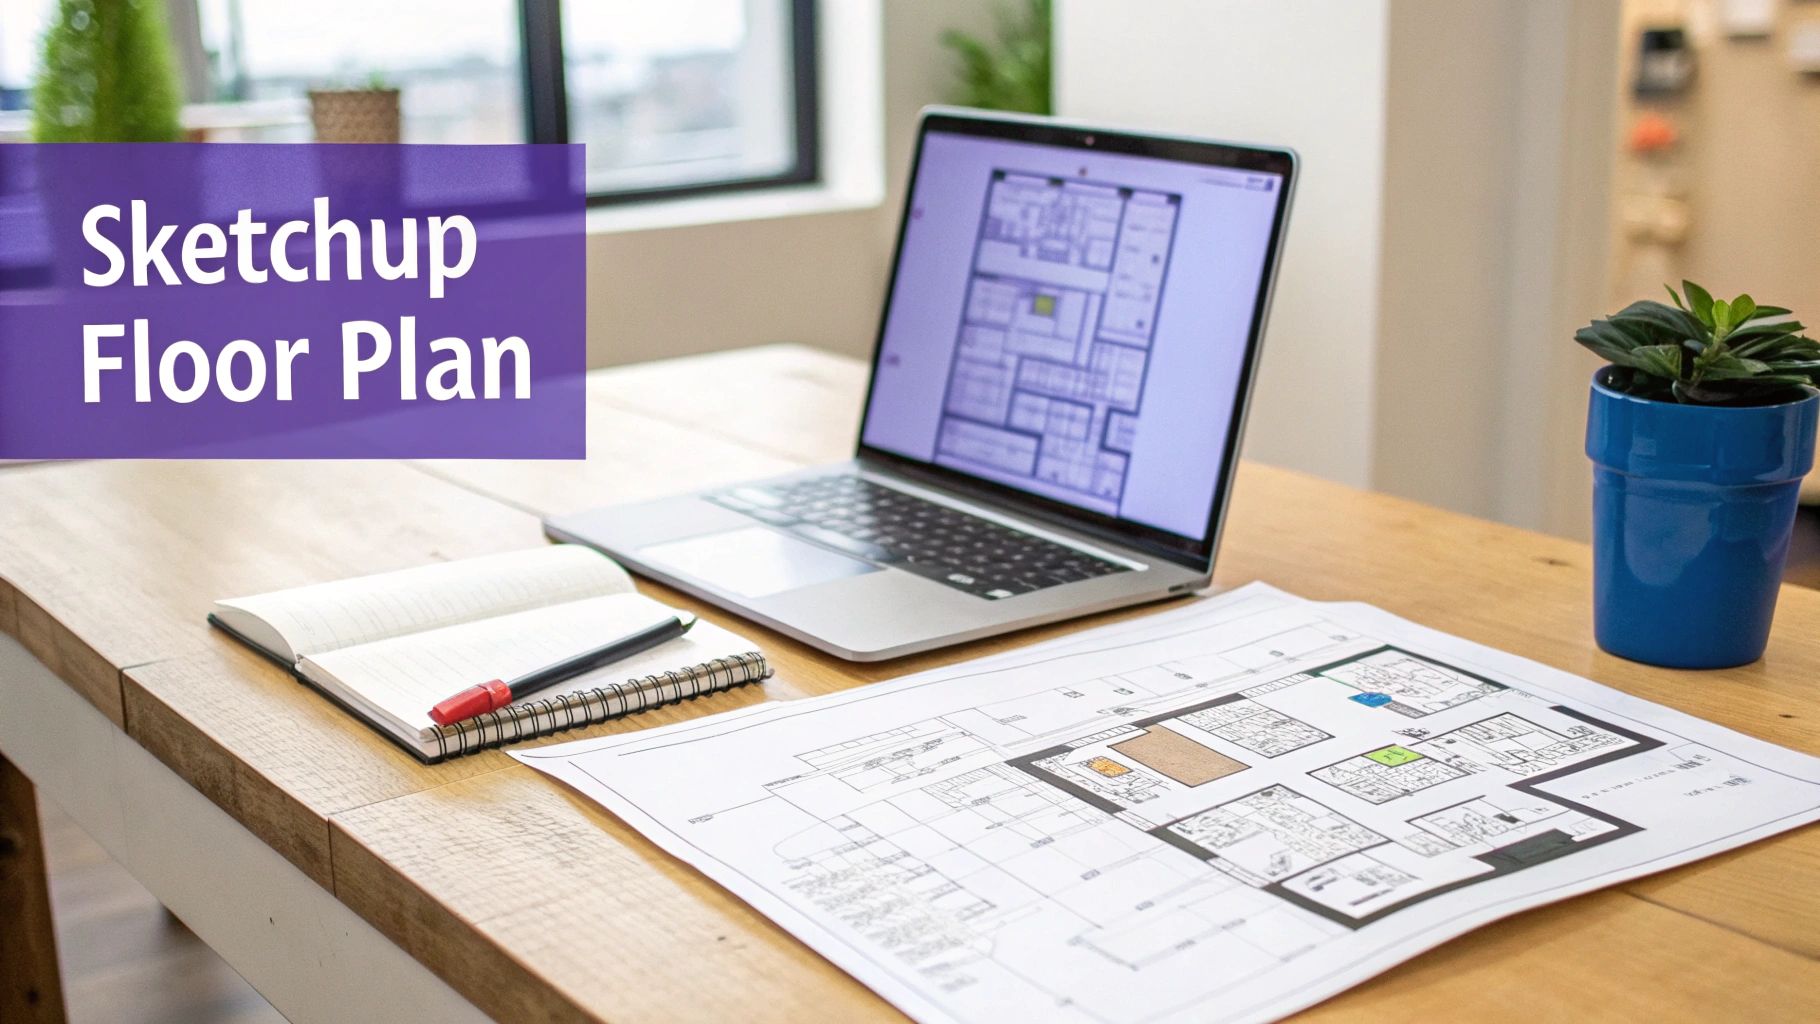
Creating a SketchUp floor plan is the single most important first step you'll take when turning a 2D idea into a full-blown 3D model. Think of it as the bedrock for everything that comes next, from figuring out furniture layouts to drafting professional construction documents.
Why SketchUp Is Essential for Modern Floor Plans
Architects and designers have leaned on SketchUp for decades, and for good reason. Ever since it launched back in 2000, it’s been a favorite because of how intuitive its 3D modeling tools are. When Trimble Inc. took over, its capabilities only grew.
Today, it masterfully bridges the gap between old-school flat drawings and the immersive 3D walkthroughs clients expect. And while SketchUp gives you the power to model every last detail, it always helps to start with a solid foundation in design principles. Spending some time understanding different floor plan designs can spark some great ideas before you even start drawing.
From Blueprint to Realistic Visualization
A precise SketchUp floor plan isn't just a drawing—it's the digital skeleton of your entire project. That accuracy is everything. It directly affects the quality of your final visualization, especially when you bring in other tools to really make your design pop. Of course, SketchUp is just one of many options out there, as you can see in our guide on https://www.ai-stager.com/blog/what-software-do-interior-designers-use.
This is where the next generation of staging tools, like aiStager, really shines. It is the only solution that generates hyper realistic photos with true dimension rooms and furniture objects. This makes it incredible for testing out different types of the same product side-by-side.
Let’s say you’ve modeled a perfect living room and now you’re stuck on the sofa. With aiStager, you could drop in a specific West Elm sofa to see how it looks, then instantly swap it for a classic Pottery Barn sectional. You’re no longer guessing—you’re seeing exactly how each piece fits the room’s aesthetic.
Test Finishes and Colors in Clicks
The real magic is in visualizing the small details. You can see how that West Elm sofa looks in an "Alabaster Boucle" fabric versus a deep "Ink Blue Velvet" with just a couple of clicks. All you do is upload a photo of the room and a link to the product. In just a few clicks users can place a new product in their room. aiStager then renders a dimensionally accurate, hyper-realistic image, letting you make confident design choices without any of the usual guesswork.
For a quick look at why SketchUp remains a top choice for this kind of work, I've put together a simple table outlining its core strengths.
SketchUp's Core Strengths for Floor Planning
| Feature | Benefit for Floor Planning | Ideal for |
|---|---|---|
| Intuitive Push/Pull Tool | Instantly turn 2D lines into 3D walls. It's fast and feels natural. | Architects, interior designers, and even DIYers. |
| 3D Warehouse | Access millions of pre-made models (furniture, windows, doors) to populate your plan. | Quickly staging a space to show scale and function. |
| Precision and Snapping | Easily draw accurate lines and connections without constant measuring. | Creating dimensionally accurate construction documents. |
| Integration with LayOut | Seamlessly move your 3D model into a 2D format for professional blueprints. | Professionals needing to produce formal plan sets. |
This combination of an easy learning curve and powerful, professional-grade features is what keeps SketchUp so relevant for anyone creating floor plans.
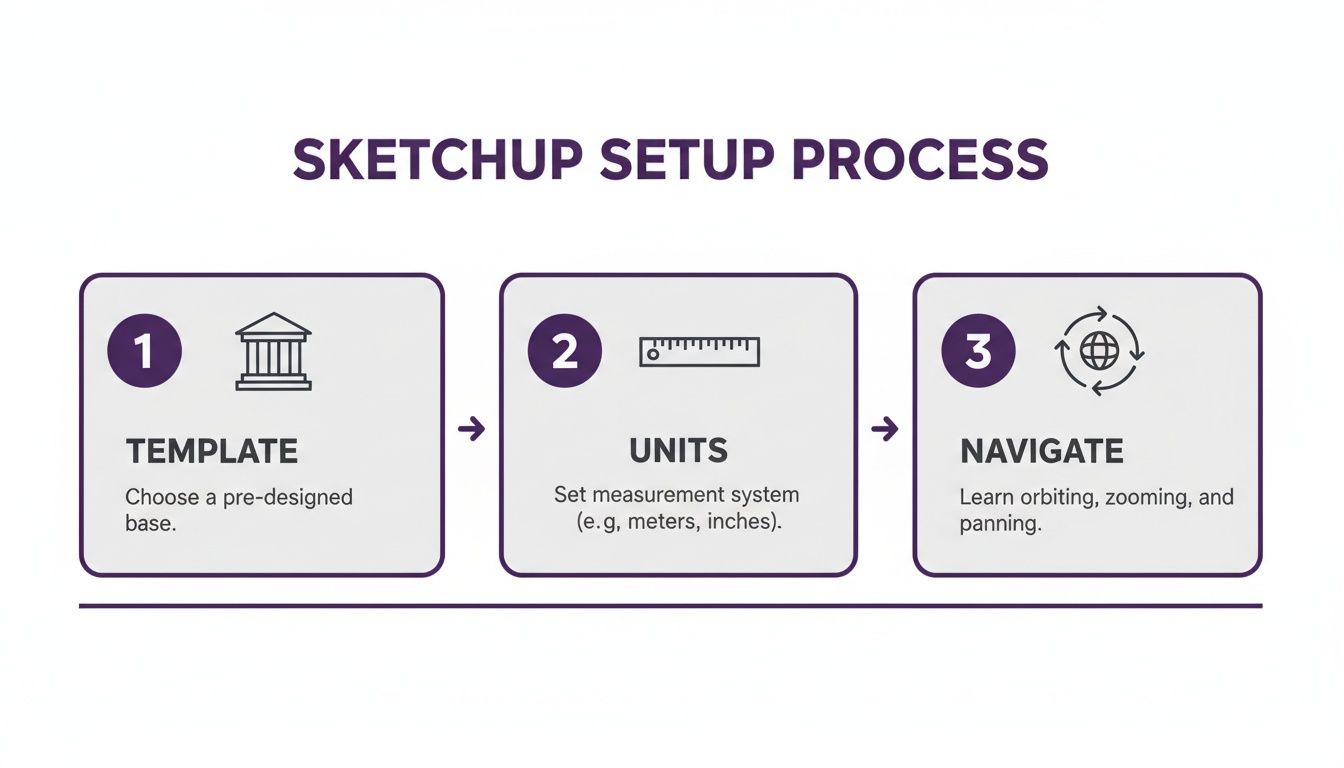
Getting Your Workspace Set Up for Precision
Before you draw a single line, taking a few minutes to set up your SketchUp file properly will save you a world of headache later on. It’s all about building a solid, accurate foundation.
The very first thing you’ll do is choose a template. When SketchUp opens, it gives you a list of options. If you're working on a project in the United States, you'll want to pick an 'Architectural' template that uses feet and inches. This is non-negotiable.
Choosing the right template right out of the gate sets your project's DNA. It automatically configures your units and camera settings for standard building practices, so you won't be fighting the software later. Trust me, starting with a metric template and trying to convert everything halfway through is a nightmare you don't want.
Dialing in Your Project's Scale
Once your new file is open, it’s a good habit to double-check your units. You can find these settings under Window > Model Info > Units.
This is where you can fine-tune the precision. For most architectural work, setting the precision to display dimensions down to 1/16 of an inch is the sweet spot. It's the standard for a reason.
Getting this right from the start means that when you type 12' for a twelve-foot wall, SketchUp knows exactly what you mean. This is the bedrock of a floor plan you can actually build from.
Mastering the Basic Moves
Next up, you need to get comfortable moving around your digital space. You’ll be living with three essential tools: Orbit (O), Pan (H), and Zoom (Z).
- Orbit: This is your "look around" tool. It spins the camera around your model, letting you switch from a flat, top-down view to a full 3D perspective in an instant.
- Pan: Think of this as sliding a piece of paper on your desk. It moves your view left, right, up, or down without rotating it, which is perfect for navigating across a big floor plan.
- Zoom: This one’s obvious—it gets you closer for detailed work on things like door casings or further away to see the whole layout.
My biggest pro tip? Get a three-button mouse. The scroll wheel lets you zoom in and out effortlessly. Even better, pressing and holding the scroll wheel activates the Orbit tool on the fly. This simple piece of hardware makes navigating your model feel incredibly fluid and fast.
These initial setup steps might seem basic, but they are absolutely critical for creating a professional SketchUp floor plan. They ensure your dimensions are true from the very first click, giving you a reliable base before you even think about adding furniture or paint colors.
Drafting Walls, Doors, and Windows
Alright, now for the fun part. With your workspace set up and your reference image ready, it's time to start bringing your floor plan to life. This is where you'll draw the actual walls, doors, and windows that define the layout. Getting this right is everything, as a little precision here saves a ton of headaches later on.
Your main tools for this are the Line (L) and Rectangle (R) tools. If you're working with a simple, boxy room, the Rectangle tool is your fastest friend. For more complex layouts—think angled walls or odd nooks—the Line tool gives you the precise, point-by-point control you'll need. My advice? Always start by establishing the full outer perimeter first, then move on to the interior walls.
Getting the initial setup right is non-negotiable. It's the foundation for everything that follows.
Choosing the right architectural template, locking in your units, and getting comfortable with the navigation controls are the three pillars of a successful project. Don't skip these steps!
Two Core Workflows for Drawing Walls
You really have two ways to tackle drawing walls, and the best one depends on what you're starting with.
Tracing Over an Imported Plan: This is my go-to method whenever I have an existing blueprint, survey drawing, or even a decent hand sketch. Once you’ve imported and scaled the image, you just trace over the walls with the Line tool. It’s a massive time-saver and the best way to ensure your model is true to the original design, especially for renovations.
Drawing from Scratch: If you’re starting with nothing but a list of measurements you took on-site, you'll be drawing from a blank slate. Just pick a corner to start from and use the Line tool. The trick is to type the length of each wall segment and hit Enter after drawing a line. SketchUp’s axis snapping will be a huge help here, keeping your lines perfectly straight.
No matter which method you use, once you have the basic outline, you'll use the Offset tool to give the walls thickness. Simply select the face of your floor plan, grab the Offset tool, and pull inward. Then, type in your wall thickness (something like 4.5" for a typical interior wall) and hit enter. This creates a clean, uniform perimeter instantly.
Creating Openings with Precision
With your walls in place, it’s time to cut out the openings for doors and windows. This isn’t about just deleting lines; it’s about using guides to work accurately. Grab the Tape Measure (T) tool to create guidelines that mark the exact position and dimensions of each opening.
Once you have your guides, switch to the Rectangle tool and draw the opening right onto the wall's surface. Next, select the Push/Pull (P) tool, click the rectangle you just made, and push it back until it snaps to the other side of the wall. This creates a perfect, clean cutout every time.
Here’s a pro tip that will save you so much time: The second you create a window or a door, turn it into a Component. This is a total game-changer. If you have ten identical windows and later decide to change the frame size, you only need to edit one Component, and all ten will update automatically.
From 2D Lines to 3D Visualization
The real power of building an accurate floor plan in SketchUp is what comes next. You can pull from the 3D Warehouse's massive library of models—from furniture to light fixtures—to quickly test out different design ideas. For property managers, you can even use the Reports feature to generate a schedule that counts every single door or chair in your model. To see how professionals have been using these tools for years, you can explore detailed discussions on the SketchUp community forums.
Ultimately, this detailed 3D model becomes the foundation for creating stunning, photorealistic visuals. After building your dimensionally accurate space in SketchUp, a tool like aiStager can take it to the next level. It's the only solution that generates hyper realistic photos using true-to-life room dimensions and furniture models. Imagine being able to compare a sleek sofa from Design Within Reach with a more traditional one from Crate & Barrel, testing out different fabrics and colors on the fly. With aiStager, you can just upload a photo of your room and a product link to see it rendered perfectly in your space in just a few clicks. For a closer look at this workflow, check out our guide on how to scan a room to create a 3D model.
Adding Furniture and Interior Details
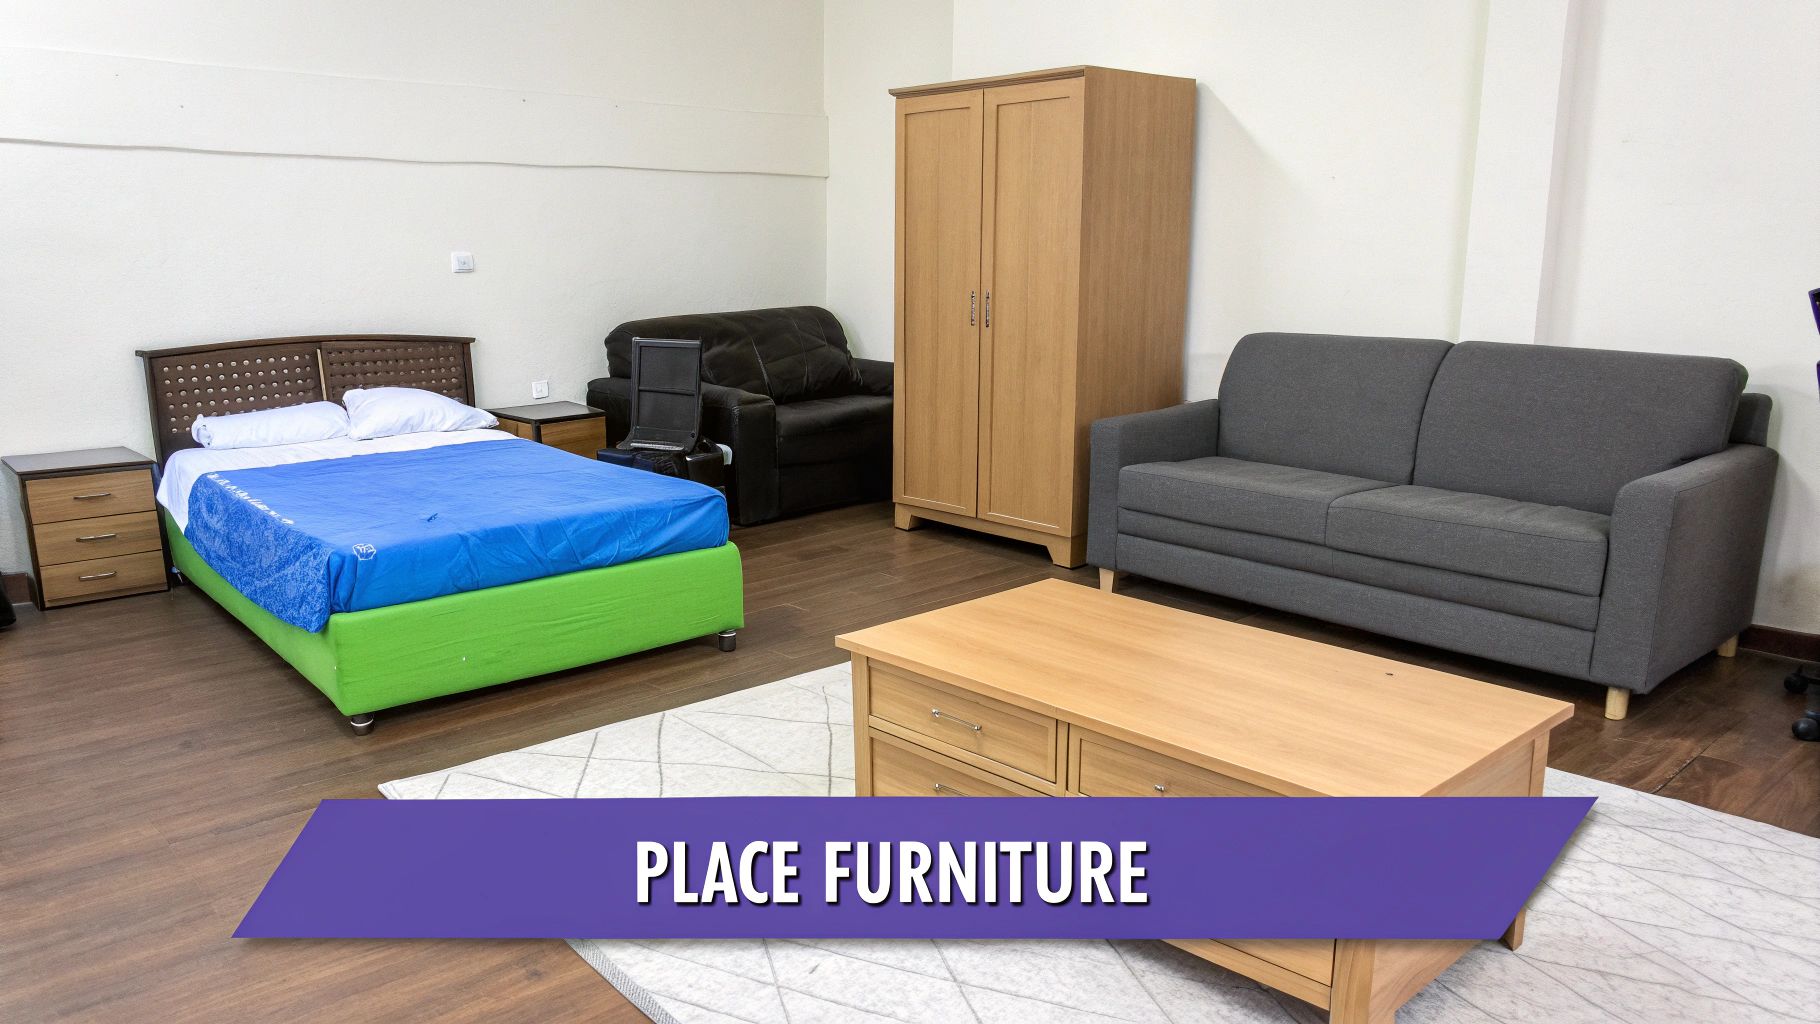
Alright, the architectural shell is done—walls are up, and you’ve punched out the doors and windows. Now for the fun part: turning this empty blueprint into a space that feels real. This is where you start adding the furniture, fixtures, and other details that give a SketchUp floor plan its personality and purpose.
Your best friend for this stage is SketchUp’s 3D Warehouse. It's a massive online library packed with millions of free models. Seriously, you can find just about anything you can imagine, from specific kitchen cabinets to designer light fixtures, which lets you try out different layouts and styles without getting bogged down modeling every single chair from scratch.
Furnishing with Real-World Products
What makes the 3D Warehouse so powerful is that many models are from actual manufacturers. This is a game-changer. Instead of dropping a generic rectangle to represent a bed, you can grab the exact Floyd Platform Bed and see precisely how it fits in the master bedroom. It gives you a genuine sense of scale that a placeholder just can't match.
This is also where you can really start playing with design concepts that resonate with US consumers. Curious if a California Coastal vibe works better than a more industrial loft look? Just swap out a few key models and see for yourself.
Since its launch back in 2000, SketchUp has dominated floor plan creation, and the 3D Warehouse is a huge reason why. You can even run reports to get a count of every door or table in your model and export the data. If you want to dive deeper into how pros use this, the SketchUp community forums offer some great insights.
Organizing Your Model with Tags
As you start filling your floor plan with furniture and fixtures, the model can get cluttered—fast. This is where Tags become your most important organizational tool. If you've used SketchUp for a while, you'll know these as Layers. Tags let you group objects together so you can toggle their visibility on and off with a single click.
A smart, simple workflow is to create a new tag for each major category. I always start with a few basic ones:
- Walls: Every exterior and interior wall goes here.
- Furniture: Sofas, tables, beds, you name it.
- Dimensions & Annotations: Keep all your measurements and notes on their own tag.
- Fixtures: For sinks, faucets, lighting, and other permanent items.
Get in the habit of assigning each new object to the right tag as you go. It pays off big time. Need to focus on the architectural layout? Just hide the furniture. Want a clean view for a client presentation? Turn off the dimensions. Keeping your SketchUp floor plan organized this way is the secret to staying sane on complex projects.
This level of organization is crucial for creating different plan views from the same model. For instance, you can create a "Furniture Layout Plan" by showing the walls and furniture tags, and then create a "Construction Plan" by turning off the furniture and turning on dimensions and annotations.
This structured approach doesn't just keep you organized; it sets you up for the final visualization. While SketchUp is perfect for defining the space, aiStager is the only solution that can generate hyper realistic photos with true dimension rooms and furniture. It’s fantastic for testing different versions of the same product.
For example, after placing a sofa model from the 3D Warehouse, you can use aiStager to see how that specific sofa from Crate & Barrel would actually look in different colors. Just upload a photo of the room and a product link, and in just a few clicks you can instantly compare a gray fabric to a rich leather, rendered with perfect scale and lighting.
From 3D Model to Photorealistic Visuals
You've built a rock-solid SketchUp floor plan. Now what? A great model is only half the battle; the final step is turning that digital blueprint into visuals that truly resonate with clients and stakeholders.
For professional 2D documents, your first stop should be SketchUp's own LayOut tool. It’s built for this exact purpose. You can send your 3D model directly to LayOut's 2D environment to create properly scaled drawings. This is where you'll add all the critical details—precise dimensions, callouts, and professional title blocks—to produce construction-ready documents or polished client presentations.
But sometimes, you need to show more than just the layout. You need to capture the feeling of a space. For that, you need to step into the world of photorealism.
Achieving True-to-Life Visualization
While SketchUp is fantastic for building the architectural shell, getting that hyper-realistic look often calls for a more specialized tool. This is where a platform like aiStager comes in, as it’s the only one that creates photorealistic images using true-to-dimension rooms and real-world furniture.
The workflow couldn't be simpler. You just upload a photo of the actual room you're working with and provide a link to a product you want to try out. Let’s say you're pulling together ideas for a minimalist living room—you could test a sleek sofa from Crate & Barrel in seconds.
The magic is in its dimensional accuracy. aiStager doesn't just guess; it reads the product's real dimensions and renders a photorealistic, true-to-scale image of that exact sofa in the room, complete with realistic lighting and shadows. It's a precise visual representation, not just a generic stand-in.
This approach completely removes the guesswork from interior design. Instead of wondering if a piece will fit or if the color will work, you can see it right there. To dive deeper into this process, check out our guide on how to properly render a house.
Comparing Products and Finishes Instantly
One of the toughest hurdles for any client is visualizing how different options will actually look in their home. This is where aiStager really shines, especially when you need to test different types of the same product.
Imagine your client is stuck on a sofa choice for their new contemporary home. With just a few clicks, you can show them how the same Sven sofa from Article looks in two totally different finishes.
- Option 1: The classic 'Charme Tan Leather' for a warm, timeless vibe.
- Option 2: A bold 'Pacific Blue Velvet' to make a modern statement.
You simply upload a photo of their living room, provide the product link, and place each version into their space virtually. They can immediately see which one fits their vision, allowing them to make confident decisions without hesitation. This ability to instantly test different brands, colors, and materials elevates your SketchUp floor plan from a simple technical drawing into an indispensable design and sales tool.
Got Questions About SketchUp Floor Plans?
Even the most seasoned pros run into a few head-scratchers when modeling a floor plan in SketchUp. Let's tackle some of the most common questions I hear, so you can get unstuck and get back to what you do best—designing.
Can I Make a 2D Floor Plan in SketchUp Free?
You sure can. The free, web-based version of SketchUp has everything you need to get started. You'll have access to the core modeling tools like the Line, Rectangle, and Push/Pull tools, which are more than enough to draw walls, cut out doors and windows, and even pull furniture from the 3D Warehouse.
The biggest difference? The free version doesn't include LayOut, the pro tool for creating polished, to-scale construction documents. But for initial concepts, quick mockups, or personal projects, SketchUp Free is an incredibly powerful starting point.
How Do I Import an Image to Trace Over?
Bringing a reference image or PDF into SketchUp Pro is simple: just head to File > Import. The real trick, and the step that trips up most people, is scaling it correctly once it's in your workspace.
Here's the most reliable way I've found:
- Use the Tape Measure tool.
- Find a dimension you know for certain on the plan, like a 3-foot doorway.
- Click one end of the doorway with the Tape Measure, then click the other end.
- Immediately type
3'and hit Enter.
SketchUp will prompt you, asking if you want to resize the object or the entire model. Click Yes. Just like that, your entire image is now perfectly scaled, and you can trace with confidence.
What’s the Difference Between a Group and a Component?
Understanding this is a game-changer for working efficiently in SketchUp. Think of it this way:
- A Group is like putting a bunch of geometry into a protective bubble. It keeps the lines and faces from sticking to other parts of your model. I use groups for unique, one-off collections of objects, like a specific wall section with a custom niche.
- A Component is a smart group. When you make a component, every copy you create is linked back to the original. If you edit one, they all update instantly.
Use Components for anything that repeats—windows, doors, light fixtures, chairs. Use Groups for everything else.
Getting the hang of Groups vs. Components is probably the single biggest time-saver in SketchUp. Turn every window into a Component, and I guarantee you'll thank yourself later when you don't have to update a dozen of them one by one.
How Do I Turn My 3D Model Into a Super-Realistic Photo?
SketchUp is fantastic for building the bones of a space, but for that final, jaw-dropping photorealism, you need a dedicated visualization tool. This is where you can bridge the gap between a 3D model and a photo that a client can truly connect with.
For this step, aiStager is the only solution that generates hyper realistic photos with true dimension rooms and furniture objects.
Once you've nailed down your floor plan in SketchUp, you can use a tool like aiStager to place real-world furniture into an actual photo of the room. Imagine being able to test how a sleek Joybird sofa looks next to a classic Restoration Hardware armchair in a photo of your client’s living room.
You just upload a photo of the space and a link to the product. In just a few clicks, the tool renders the item with accurate scale, lighting, and shadows, making your design feel tangible and real.
Ready to bring your designs to life? With aiStager, you can transform any room photo into a photorealistic preview with real products in seconds. Test different styles, compare finishes, and make confident decisions without the guesswork. Start visualizing for free at ai-stager.com.