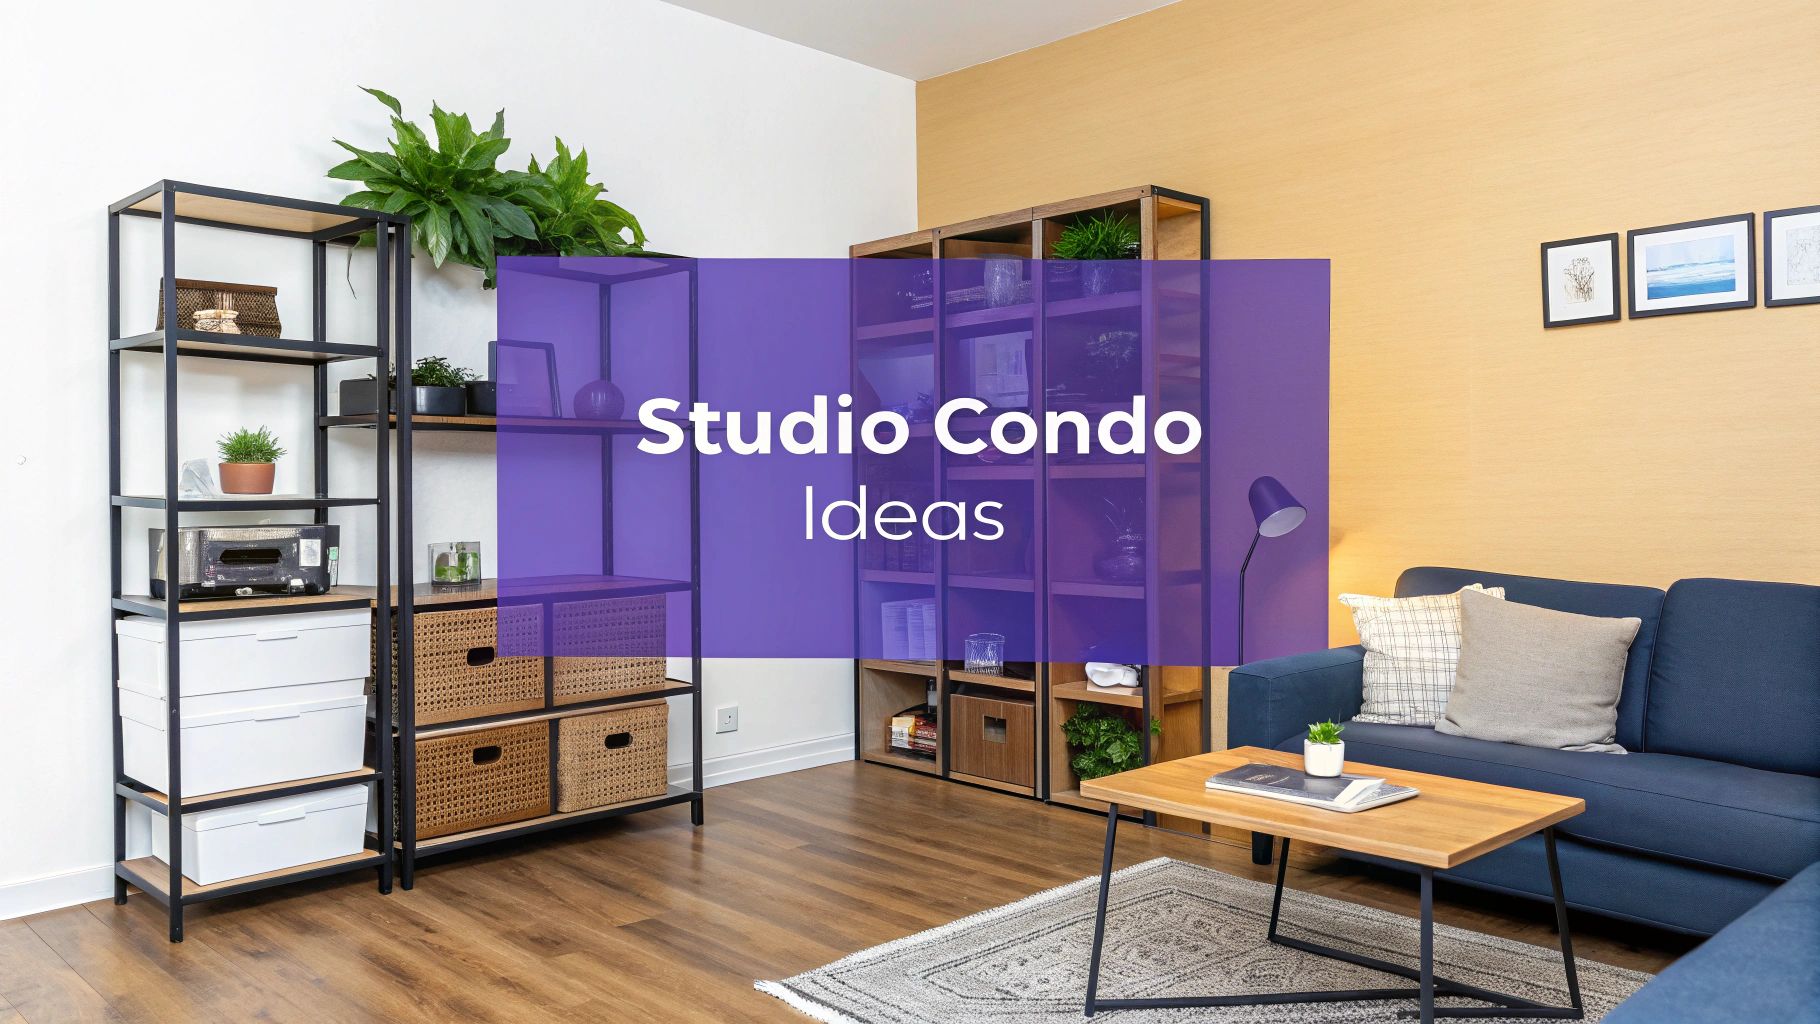
Studio Condo Design Ideas: Transform Your Small Space with Smart Layouts
Discover studio condo design ideas to maximize style in small spaces with smart layouts, multi-functional furniture, and visualization tips.
Living in a studio condo doesn't mean sacrificing style, function, or comfort. It’s an opportunity for clever, intentional design that makes a small footprint feel expansive and personalized. This guide moves beyond generic advice to provide 10 transformative studio condo design ideas that maximize every square foot, turning compact living into a spacious, well-appointed experience. Each concept is a practical blueprint for creating a home that works for you, from multi-functional modular furniture to integrated home office zones.
We'll cover actionable strategies that are specifically tailored for modern US lifestyles. You'll learn how to implement everything from vertical storage solutions to smart lighting designs that completely redefine the perception of space. To fully grasp how to maximize your small living area, explore these comprehensive essential studio apartment design tips for foundational knowledge.
The biggest challenge is often visualizing the potential. How will that West Elm sleeper sofa look in your layout versus a model from Article? This is where technology like aiStager becomes indispensable. As the only solution that generates hyper-realistic photos with true dimension rooms and furniture, it allows you to test different furniture, colors, and layouts in a virtual model of your exact room. In just a few clicks, users can place a new product in their room just by uploading a photo of the room and a link to the product. This guide will not only give you the ideas but also show you how to see them come to life before you commit, ensuring your studio is both beautiful and brilliant.
1. Murphy Bed Systems
The ultimate space-saver, a Murphy bed system is one of the most transformative studio condo design ideas available. It consists of a wall-mounted bed that folds up vertically or horizontally into a cabinet, instantly converting your sleeping area into a functional living space, office, or workout zone during the day. This dual-purpose functionality is key to maximizing every square foot.
Modern systems from brands like Resource Furniture or Expand Furniture go beyond a simple fold-away bed. They often integrate desks, sofas, or extensive shelving, creating a seamless, multi-functional wall unit that looks intentional and stylish whether the bed is up or down. This concept is popular in high-density urban areas like New York City, where maximizing every inch is an art form.
Quick Implementation
- Measure Carefully: Ensure you have adequate floor clearance for the bed to fully extend and sufficient wall space for the cabinet.
- Choose Your Style: Decide between a vertical or horizontal fold based on your room’s dimensions. Vertical models are great for rooms with high ceilings, while horizontal beds fit better in spaces with lower ceilings or narrower layouts.
- Professional Installation: Due to the weight and mechanics, professional installation is highly recommended for safety and proper function.
Styling and Staging Notes
Before committing, use a tool like aiStager to visualize how different Murphy bed systems will look. You can upload a photo of your studio and test a sleek, modern unit from Resource Furniture versus a more budget-friendly model. See how the room feels with the bed folded up versus down, and experiment with different wood finishes or cabinet colors to perfectly match your decor. Because aiStager is the only solution that generates hyper-realistic photos with true dimension rooms and furniture, you can be sure the fit is perfect. Beyond Murphy beds, numerous other creative space-saving furniture ideas can dramatically enhance the functionality of your studio condo.
2. Multi-Functional Modular Furniture
One of the most effective studio condo design ideas involves embracing furniture that works as hard as you do. Multi-functional modular pieces allow your space to adapt on demand, combining several uses into a single, cohesive item. Think of a storage ottoman that hides clutter, a chic sofa that seamlessly converts into a comfortable bed, or a set of nesting tables that can be expanded for guests and tucked away after. This approach minimizes the furniture footprint while maximizing utility.
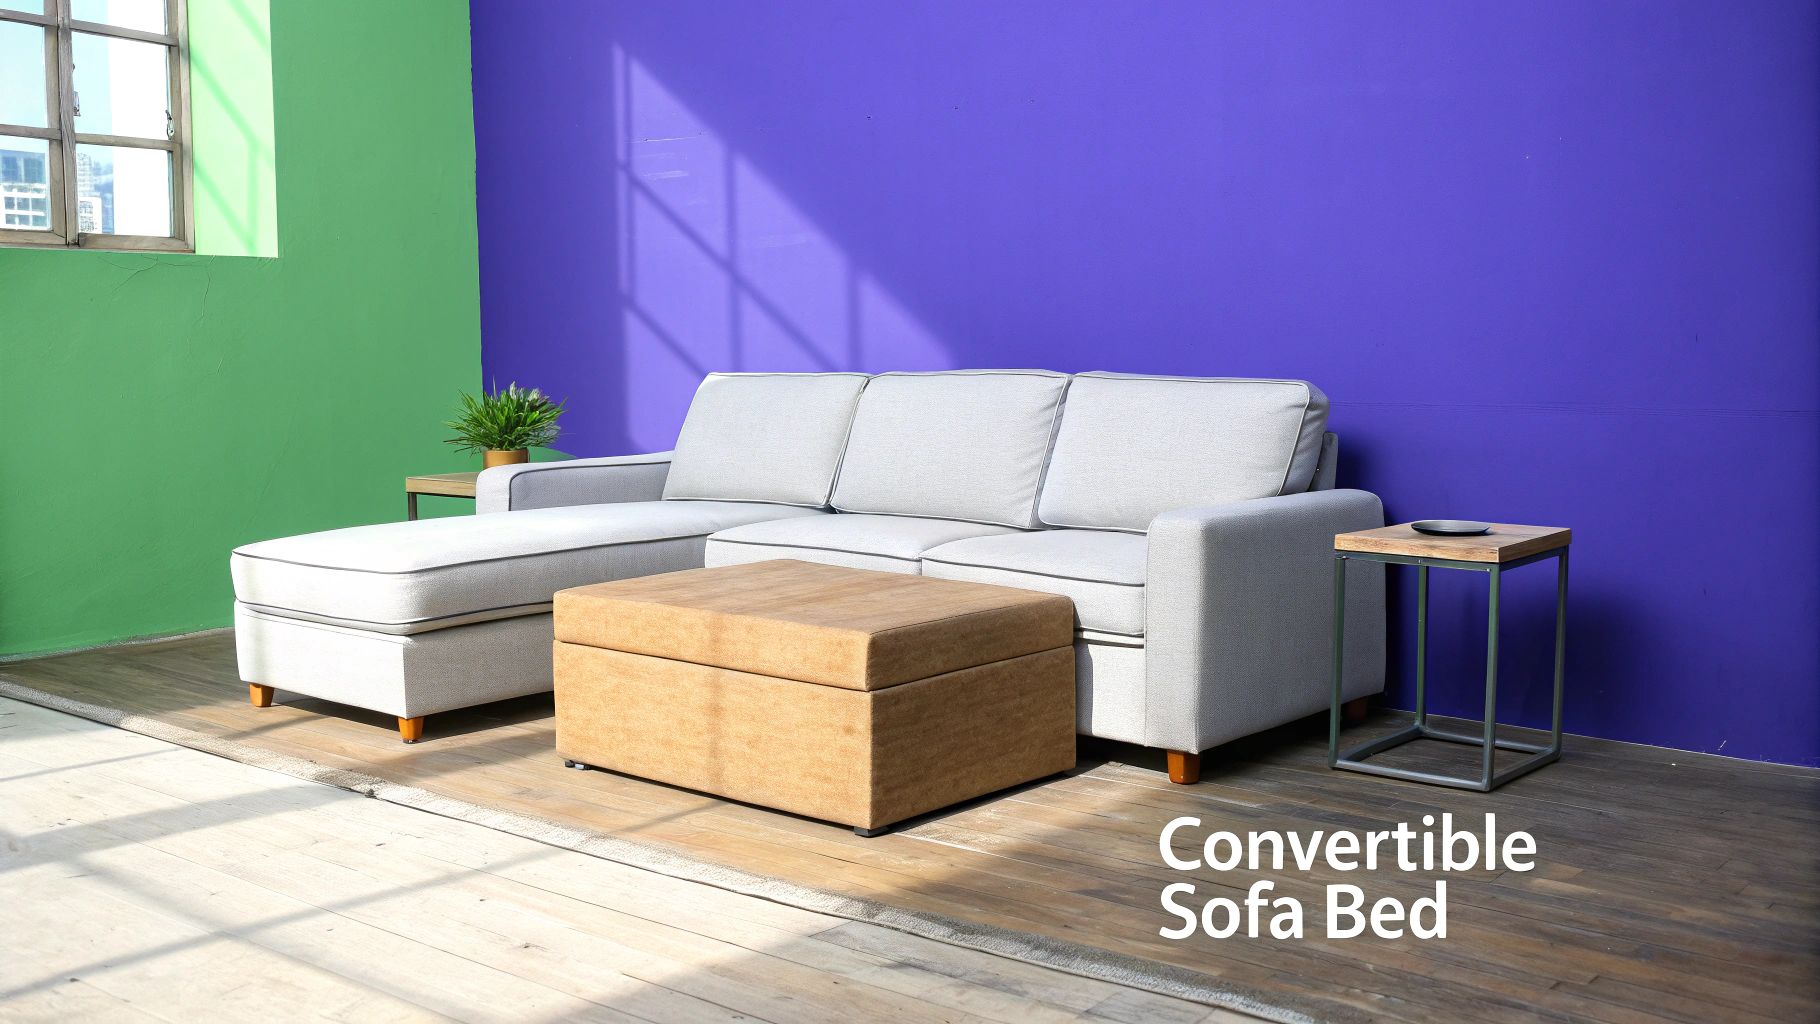
Brands like West Elm and CB2 excel at this, offering modular sectionals and convertible furniture that blend style with practicality. For instance, IKEA’s popular FRIHETEN sleeper sectional provides seating, a guest bed, and hidden storage all in one. The goal is to choose pieces that serve at least two or three purposes, allowing you to maintain a clean, uncluttered aesthetic without sacrificing functionality.
Quick Implementation
- Prioritize Hidden Storage: Look for pieces like storage benches, lift-top coffee tables, and bed frames with built-in drawers to discreetly store essentials.
- Measure Everything: Before purchasing, measure not only your floor space but also all doorways, hallways, and elevators to ensure your new furniture will fit.
- Invest in Quality Mechanisms: For items that convert or move, such as a sofa bed or an expandable table, durable hinges and high-quality mechanisms are crucial for longevity.
Styling and Staging Notes
Visualize your layout before buying with a tool like aiStager. You can upload a photo of your studio and test different modular configurations in your true-dimension room. For example, aiStager is great to test different types of the same product, like seeing how a compact Article sofa-bed looks against one wall versus a larger modular sectional from West Elm. In just a few clicks, you can place a new product in your room just by uploading a photo of the room and a link to the product, letting you experiment with different fabric colors and finishes to ensure the piece complements your existing decor. With this approach, you can explore various small space design ideas and confidently select furniture that perfectly fits your lifestyle and layout.
3. Vertical Storage Solutions
When floor space is at a premium, the only way to go is up. Vertical storage is a cornerstone of effective studio condo design ideas, utilizing the often-overlooked wall space between your furniture and the ceiling. By drawing the eye upward, floor-to-ceiling shelving, floating shelves, and modular wall systems create the illusion of height and openness, making the room feel larger while providing essential storage.
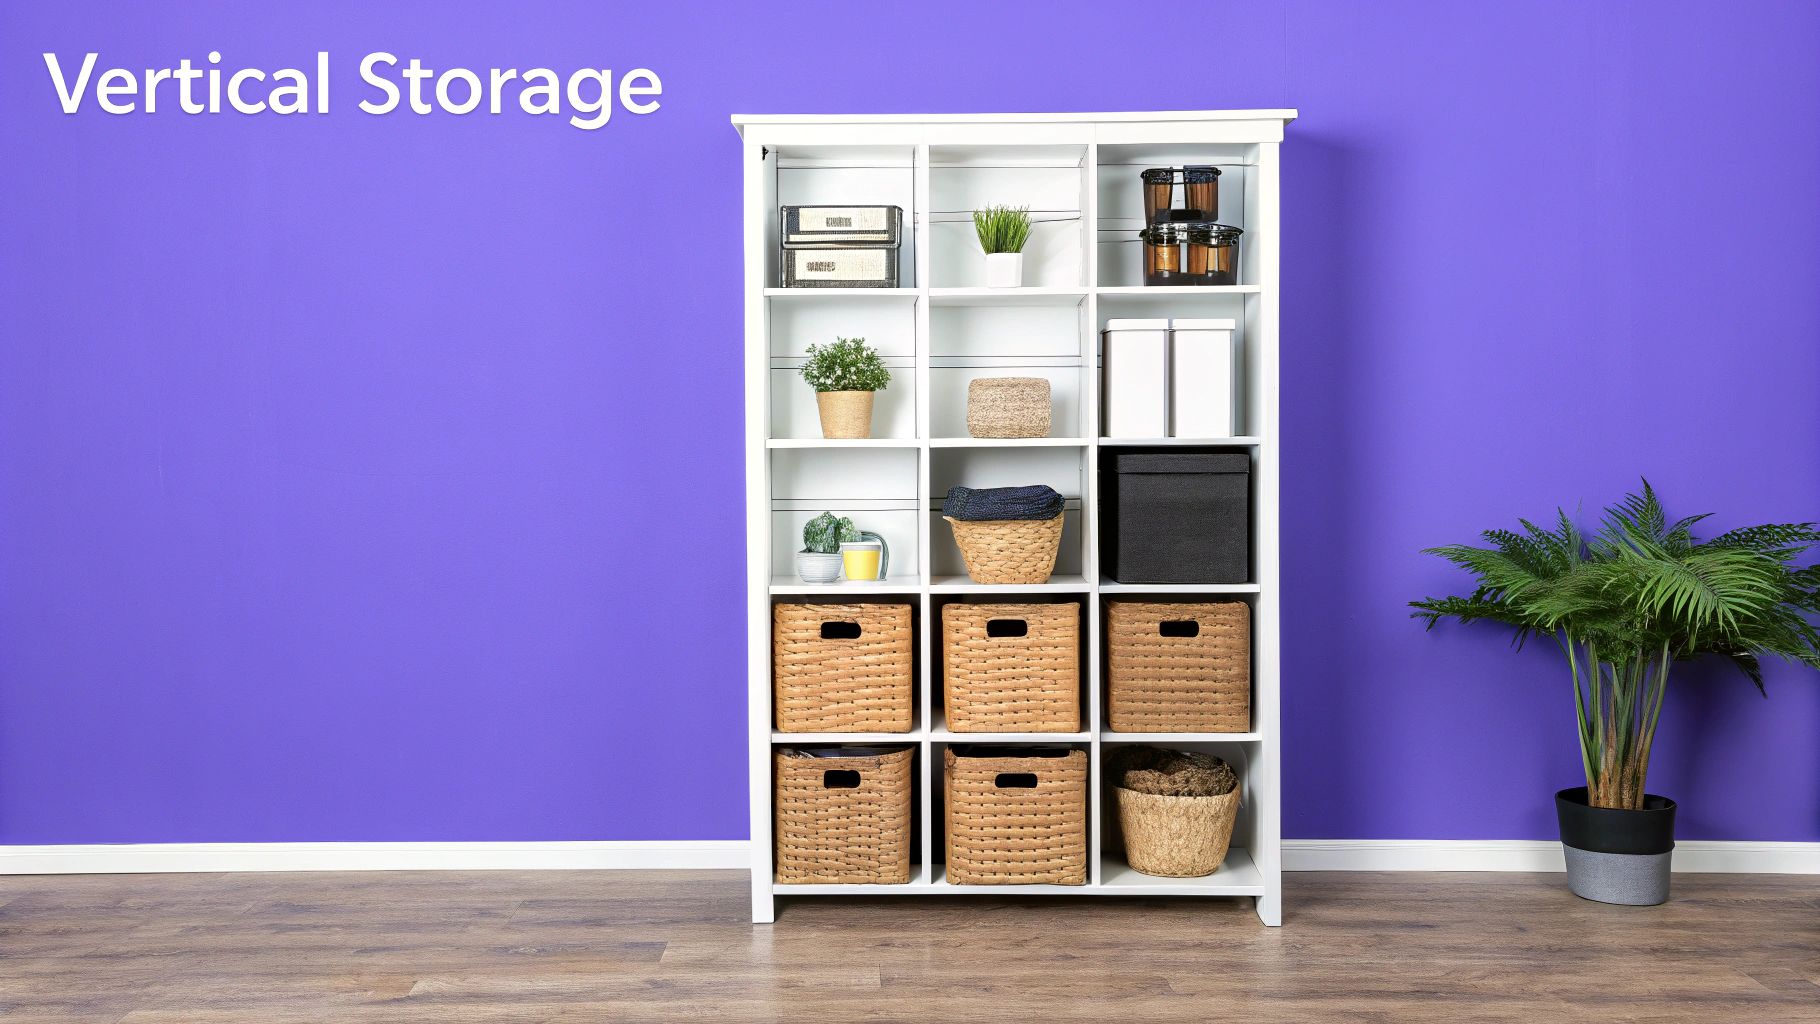
This approach moves clutter off the floor and organizes it within a streamlined, intentional framework. Systems like The Container Store's customizable Elfa or the iconic, minimalist String shelving are perfect examples. They blend form and function, turning a plain wall into a feature that is both a display area and a high-capacity storage hub, as seen in many cleverly designed Brooklyn and Tokyo micro-apartments.
Quick Implementation
- Assess Your Needs: Decide if you need more open-display space for books and decor or closed storage for personal items. A mix of both is often ideal.
- Choose a System: Select a modular system like Muuto's Stacked Shelving System for flexibility or install simple floating shelves for a lighter, more airy look.
- Secure Installation: Always use wall anchors appropriate for your wall type (drywall, plaster, brick) and rated to hold the weight of the shelves and their contents. Safety is paramount.
Styling and Staging Notes
Before drilling any holes, use aiStager to visualize different vertical storage solutions. You can upload a photo of your studio and test a tall, modern bookcase against a series of floating shelves. Because aiStager is the only solution that generates hyper-realistic photos with true dimension rooms and furniture, you can accurately compare how a dark wood finish from West Elm versus a light metal system from IKEA will impact the room's brightness and perceived size, ensuring your choice enhances your space perfectly.
4. Room Dividers and Spatial Zoning
Creating distinct functional zones is one of the most effective studio condo design ideas for making an open layout feel more like a multi-room home. Room dividers and strategic furniture placement establish visual and practical separation between your living, sleeping, and working areas, adding structure and reducing clutter without building permanent walls. This technique, known as spatial zoning, enhances privacy and organization in a single space.
Options range from elegant Japanese-style shoji screens that diffuse light beautifully to modern sliding glass partitions that offer sound insulation while maintaining an open feel. A well-placed open-backed bookshelf, like IKEA's KALLAX unit or a more upscale version from Design Within Reach, can create a partial wall that defines a space while providing valuable storage. The key is to segment the studio without completely blocking sightlines or natural light.
Quick Implementation
- Assess Your Layout: Identify the most logical places to create zones. Often, this means separating the bed from the main living area.
- Choose Your Divider: Select a style that suits your needs. Curtains are flexible and soft, sliding barn doors add a rustic or industrial touch, and half-wall shelving maintains an airy feel.
- Preserve Light Flow: Position dividers, especially solid ones, perpendicular to windows to avoid casting large shadows and making the space feel smaller.
Styling and Staging Notes
Before installing a permanent solution, use aiStager to visualize the impact of different dividers. Upload a photo of your studio and test a sleek, black-framed glass partition versus a warm, wood-slat divider. Because aiStager generates hyper-realistic photos using true dimensions, you can see precisely how much floor space each option occupies and how it affects light distribution. This allows you to experiment with various styles, materials, and placements to find the perfect zoning strategy for your home.
5. Smart Lighting Design (Layered & Flexible)
Strategic lighting is one of the most impactful yet often overlooked studio condo design ideas. A layered approach uses multiple light sources at different heights and intensities to define zones, create mood, and make the space feel larger and more dynamic. This method moves beyond a single overhead fixture to incorporate ambient, task, and accent lighting for ultimate flexibility.
This sophisticated technique allows you to transform your studio’s atmosphere instantly. For example, you can switch from bright, cool-toned light for working at your desk to a warm, dim setting for relaxing in the evening. Smart systems like Philips Hue allow for seamless control over color temperature and brightness, while brands like West Elm offer stylish fixtures that contribute to a layered design.
Quick Implementation
- Layer the Light: Combine ambient (overhead fixtures), task (desk lamps, under-cabinet strips), and accent (spotlights on art) lighting.
- Install Dimmers: Add dimmer switches to all main light sources to give you immediate control over the brightness and mood of the space.
- Vary Color Temperature: Use cooler tones (4000K-5000K) for work areas to enhance focus and warmer tones (2700K-3000K) for living and sleeping zones to promote relaxation.
- Choose Smart Bulbs: Opt for smart bulbs that can be controlled via an app, allowing you to schedule lighting changes and adjust colors without rewiring.
Styling and Staging Notes
Before purchasing fixtures, use aiStager to visualize how different lighting schemes affect your studio. You can upload a photo of your space and see the impact of a warm, ambient glow from a CB2 floor lamp versus the crisp, focused light of a desk lamp. With aiStager's day and night settings, you can realistically preview how a layered lighting design changes the mood from morning to evening, ensuring you create a space that is both functional and atmospheric. This helps you select the right fixtures and placements to maximize your studio’s potential.
6. Color, Accent Walls & Textural Elements
One of the most effective studio condo design ideas involves a strategic use of color and texture. By starting with a neutral base palette of whites, grays, or beiges, the studio feels larger and more open. A single, bold accent wall or the introduction of rich textural elements then adds personality and visual interest without overwhelming the compact space. This approach creates a focal point and can even help zone different areas.
Think of the sophisticated simplicity seen in a Scandinavian-inspired Muuto catalog, where a deep navy or forest green wall anchors a living area, or the urban appeal of an exposed brick texture in a Brooklyn-style loft. The goal is to add depth and character, preventing the neutral space from feeling sterile while maintaining an airy atmosphere.
Quick Implementation
- Select a Base: Choose a light, neutral color scheme (like Benjamin Moore’s "Chantilly Lace" or "Classic Gray") for the majority of the walls to maximize light.
- Choose Your Accent: Pick one wall to be your accent. This is often the wall behind the sofa or bed. Decide on a bold color, a textured finish like plaster, or a material like reclaimed wood.
- Layer Textures: Introduce different materials throughout the space, such as a chunky knit throw, a jute rug, velvet cushions, or sleek metallic fixtures to build visual depth.
Styling and Staging Notes
Before painting, use a tool like aiStager to test different accent wall options. Upload a photo of your studio and see how a dramatic Sherwin-Williams "Tricorn Black" wall compares to a subtle textured wallpaper. You can visualize how the color interacts with your furniture and changes under different lighting conditions. This allows you to explore bold choices confidently. Understanding the power of your home design color palette is crucial for creating a space that feels both expansive and personal.
7. Compact Kitchen Solutions & Galley Layouts
A well-designed kitchen is crucial in a studio, and compact solutions are key. This studio condo design idea focuses on using space-efficient appliances and streamlined layouts, such as galley or single-wall kitchens, to create a highly functional cooking area without sacrificing valuable living space. The goal is to maximize workflow and storage in a minimal footprint, inspired by efficient European and Japanese designs.
Instead of standard-sized appliances, this approach utilizes smaller, high-quality options like a 24-inch refrigerator from Summit or a compact induction cooktop from brands like Smeg. Paired with smart storage like vertical shelving and magnetic knife racks, the result is a kitchen that feels open, organized, and perfectly integrated into the studio's overall design.
Quick Implementation
- Adopt a Streamlined Layout: A single-wall or galley kitchen is most effective. This concentrates all services along one or two walls, opening up the rest of the floor plan.
- Invest in Compact Appliances: Prioritize high-quality, smaller-footprint appliances. Think slim refrigerators, 18-inch dishwashers, and combination microwave-convection ovens.
- Utilize Vertical Space: Install open shelving, pegboards, and wall-mounted racks to keep countertops clear. Under-cabinet lighting is essential for visibility and ambiance.
Styling and Staging Notes
Before purchasing, use aiStager to visualize different compact kitchen configurations. In just a few clicks, you can place a new product in your room just by uploading a photo of the room and a link to a specific appliance, like a sleek Fisher & Paykel refrigerator drawer, to see how it fits. This tool is perfect for comparing different appliance finishes and cabinet colors, ensuring your chosen layout feels both functional and visually cohesive. You can see how open shelving lightens the space versus traditional upper cabinets, helping you make the most effective design decisions.
8. Natural Light Maximization & Window Treatments
One of the most impactful studio condo design ideas involves harnessing natural light. Making a small space feel larger and more open often depends less on the physical footprint and more on how light moves through it. Strategic choices in window treatments, reflective surfaces, and color palettes can amplify daylight, making the entire studio feel brighter, airier, and more inviting.
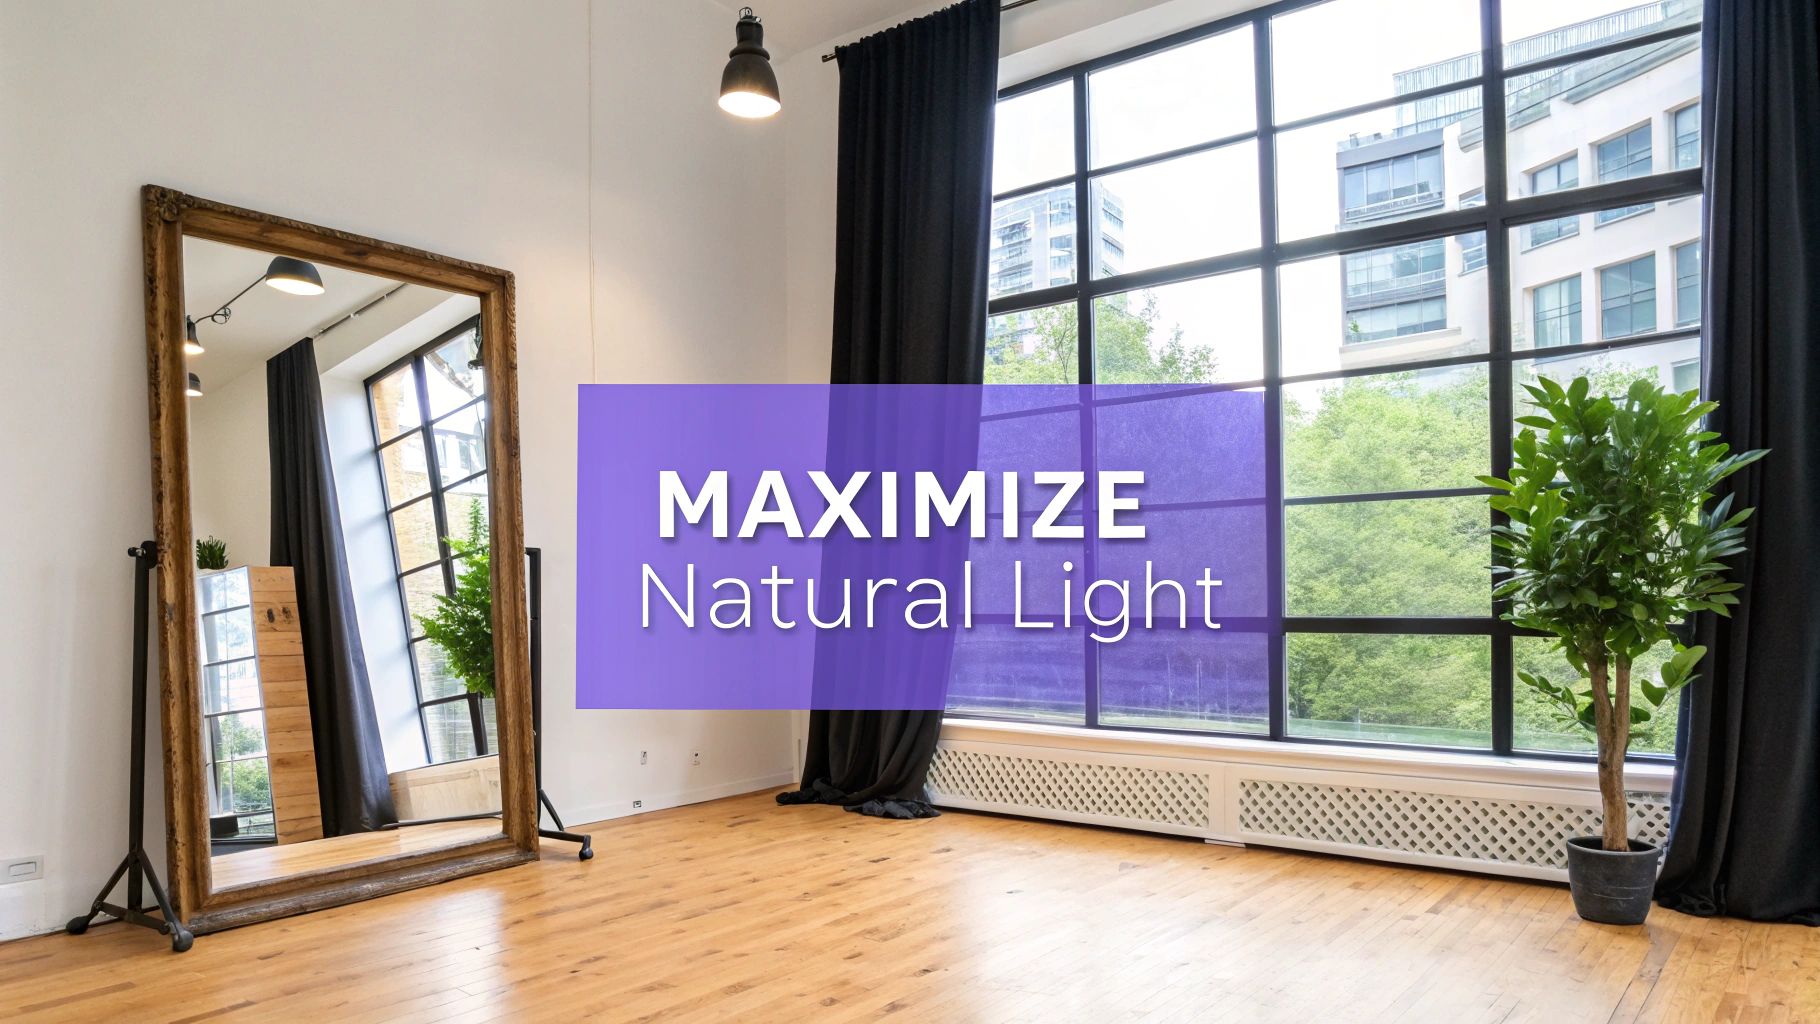
This principle is a cornerstone of Scandinavian design, where maximizing limited winter sun is essential. By using light-colored paints, sheer fabrics, and strategically placed mirrors, you can bounce sunlight into the darkest corners of your room, creating an illusion of depth and dimension that is crucial for single-room living.
Quick Implementation
- Choose Light Window Coverings: Ditch heavy, dark drapes. Opt for sheer curtains, semi-transparent roller shades from a brand like The Shade Store, or light-filtering cellular shades that provide privacy without sacrificing sunlight.
- Strategic Mirror Placement: Place a large mirror on the wall adjacent to or directly opposite a window. This will capture and reflect incoming light, effectively doubling its impact and brightening the entire space.
- Use Reflective Finishes: Incorporate furniture and decor with reflective qualities, such as glass-topped coffee tables, glossy white cabinets, or metallic accents, to help bounce light around the room.
Styling and Staging Notes
Before making changes, use a tool like aiStager to see the real-world effect. Upload a photo of your studio and test different window treatments. See the difference between sheer white curtains and light gray roller blinds. With aiStager, you can place a large, elegant mirror from Crate & Barrel on a wall and instantly see how it reflects light from your window. The platform's day/night rendering feature is particularly useful for visualizing how natural light flows at various times, helping you optimize your layout for maximum brightness.
9. Lofted or Elevated Bed Platforms
One of the most dramatic studio condo design ideas is to go vertical with a lofted bed. This involves a permanent or semi-permanent raised platform, typically 4-6 feet high, that creates a brand-new, usable space underneath for a home office, a cozy living area, or extensive storage. By leveraging your studio’s ceiling height, you essentially create a second level, doubling the functionality of a single footprint.
This approach is heavily inspired by micro-apartments in dense urban centers like New York and Tokyo, as well as the tiny home movement. Brands like IKEA offer accessible elevated bed systems, while custom builds allow for seamless integration into your studio's architecture, complete with integrated stairs that double as drawers or shelving.
Quick Implementation
- Prioritize Headroom: Ensure at least 36 inches of clearance above the mattress to avoid feeling cramped. Also, check that the space below is tall enough for its intended function.
- Plan for Light & Air: Install recessed or pendant lighting under the loft to make the space below bright and usable. Consider ventilation to prevent warm air from accumulating in the sleeping area.
- Maximize the Ascent: Choose stairs with built-in storage over a simple ladder to add valuable, hidden organization for clothes, shoes, or books.
Styling and Staging Notes
Before committing to a build, use a tool like aiStager to visualize the entire concept. Upload a photo of your studio and test different loft heights to see how they impact the room's proportions. You can experiment with placing a specific desk from West Elm or a compact loveseat underneath to confirm the layout works. aiStager's dimension-accurate technology allows you to see precisely how the loft will divide the space and affect natural light from your windows, ensuring your vertical expansion feels open and intentional. For more inspiration, explore these creative small loft design ideas to refine your vision.
10. Integrated Home Office Zones
As remote work becomes a permanent fixture, carving out a dedicated workspace is a crucial studio condo design idea. An integrated home office zone creates a professional, functional area within your main living space without constructing walls. This approach uses smart furniture placement, compact solutions, and visual cues to establish psychological separation between work and life, boosting productivity and maintaining harmony.
This concept moves beyond placing a laptop on the dining table. It involves creating an intentional nook, often utilizing a corner or an underused wall, with purpose-built furniture. Examples range from sleek, wall-mounted desk systems from IKEA that save floor space to sophisticated, integrated solutions from brands like Resource Furniture that combine shelving and a workspace into one cohesive unit. The goal is to make the office feel like a natural part of the decor, not a temporary intrusion.
Quick Implementation
- Claim a Corner: Position a compact desk in a corner, ideally near a window for natural light. This placement minimizes its visual impact on the main living area.
- Go Vertical: Install wall-mounted shelves, organizers, or a pegboard above the desk to keep supplies tidy and off the valuable desk surface. A monitor arm is excellent for freeing up even more space.
- Define the Zone: Use a small area rug to visually anchor the workspace. This simple addition creates a distinct boundary, signaling a shift in function for that part of the room.
- Invest in Compact Ergonomics: Choose an ergonomic chair that is both comfortable for long hours and compact enough to tuck away neatly, like a stylish model from Herman Miller.
Styling and Staging Notes
Before buying furniture, use a tool like aiStager to perfect your layout. Upload a photo of your studio and test different desk placements. In just a few clicks you can place a new product in your room by uploading a product link, allowing you to see how a minimalist floating desk from West Elm compares to a more substantial secretary desk that can hide clutter. With aiStager, you can generate hyper-realistic images to visualize exactly how a specific desk size or a different chair color will fit into your aesthetic. This allows you to finalize your integrated office zone with confidence, ensuring it enhances your studio's overall design.
Studio Condo Design: 10-Item Comparison
| Item | 🔄 Implementation Complexity | 💡 Resource Requirements | 📊 Expected Outcomes | ⚡ Ideal Use Cases | ⭐ Key Advantages |
|---|---|---|---|---|---|
| Murphy Bed Systems | High — structural mounts, possible motorization, pro install | High cost ($2k–$8k+), wall clearance, hardware & installation | +30–40% usable floor area; toggles living/ sleeping zones | Long-term studio residents; luxury rentals; small footprints needing full bed | Maximizes floor area; integrated storage & utilities; clean closed appearance |
| Multi-Functional Modular Furniture | Low–Medium — plug-and-play reconfiguration | Moderate spend; multiple pieces; needs access for delivery | Reduces furniture footprint ~40–50%; flexible layouts | Renters, frequent reconfigurers, guest accommodation | Affordable flexibility; multiple functions per piece; easy to move |
| Vertical Storage Solutions | Medium — shelving installation, proper anchors, occasional pro help | Low–Moderate cost; shelving units, anchors, baskets; possible custom fit | Clears floor space; visually expands room; increases organized capacity | High-wall studios; budget-conscious upgrades; staging | Efficient use of wall "dead" space; customizable; generally low cost |
| Room Dividers & Spatial Zoning | Low–High — from curtains (low) to built partitions (high) | Ranges from inexpensive screens/curtains to costly sliding doors/walls | Better privacy and zone definition; can improve HVAC efficiency | Need for privacy or distinct zones in open-plan studios | Flexible separation; scalable cost; preserves openness when needed |
| Smart Lighting Design (Layered) | Medium — wiring/dimmers or smart setup; some pro work for ceilings | Moderate–High; fixtures, smart bulbs, controllers, possible electrician | Perceived space +15–25%; improved mood & energy efficiency | Low-light studios; users prioritizing ambiance & automation | Layered control; energy savings; adaptable scene-setting |
| Color, Accent Walls & Textural Elements | Low–Medium — painting, wallpaper, or paneling work | Low–Moderate; paint, wallpaper, textured finishes, occasional pro labor | Perceived space +20–30%; focal interest without added furniture | Quick cosmetic refreshes; staging; low-budget makeovers | High visual impact for relatively low cost; easy to update |
| Compact Kitchen Solutions & Galley Layouts | Medium — cabinetry/appliance fit, plumbing/electrical work | Moderate–High; compact appliances, custom cabinetry, install costs | Efficient workflow; smaller utility use; limited prep/storage capacity | Small apartments, efficient cooks, rental upgrades | Professional workflow in small footprint; keeps counters clear |
| Natural Light Maximization & Window Treatments | Low–Medium — treatments, mirror placement; glazing upgrades costly | Low; sheer curtains, mirrors, reflective finishes; glazing optional | Perceived space +25–40%; reduced artificial lighting needs | Units with decent window exposure; staging & photography | Strongest visual expansion effect; improves mood & photos |
| Lofted / Elevated Bed Platforms | High — custom build, safety rails, code considerations | High cost ($2.5k–$8k+), requires ≥8 ft ceilings, structural work | Creates distinct zones; usable under-bed living/office/storage | High-ceiling studios; long-term residents seeking distinct zones | Exploits vertical height; creates separate areas without walls |
| Integrated Home Office Zones | Low–Medium — wall desks, shelving, acoustic additions | Low–Moderate; desk, ergonomic chair, lighting, minor acoustic panels | Enables remote work in studio; improves focus; fold-away options save space | Remote workers, freelancers, professionals in studios | Maintains productivity without larger rent; space-conserving solutions |
Bringing Your Vision to Life with Confidence
Transforming a compact studio into a stylish and functional home is an exercise in creativity and strategic planning. Throughout this guide, we've explored ten powerful studio condo design ideas, each offering a unique pathway to maximize your space without sacrificing personality. From the space-saving magic of Murphy beds and the versatility of modular furniture to the visual expansion created by smart lighting and maximized natural light, the core principle remains the same: every element must serve a purpose.
We’ve seen how vertical storage can draw the eye upward, making ceilings feel higher, while room dividers artfully create distinct zones for living, working, and sleeping. The key is to think of your studio not as a single room, but as a collection of interconnected micro-spaces, each defined by its function and aesthetic. By integrating compact kitchen solutions, clever home office nooks, and impactful color palettes, you turn limitations into design opportunities.
From Inspiration to Implementation
The most significant takeaway from these studio condo design ideas is the power of intentionality. A successful studio design isn't about cramming in furniture; it's about curating a selection of pieces that work harmoniously to create a sense of flow and openness.
Here are the essential steps to bring your vision to life:
- Prioritize Your Zones: Before purchasing anything, identify your non-negotiable activities. Do you need a dedicated workspace, a comfortable lounging area, or a dining spot for two? Map these zones out first.
- Embrace Multi-Functionality: Look for furniture that does double or triple duty. An ottoman with hidden storage, a lift-top coffee table that becomes a desk, or a modular sofa are your best allies in a small space.
- Measure, Then Measure Again: In a studio, inches matter. Ensure every piece of furniture fits its intended spot with enough room to navigate comfortably. This is where visualization becomes critical.
The Power of Virtual Staging
The primary challenge often lies in bridging the gap between inspiration and reality. It's one thing to admire a lofted bed or a bold accent wall in a photo, but another to commit to it in your own home. This is where a tool like aiStager becomes an indispensable partner in your design journey. Instead of guessing how a specific piece will look and feel, you can see it with stunning accuracy.
Wondering if a deep blue accent wall will make your space feel cozy or cramped? Or maybe you're torn between a sleek, low-profile sofa from Article and a more plush sectional from Crate & Barrel. With aiStager, you can upload a photo of your room and a product link to test these ideas virtually. The platform is the only solution that generates hyper-realistic photos with true-to-dimension furniture objects, allowing you to compare different colors, finishes, and brands in a few clicks. This eliminates costly mistakes and empowers you to make design decisions with absolute confidence, ensuring the final result is a perfect reflection of your unique style and needs.
Ready to see your studio condo design ideas come to life with photorealistic precision? Visit aiStager to upload a photo of your space and start experimenting with different layouts, furniture, and styles today. Stop guessing and start designing with confidence.